
Size
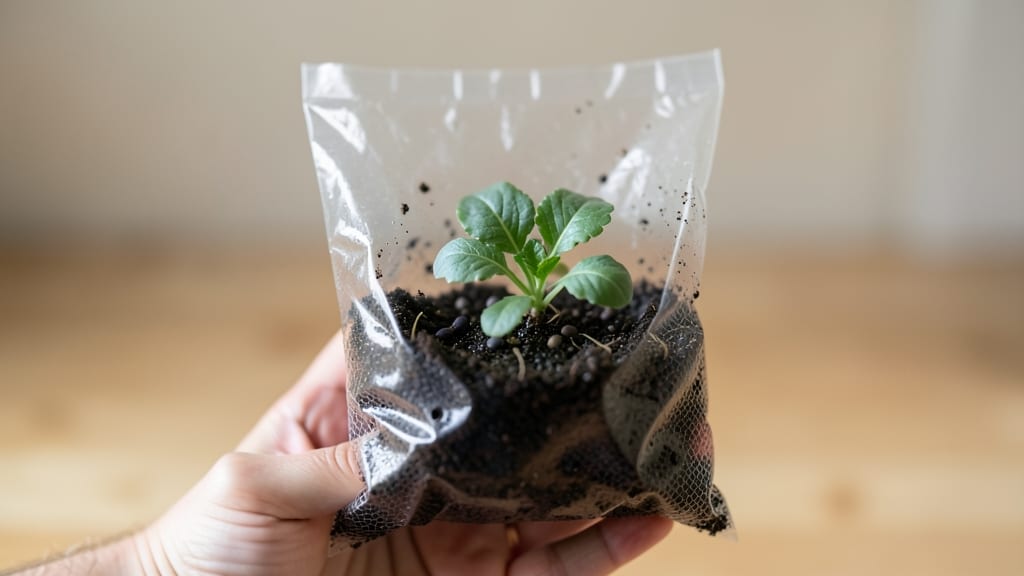
Growing a seed in a bag saved my kitchen counter from becoming a seedling graveyard. 🌱 The method is shockingly simple—no trays, no soil spills, just a bag, some seeds, and a little patience. My first batch of peas sprouted in under a week, and I haven’t looked back since.
You only need a sturdy paper or plastic bag, a damp paper towel, and your chosen seeds. No fancy tools—just what you’ve got in your pantry.
The key is keeping everything moist but not soggy, and placing the bag near a sunny window. It’s foolproof once you get the hang of it.
By the time your seedlings have their first true leaves, they’ll be ready to transplant into pots or the garden. The best part? You’re not stuck with a messy tray to clean up afterward. This method cuts down on waste and gives you strong, healthy starts without the hassle.
Perfect for urban gardeners, small spaces, or anyone who’s tired of losing seedlings to damp soil or overwatering. Let’s get those seeds growing—no mess, just results.
📚 In This Guide
- What you need
- Instructions
- Tips and common mistakes
- Wrapping up and next steps
What you need
- ● 1 seed packet (choose fast-sprouting varieties like alfalfa, lentils, radishes, or broccoli—they thrive in this method!).
- ● 1 quart-sized resealable plastic bag (or a gallon bag for larger seeds like sunflower).
- ● 1–2 tbsp of seeds (adjust based on seed size; tiny seeds like clover need less space).
- ● Water (room temperature or slightly warm).
- ● A spray bottle (for gentle watering if you prefer precision).
- ● Paper towels or a clean kitchen towel (to line the bag for extra absorbency).
- ● Rubber band or hair tie (to secure the bag if it’s too loose).
- ● Small bowl or colander (for rinsing seeds if you want to avoid bag spills).
- ● Notebook & pen (to track sprouting progress—because science!).
Step-by-step instructions for growing seeds in a bag
Here’s how to grow sprouts with zero mess—just a bag, seeds, and a little patience.
🌱 Step 1: Soak the Seeds for Even Germination
Place 2 tablespoons of seeds (like alfalfa, radish, or broccoli) in a clean quart-sized zip-top bag. Add 2 cups of filtered water—enough to fully submerge the seeds. Seal the bag and give it a gentle shake to mix. Let them soak for 8-12 hours at room temperature. You’ll know they’re ready when they’re soft and slightly swollen—like tiny marbles.
Don’t skip this step! Soaking softens the seed coat, ensuring faster and more uniform germination. If you’re in a hurry, a warm spot (like near the fridge) speeds things up. Just avoid heat sources—seeds should stay cozy, not hot.
💧 Step 2: Drain and Rinse Twice Daily
After soaking, drain the water completely and give the bag a gentle squeeze to remove excess moisture. Lay the bag flat on a counter and prop it open with a fork or chopstick to create airflow. Rinse the seeds under cool running water for 30-60 seconds, shaking the bag to loosen any clumps. Drain again and repeat this process twice daily—morning and night.
This keeps the seeds hydrated without drowning them. You’ll see tiny sprouts appear in 24-48 hours, and by day 3, they’ll look like fuzzy green stars. If the bag feels slimy or smells funky, rinse longer next time—bacteria love damp, stagnant seeds.
☀️ Step 3: Position for Optimal Light and Airflow
Place the bag in a spot with indirect sunlight—like a windowsill facing east or west. Avoid direct midday sun, which can overheat the bag and dry out the sprouts. If your space is dim, a grow light (12-16 hours daily) works too. Just keep it 6-12 inches away—closer light can scorch tender sprouts.
Every 12 hours, open the bag and give the sprouts a quick shake to prevent mold. You’ll notice them stretching toward the light—this is normal! If they start leaning, rotate the bag quarter-turn daily so they grow straight. By day 5, they’ll be ready to harvest.
✂️ Step 4: Harvest and Store for Freshness
When sprouts reach 1-3 inches (depending on the type), drain them well and spread them on a paper towel to dry for 5-10 minutes. This removes excess moisture, making them last longer in the fridge. Store them in a clean, dry container with a lid or back in the sprouting bag (with airflow) in the fridge for up to 5 days.
Here’s the thing—harvesting is fastest when sprouts are crisp. If they taste bitter, they’ve overgrown. And if you see fuzzy white spots? Toss them—mold spreads fast. But with proper rinsing, you’ll avoid this entirely.
🪴 Step 5: Clean Up and Repeat
After harvesting, rinse the bag with hot, soapy water and let it air-dry completely. Reuse it for the next batch—just start fresh with new seeds. I’ve grown dozens of batches in the same bag over months, and it’s still going strong. The key? Scrubbing between uses prevents cross-contamination and keeps sprouts safe to eat.
This method is foolproof for beginners. No soil, no pots, just fresh sprouts in minutes. Try it with sunflower, pea, or lentil seeds next—they’re just as easy and packed with flavor.
Tips & tricks for perfect seed sprouting in bags
These simple strategies will help you grow vibrant, healthy sprouts every time—without the usual mess or guesswork.
Seed Selection: Not all seeds sprout at the same rate. Alfalfa and radish seeds typically germinate within the 24-48 hour window mentioned, while sunflower seeds may take up to 72 hours to show sprouts. For fastest results, stick with smaller seeds like broccoli or lentils—they respond best to the 8-12 hour soak time. If you're impatient, try mixing seed types for a continuous harvest.
Soak Temperature: Room temperature is ideal, but if your kitchen runs cool, place the sealed bag near the fridge (not inside it) to speed up germination. The goal is 70-75°F—think "warm but not hot." I learned this the hard way after leaving a batch in a cold kitchen and waiting an extra day for sprouts to appear. A quick test: press your finger against the bag after soaking—it should feel warm, like a cup of tea.
Airflow Hack: The fork-or-chopstick prop trick works, but for even better airflow, try this: lay the bag flat on a wire cooling rack (the kind for drying herbs). This creates space underneath too, preventing mold buildup. I've found this especially helpful when sprouting in humid kitchens. Just remember to drain thoroughly after each rinse—those 30-60 seconds of shaking make all the difference in preventing slimy bags.
Light Positioning: For straight, sturdy sprouts, rotate your bag quarter-turn daily as mentioned, but also adjust the light source. If using a grow light, position it slightly to the side rather than directly overhead—this encourages upward growth without leaning. Natural light works best near an east-facing window where morning sun is gentle. I once grew a batch that leaned dramatically toward a west-facing window, and while they were edible, they looked like they were doing a yoga stretch!
Pro Tips for Grow A Seed In A Bag
- These simple strategies will help you grow vibrant, healthy sprouts every time—without the usual mess or guesswork.
- Seed Selection: Not all seeds sprout at the same rate. Alfalfa and radish seeds typically germinate within the 24-48 ...
- Soak Temperature: Room temperature is ideal, but if your kitchen runs cool, place the sealed bag near the fridge (not...
Frequently asked questions
Got questions about growing seeds in a bag? You’re not alone! Here are some of the most common queries—and their easy, no-fuss answers—to help you sprout like a pro.
How long does it take for seeds to sprout in a bag?
Most seeds (like alfalfa, radish, or broccoli) sprout in 3–7 days when kept in a warm, dark place. Check the seed packet for specifics—tiny seeds (e.g., clover) may sprout faster than larger ones (e.g., lentils). Rinse twice daily to speed things up!
Can I reuse the bag for another batch of sprouts?
Yes! Rinse the bag thoroughly after harvesting, let it dry completely, and store it in a clean, dry place. Avoid reusing it for different seed types (e.g., don’t switch from alfalfa to sunflower seeds) to prevent cross-contamination. A good rule: 1–2 uses per bag before replacing it.
What if my sprouts smell bad or look moldy?
Toss ‘em! Mold (fuzzy spots) or a sour smell means bacteria or fungus is growing—not safe to eat. To prevent this:
- Use filtered water (chlorine can encourage mold).
- Rinse sprouts twice daily for 2–3 minutes.
- Harvest within 7–10 days (longer = higher risk).
Do I need special seeds for this method?
Nope! Use any raw, organic seeds labeled for sprouting (e.g., alfalfa, radish, mung beans, lentils). Avoid seeds meant for planting (like sunflower or pumpkin)—they’re too large and may not sprout well in a bag. Pro tip: Check for “sprouting seeds” in health food stores or online!
How often should I rinse the bag?
Rinse sprouts 2 times daily (morning and evening) for the first 3–4 days, then once daily until harvest. Use a fine-mesh strainer or hold the bag under running water to avoid overcrowding. Drain well after rinsing to prevent soggy sprouts!
Bonus Tip: Troubleshooting Slow Growth
If your seeds aren’t sprouting, try these fixes:
Not warm enough? Place the bag near a sunny window or use a seedling heat mat (70–75°F is ideal).
Seeds too dry? Soak them in water for 6–8 hours before starting the bag method.
Bag too tight? Use a larger mesh bag (¼” holes) for seeds like chickpeas or lentils.
Wrapping up and next steps
Growing a seed in a bag is more than just a fun experiment—it’s a simple, rewarding way to bring fresh, nutrient-packed greens to your table without the clutter!
Whether you’re a beginner or a seasoned gardener, this method proves that you don’t need a green thumb or extra space to cultivate your own food. Start with one bag, and soon, you’ll be sprouting like a pro—one tiny seed at a time!
Ready to take the next step? Pick your favorite seeds, grab a bag, and let your kitchen counter become your mini garden. Try it today! 🌱