
Lawn
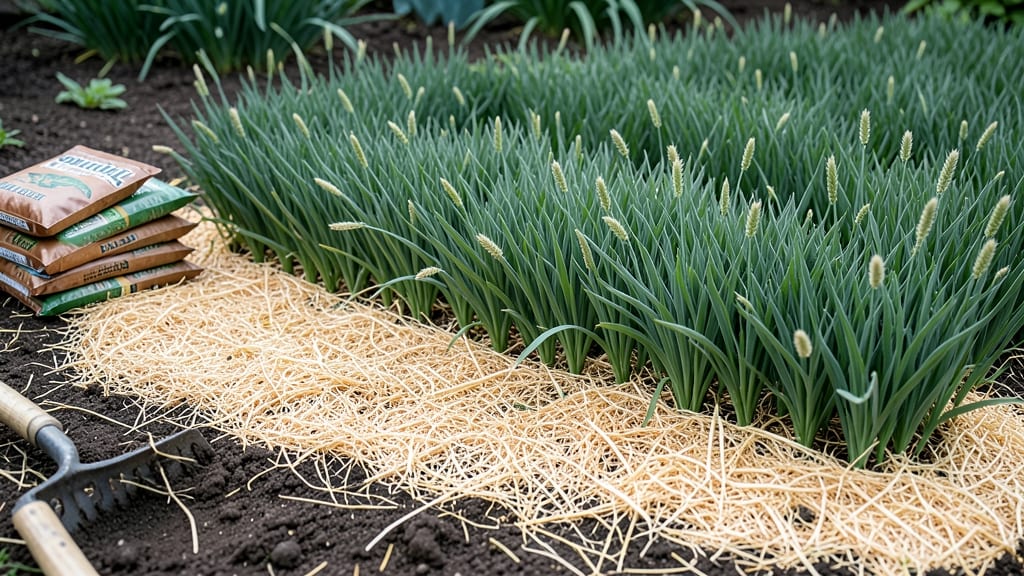
That lightweight layer of mulch makes all the difference when seeding new grass. 🌱 After my first attempt without it, I watched seeds dry out in days—this time, I’ll show you how to keep them moist, shaded, and weed-free until they root.
The right mulch—like straw or peat moss—creates a protective blanket that holds three times more moisture than bare soil. Spread it ¼-inch thick after seeds sprout (not before) to avoid smothering them. Too thick, and you’ll suffocate new growth; too thin, and weeds sneak in.
By week three, you’ll see uniform green instead of patchy bare spots. The mulch breaks down naturally, feeding soil while keeping weeds at bay. No more guessing—just consistent, lush results every time. Works for cool-season and warm-season grasses alike. Here’s exactly how to do it without mistakes.
📚 In This Guide
- What you need
- Instructions
- Tips and common mistakes
- Wrapping up and next steps
What you need
- ● Grass seed: Choose a high-quality blend (e.g., Kentucky Bluegrass, Fescue, or Ryegrass) at a rate of 5–10 lbs per 1,000 sq ft (follow package instructions for exact amounts).
- ● Straw mulch: 10–15 lbs per 1,000 sq ft (avoid dyed or treated straw—opt for natural, seed-safe straw).
- ● Lawn roller: A lightweight, 20–30 lb roller (or a rented one) to press mulch into the soil.
- ● Garden rake: A stiff-bristle rake to level soil and distribute mulch evenly.
- ○ Broadcast spreader: For even seed distribution (optional but helpful for large areas).
- ● Water source: Hose with a gentle spray nozzle or a watering can.
- ● Gloves & knee pads: For comfort during prep and application.
- ● Soil test kit: Check pH and nutrients before seeding (ideal pH: 6.0–7.0).
- ● Starter fertilizer: A phosphorus-rich blend (e.g., 10-20-10) to boost root growth.
- ● Weed barrier fabric: If your lawn has stubborn weeds, lay down a biodegradable fabric before mulching.
- ● Lawn aerator: For compacted soil (rent or borrow one for best results).
Step-by-Step guide to applying grass seed mulch for weed control
Here's the method I rely on to create a lightweight, moisture-retaining layer that keeps weeds at bay.
🌱 Step 1: Prepare the Soil Before Seeding
Start by tilling the soil to a depth of 4-6 inches to loosen compacted areas and remove existing weeds. I like to use a broadfork for minimal soil disruption—this preserves beneficial microorganisms while creating the right texture for seed contact. Smooth the surface with a rake, removing any large clumps or debris that could block seed-to-soil contact.
Test the soil moisture by squeezing a handful—it should hold together but not feel soggy. If it's too dry, water lightly until the top 2 inches feel damp. This ensures your grass seed mulch will work with—not against—the natural moisture in the soil. I often do this in the late afternoon to allow any surface water to absorb before nightfall.
💧 Step 2: Spread Grass Seed Evenly
Use a broadcast spreader or hand-sow the grass seed at the rate recommended on the package—typically 5-10 pounds per 1,000 square feet. I like to walk in a crisscross pattern to ensure even coverage, especially in high-traffic areas where weeds tend to sprout first. For larger areas, divide the space into sections and work methodically to avoid overlapping.
Lightly rake the seed into the soil with a fine-toothed rake, pressing it just enough to ensure good seed-to-soil contact without burying it too deeply. The goal is to create a 1/4-inch-deep seed bed where moisture can reach the seeds without washing them away. This step is critical—if seeds are too deep, they won’t germinate properly.
☀️ Step 3: Apply the Mulch Layer Strategically
Choose a straw-based mulch (not wood chips or bark) for grass seed—it breaks down slowly and won’t smother emerging seedlings. Spread the mulch evenly over the seeded area at a thickness of 1/4 to 1/2 inch. I use a drop spreader for consistency, making two passes in perpendicular directions to avoid thin or thick patches.
Leave 1-2 inches of bare soil around the edges of the seeded area to prevent erosion and ensure water reaches the seeds. This also makes it easier to spot where new grass sprouts appear. The mulch should feel slightly springy when pressed—if it’s too dense, loosen it with a rake to improve airflow and moisture penetration.
🪴 Step 4: Water Gently and Consistently
Water the mulched area immediately after application with a fine mist setting on your sprinkler or hose. The goal is to saturate the mulch and soil without displacing the seed or creating runoff. I aim for 1/4 inch of water applied in short, frequent bursts over the first 7-10 days—this keeps the mulch damp but not waterlogged.
Check the moisture level daily by lifting a corner of the mulch. The soil beneath should feel consistently moist but not soggy. Overwatering can suffocate seeds, while underwatering lets weeds steal the show. I set a reminder on my phone for morning and evening watering until the grass reaches 2-3 inches tall, at which point the roots will anchor the mulch in place.
⏰ Step 5: Monitor and Maintain for Long-Term Success
Once the grass reaches 3-4 inches tall, you can reduce watering to 1-2 times per week, depending on rainfall. The mulch will now serve as a living weed barrier, suppressing unwanted plants while allowing your grass to thrive. I like to top-dress with a thin layer of compost in early spring to replenish nutrients and extend the mulch’s effectiveness.
Watch for signs of weed breakthrough—thin patches or bare spots where mulch has degraded. These areas need immediate reseeding or a fresh 1/8-inch mulch layer to restore protection. With consistent care, your grass seed mulch will keep weeds at bay for 2-3 seasons, making maintenance a breeze.
Tips & tricks for perfect grass seed mulch application
These simple but game-changing strategies will help you create a weed-blocking mulch layer that actually works—no more wasted seed or soggy patches.
Soil Prep Secret: After tilling to that 4-6 inch depth in Step 1, run your fingers through the loosened soil to check for hidden rocks or clumps. I once missed a pebble the size of a quarter—it created a bare spot where weeds later took over. A quick sift with a fine-mesh screen removes these troublemakers before seeding.
Seed Placement Precision: When raking seeds into the 1/4-inch-deep bed in Step 2, think "light as a feather." Pressing too firmly can bury seeds deeper than intended, while skimming too lightly leaves them exposed to birds. I use the back of a spoon to gently press seeds—just enough to create contact without compacting the soil around them.
Mulch Thickness Matters: That 1/4 to 1/2 inch range in Step 3 is non-negotiable. Too thin and you lose moisture retention; too thick and you smother seedlings. I test by holding a ruler vertically—if the mulch exceeds 1/2 inch, I immediately rake off the excess. For slopes, I apply mulch horizontally to prevent runoff from washing it away during watering.
Watering Hack: The 1/4 inch of water in Step 4 should feel like a gentle rain—not a downpour. I use a rain gauge or tuna can to measure: fill it with water, then pour it over a square foot of mulch. If it all soaks in without pooling, you've got the right amount. For large areas, I set my sprinkler to run for 5 minutes, then check the can to adjust timing.
Pro Tips for Grass Seed Mulch
- These simple but game-changing strategies will help you create a weed-blocking mulch layer that actually works—no more wasted seed or soggy patches.
- Soil Prep Secret: After tilling to that 4-6 inch depth in Step 1, run your fingers through the loosened soil to check for hidden rocks or clumps.
- Seed Placement Precision: When raking seeds into the 1/4-inch-deep bed in Step 2, think "light as a feather."
Frequently asked questions
Got questions about grass seed mulch? You’re not alone—it’s a game-changer for lawn care, but the details can be tricky! Below, we’ve rounded up the most common queries to help you mulch like a pro.
What’s the best time of year to apply grass seed mulch?
The ideal window is early fall (September–October) or late spring (April–May) when soil is warm but air temps are mild. This gives seeds time to germinate before extreme heat or frost. Avoid summer—mulch can bake seeds or dry out too fast!
Can I use grass seed mulch in winter?
Not directly! Mulch is for seed germination, not established grass. If overseeding in winter (e.g., cool-season grasses), use a light straw layer (¼ inch) to protect seeds from frost. Skip mulch in freezing temps—it can suffocate seeds.
Is straw or peat moss better for mulching grass seed?
Straw
is the gold standard—it’s lightweight, decomposes slowly, and holds moisture well. Peat moss can work but may compact or acidify soil over time. Avoid hay (it contains weed seeds!) and wood chips (they steal nitrogen as they break down).
Why won’t my grass grow even with mulch?
Check these culprits:
- Too much mulch (bury seeds deeper than ¼ inch—they need light!).
- Poor soil contact—rake seeds into soil before adding mulch.
- Dry conditions—water daily (lightly) until germination.
- Old mulch—fresh straw is key; composted mulch loses effectiveness.
Can I reuse mulch from last year’s lawn?
Only if it’s straw and hasn’t decomposed into sawdust-like bits. Never reuse hay (weed risk!) or mulch with visible mold/mildew. For safety, buy fresh straw or composted mulch labeled “seed-safe.” Pro tip: Store mulch in a dry, ventilated area to reuse next season!
Wrapping up and next steps
Using grass seed mulch is a game-changer for any lawn care routine—it’s lightweight, easy to apply, and delivers serious benefits like moisture retention and weed suppression.
Whether you’re a seasoned gardener or just starting, this simple step can save you time, water, and frustration while nurturing a lush, healthy lawn. 🌱
Ready to take the next step? Grab your mulch, follow the tips we’ve shared, and watch your lawn thrive with minimal effort. Your perfect green space is just a layer away!