
Lawn
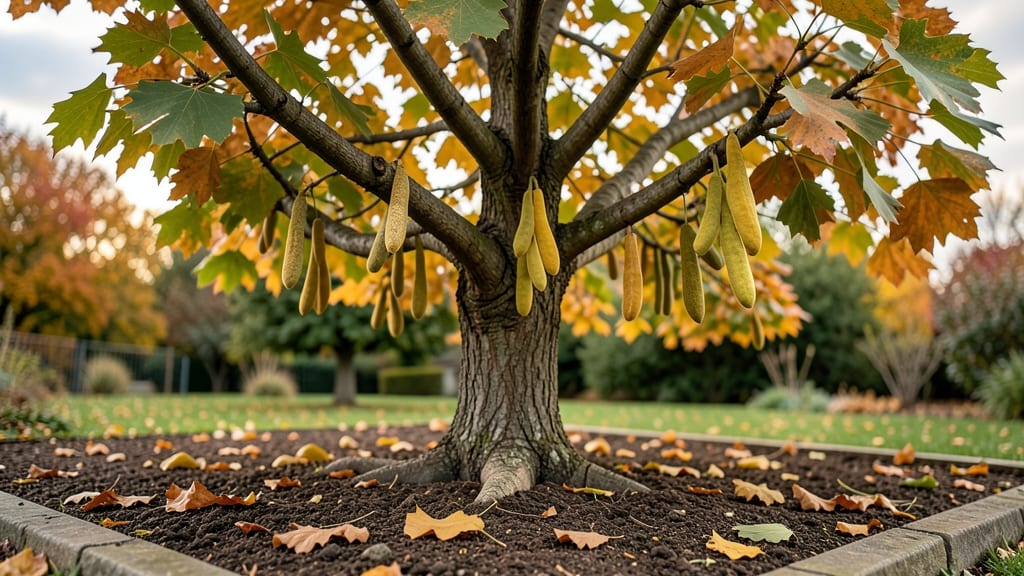
Cold-stratifying ginkgo tree seed pods unlocks the secret to growing these ancient trees from scratch. 🌱 I’ve struggled with ginkgo germination for years—until I discovered the 60-day cold-stratification method that finally worked. The key? Mimicking nature’s winter dormancy to break dormancy and trigger sprouting.
You’ll need just three things: fresh seed pods, a damp paper towel, and a refrigerator. No fancy equipment—just patience and a little science. The process starts in late summer when pods turn yellow and open, revealing the seeds inside. Collect them before they dry out completely, as freshness is everything.
By late winter, you’ll see tiny roots peeking through the paper towel, ready for planting. The seedlings grow slowly but steadily, and within a few years, you’ll have a majestic ginkgo tree that thrives for centuries.
The smell of fresh soil and the first signs of growth make every step worth it. This method works best in USDA Zones 4-8, where winters are cold enough to naturally stratify seeds.
If you’re in a warmer climate, you can extend the cold treatment or use a seedling heat mat for extra warmth. Either way, you’re growing a living piece of history right in your yard.
📚 In This Guide
- What you need
- Instructions
- Tips and common mistakes
- Wrapping up and next steps
What you need
- ● Fresh ginkgo tree seed pods: 5–10 mature, intact pods (harvested in fall, when they turn yellow-brown). Pro tip: Avoid pods with cracks or mold!
- ● Plastic storage bag or container: 1 gallon-sized bag with a zip-top closure (or a small, airtight container).
- ● Potting mix: 1 bag (1–2 cubic feet) of well-draining, sterile seed-starting mix (or a 50/50 blend of peat moss and perlite).
- ● Small pots or seed trays: 6–10 individual 2–3 inch pots (or a single tray with cell inserts).
- ● Spray bottle: 1 (for gentle watering).
- ● Refrigerator or cold stratification setup: A standard fridge (35–40°F) or a dedicated cold stratification box.
- ● Plastic wrap or humidity dome: To retain moisture during germination.
- ● Kitchen knife or pruning shears: For carefully opening seed pods (sterilized with rubbing alcohol).
- ○ Measuring cup and scale: To ensure accurate potting mix ratios (optional but helpful).
- ● Grow lights or sunny windowsill: A 12–16 hour light source (LED grow lights work best).
- ○ Thermometer (optional): To monitor fridge temps during stratification.
- ○ Patience and a journal (optional): Track seed progress and germination dates!
Step-by-step instructions for cold-stratifying ginkgo tree seed pods
Here's how I reliably break dormancy and get ginkgo seeds sprouting in just two months.
🌱 Step 1: Harvest and Prepare the Seed Pods
Collect fresh ginkgo seed pods in late fall when they've turned yellow and opened slightly. Remove the fleshy outer layer by hand—it's sticky and contains butyric acid, which can inhibit germination. Rinse the clean seeds thoroughly under cool water to remove all residue. I like to soak them for 10 minutes in a 10% bleach solution (1 part bleach to 9 parts water) to prevent mold, then rinse again.
Spread the seeds on a paper towel to dry completely. This step is crucial—moisture trapped in the seeds during stratification will cause rot. Store them in a labeled paper envelope until you're ready to stratify. The seeds should feel dry to the touch but not brittle.
💧 Step 2: Moisten and Stratify the Seeds
Fill a quart-sized resealable plastic bag with 2 cups of damp sphagnum peat moss or a 50/50 mix of peat and perlite. The mix should feel like a wrung-out sponge—moist but not dripping. Add 4-6 ginkgo seeds (since germination rates vary) and seal the bag tightly.
Place the bag in a refrigerator set to 35-40°F for 60 days. I store mine on a middle shelf where the temperature stays consistent. Check the bag weekly—if condensation forms on the inside, open it for 10 minutes to air out. The goal is cold, moist conditions without rot.
☀️ Step 3: Transfer to Warmth for Germination
After 60 days, remove the bag from the fridge and open it. You'll see the seeds have swollen slightly—this means stratification worked. Plant them ½ inch deep in a 4-inch pot filled with sterile seed-starting mix. I use a mix of 50% peat moss, 30% perlite, and 20% vermiculite for fast drainage.
Place the pots in a warm, bright location (around 70°F) with indirect light. Keep the soil consistently moist but never soggy. Germination can take 4-8 weeks—patience is key. You'll know it's working when the soil surface shows tiny cracks as roots push through.
🌿 Step 4: Provide Ideal Growing Conditions
Once seedlings emerge, move them to a south-facing window or under grow lights for 14-16 hours of light daily. I use a T5 fluorescent grow bulb positioned 4 inches above the seedlings. Rotate the pots weekly so they grow straight instead of leaning toward the light.
Water gently from the bottom by placing the pot in ½ inch of water for 10 minutes twice weekly. This prevents stem rot while keeping roots hydrated. Fertilize lightly with a half-strength fish emulsion every 4 weeks once the first true leaves appear (not the initial seed leaves).
⏰ Step 5: Harden Off and Transplant
After 6-8 weeks of growth, when seedlings have 3-4 sets of leaves, begin hardening off. Place them outdoors in a shaded, sheltered spot for 2 hours daily, gradually increasing time over 10 days. Choose a partially sunny location with well-draining soil for transplanting.
Dig a hole twice as wide as the root ball but no deeper. Ginkgo seedlings hate root disturbance, so I transplant on an overcast day to reduce stress. Water deeply after planting and mulch with 2 inches of wood chips to retain moisture. The first year is critical—keep soil consistently moist but never waterlogged.
Tips & tricks for perfect ginkgo seed germination
These little details make all the difference between seeds that sprout and seeds that rot.
Timing Secret: That 10-minute bleach soak in Step 1 is non-negotiable for mold prevention. I use a clean spray bottle to mist the seeds with the diluted bleach solution, then rinse immediately under running water. This quick step prevents fungal issues that could ruin your entire batch.
Temperature Matters: The 35-40°F refrigerator range is critical during stratification. I place a thermometer inside my fridge near the seeds to monitor—some fridges have cold spots. If your fridge runs cooler, you can extend the 60-day period by 10-15 days, but don't go beyond 90 days total or the seeds may lose viability.
Soil Mix Strategy: For Step 3, I always sterilize my seed-starting mix by microwaving it in a bowl of water for 2 minutes to kill any pathogens. The 50/50 peat-perlite mix should be fluffy enough that when you squeeze it, just a few drops of water come out—not a stream. This prevents waterlogged conditions that cause damping-off disease.
Visual Cues for Germination: In Step 4, watch for those tiny cracks in the soil surface as roots push through—this happens about 2-3 weeks before actual sprouts emerge. I use a magnifying glass to check daily once I see the first cracks. The moment you spot the first green tip, move the pot to brighter light immediately to prevent leggy growth.
Pro Tips for Ginkgo Tree Seed Pods
- These little details make all the difference between seeds that sprout and seeds that rot.
- Timing Secret: That 10-minute bleach soak in Step 1 is non-negotiable for mold prevention. I use a clean spray bottle...
- Temperature Matters: The 35-40°F refrigerator range is critical during stratification. I place a thermometer inside m...
Frequently asked questions
Got questions about germinating ginkgo tree seed pods? You’re in the right place! Here are answers to the most common queries—from timing to troubleshooting—so you can tackle this project with confidence.
How do I know when ginkgo seed pods are ready to harvest?
Harvest ginkgo seed pods when they’re plump, yellowish-brown, and slightly soft—usually in late fall (October–November). Avoid green or hard pods, as they won’t germinate well. Let them dry indoors for 1–2 weeks before cold stratification to mimic winter conditions.
Why does cold stratification take 60 days—can I speed it up?
Cold stratification (60 days in the fridge) mimics natural winter dormancy, breaking seed dormancy safely. While you can’t skip it, some gardeners try soaking seeds in warm water for 24–48 hours before stratification to soften the shell slightly—but results vary. Patience pays off!
What if my ginkgo seeds don’t sprout after stratification?
Don’t panic! Try these fixes:
- Check moisture: Seeds should stay damp but not soggy during stratification. Adjust paper towel dampness if needed.
- Verify timing: Ensure you’ve stratified for the full 60 days. Ginkgo seeds are slow—germination can take 3–6 months after stratification.
- Test viability: Cut open a seed—if the inner kernel is firm and white, it’s viable. Dark or mushy = discard it.
Can I grow ginkgo trees from store-bought seeds instead of pods?
Yes, but with a caution: Store-bought ginkgo seeds (often sold as "ginkgo nuts") are usually roasted or processed, which kills viability. Only use raw, fresh seeds from unopened pods. If you must use store-bought, look for "organic, unroasted" labels and test a few for germination.
Are ginkgo seed pods toxic to pets or kids?
While ginkgo seeds themselves aren’t highly toxic, the outer pod husks and flesh contain ginkgotoxin, which can cause mild stomach upset if ingested in large amounts. Keep pods out of reach of pets/kids, and never eat the raw seeds—they’re bitter and can be harmful. Always supervise young children around them!
Wrapping up and next steps
Growing ginkgo tree seed pods may seem like a slow process, but with cold-stratification, you can unlock their potential in just 60 days! 🌱 Whether you're a gardening enthusiast or a nature lover, these ancient seeds offer a rewarding challenge—and the chance to nurture a tree with a fascinating history.
Start small, stay patient, and soon you’ll be watching your own ginkgo saplings thrive.
Ready to take the next step? Gather your supplies, follow the stratification guide, and plant those pods this fall! Your future ginkgo tree is waiting—happy growing! 🌳