
Lawn
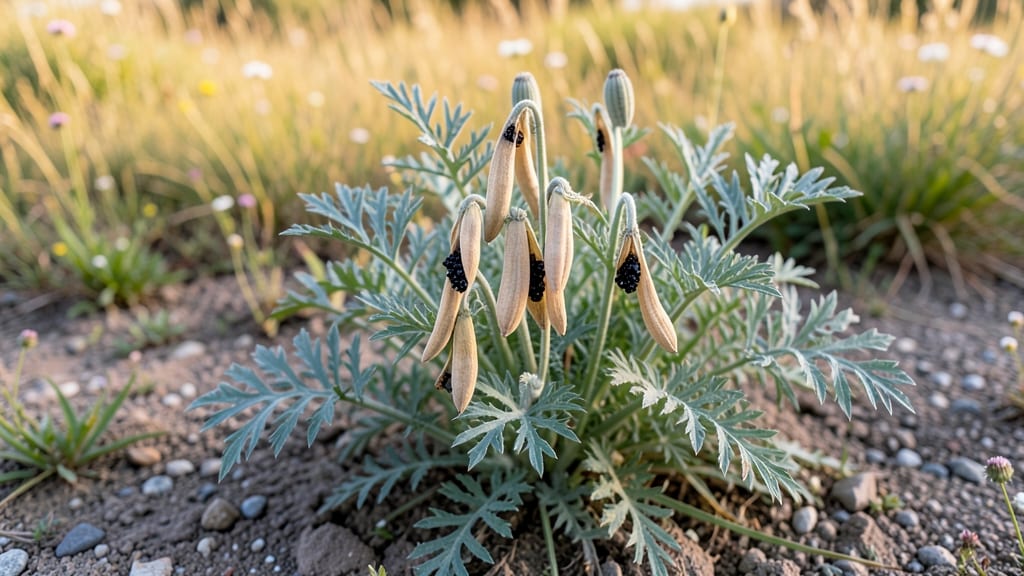
Those delicate poppy seed pods are nature's tiny treasure chests—packed with seeds for next year's garden or stunning dried decorations. 🌸 I learned the hard way that timing is everything: harvest too early, and the seeds aren't ready; too late, and they scatter or rot.
The key window is when the pods turn from green to papery brown but before they split open.
You'll need just a few simple tools: clean scissors or pruning shears, a paper bag for each plant, and a dry, shaded spot to finish drying. The process takes about 10-14 days total if you catch them at the right stage.
I like to work on cloudy days when pods are less likely to open prematurely from heat.
Once properly dried, you'll have two options: store the seeds in envelopes for planting next spring or preserve the pods whole for crafts. The seeds stay viable for 3-5 years if kept cool and dry, while dried pods make elegant centerpieces that last for months.
Fair warning: poppies can be finicky about moisture during drying. If you see mold or soft spots, spread them out immediately in a well-ventilated area. The most common mistake? Waiting too long—pods that split open lose most of their seeds to the wind.
📚 In This Guide
- What you need
- Instructions
- Tips and common mistakes
- Wrapping up and next steps
What you need
- ● Fresh poppy plants (preferably in full bloom or just past peak flowering, with seed pods forming but not yet fully dried).
- ● Pruning shears or sharp scissors (for cleanly harvesting pods without damaging the plant).
- ● Paper bags or breathable fabric sacks (1-2 per plant, to allow airflow and prevent moisture buildup).
- ● Twine or rubber bands (to secure bags and keep pods contained).
- ● A flat, dry surface (like a baking sheet, tray, or clean cardboard) for spreading pods to dry.
- ○ A small fan or dehumidifier (optional but helpful) if drying indoors in a humid climate.
- ● Mortar and pestle or a clean rolling pin (for gently crushing pods to release seeds).
- ● Fine-mesh sieve or sifter (to separate seeds from chaff).
- ● Small bowls or containers (for sorting seeds by size or quality).
- ● Labeling tags and markers (to track harvest dates or seed varieties).
- ● A dry, well-ventilated space (indoors or outdoors) with low humidity (ideally 40-50% or lower).
- ● Indirect sunlight or artificial grow lights (to prevent overheating while pods dry).
- ● Patience! Drying can take 7-14 days, depending on conditions.
How to harvest poppy seeds from mature pods
Here's the simple method I've used for years to collect viable poppy seeds before the pods shatter.
🌱 Step 1: Identify and Select the Right Pods
Poppy pods mature in stages, and timing is everything. You want pods that have turned from green to a dry, papery brown but haven't split open yet. Run your fingernail along the seam—the pod should feel firm but slightly papery, not hard or brittle. If it crumbles at the touch, you've waited too long.
Gently twist the pod to test its readiness. A ripe pod will release seeds with just a slight twist, while an underripe pod will feel rubbery and stay closed. I like to harvest on a dry morning after the dew has evaporated—this makes the pods easier to handle without crushing them.
✂️ Step 2: Harvest and Prepare the Pods
Use clean, sharp scissors or pruners to snip the pods from the stems, leaving about ½ inch of stem attached. This prevents the pods from rolling away while drying. Place them in a single layer on a clean, dry paper towel or mesh screen in a warm, dry spot away from direct sunlight.
Here's the thing—don't pile them up. Overlapping pods trap moisture and encourage mold. I spread mine out on a baking sheet lined with parchment paper and leave them undisturbed for 3-5 days. You'll know they're ready when the pods feel completely dry and papery to the touch.
💧 Step 3: Dry and Crack the Pods
Once fully dry, place the pods in a clean, dry container with a tight-fitting lid. I use a large mason jar because it seals well and prevents seeds from escaping. Shake the jar gently but firmly—you want to break open the pods without crushing the seeds inside. Listen for a rattling sound; that means the seeds are moving freely.
If some pods resist, place them in a plastic bag with a few drops of water, seal it, and let them sit for 10-15 minutes. The moisture softens the pod just enough to make cracking easier. Never soak them—they'll mold before you can dry them again.
🪴 Step 4: Separate Seeds from Pod Debris
Pour the contents of the jar onto a clean, flat surface like a baking sheet or large tray. Use a fine-mesh sieve or sifter to separate the seeds from the chaff. I like to hold the sieve over a bowl to catch the seeds as they fall through. The chaff will blow away or stay in the sieve, while the seeds collect neatly below.
For stubborn bits of pod material, I run the seeds through the sieve a second time. You're aiming for seeds that are clean, dry, and free of debris. Store them in a sealed container in a cool, dark place—viable poppy seeds stay good for 1-2 years if kept dry.
☀️ Step 5: Store and Use Your Harvested Seeds
Label your seed containers with the date and variety if you're growing multiple types. Poppy seeds are sensitive to moisture, so I add a small packet of silica gel to the container to absorb any lingering dampness. Keep them in a dark cupboard or refrigerator for longest storage life.
When ready to plant, test a few seeds by pressing them into moist soil. If they sprout within 7-10 days, your seeds are viable. If not, try again with a fresh batch—sometimes seeds need a little extra encouragement to break dormancy.
Tips & tricks for perfect poppy seed harvesting
Real talk: Harvesting poppy seeds successfully comes down to patience and attention to detail. These small tweaks make all the difference between viable seeds and wasted effort.
Timing is Everything: The 3-5 day drying period in Step 2 is non-negotiable. I've learned this the hard way—rushing leads to moldy pods, while waiting too long means the pods shatter before you can harvest. Place your pods in a spot with good airflow (like a mesh screen) and check daily. If you live in a humid climate, consider using a small fan on low to speed up drying while preventing mold.
Cracking Technique: When you're ready to crack the pods in Step 3, listen for that telltale rattling sound—it means the seeds are free inside. If some pods resist, the 10-15 minute water softening trick works wonders, but never exceed that time. I've seen pods become mushy if left too long. For stubborn pods, try rolling them gently on a hard surface before shaking to break them open more easily.
Storage Wisdom: The 1-2 year shelf life mentioned in Step 4 only applies if you keep seeds completely dry. I've had batches last longer by adding a second silica gel packet to my containers. For extra protection, consider storing seeds in small glass jars with tight lids—airtight containers prevent moisture absorption that can reduce viability.
Pro Tips for Dry Poppy Seed Pods
- Real talk: Harvesting poppy seeds successfully comes down to patience and attention to detail.
- Timing is Everything: The 3-5 day drying period in Step 2 is non-negotiable.
- Cracking Technique: When you're ready to crack the pods in Step 3, listen for that telltale rattling sound—it means the seeds are free inside.
Frequently asked questions
Got questions about harvesting dry poppy seed pods? You’re not alone! Here are some of the most common inquiries—plus quick, practical answers to keep your garden (and your patience) thriving.
When are poppy seed pods ready to harvest?
Poppy seed pods are ready when they’re dry and papery but haven’t split open. Look for a light brown or tan color and a hollow sound when tapped gently. Harvest too early, and the seeds won’t be viable; too late, and they’ll scatter like confetti in the wind! Aim for late summer to early fall, depending on your climate.
How do I prevent the pods from opening before I harvest them?
Use a breathable paper bag or a mesh bag to cover the pods before they fully dry on the plant. This traps seeds while allowing airflow. Alternatively, harvest pods in the morning when humidity is low—they’ll stay closed longer. Avoid plastic bags (they trap moisture and cause mold).
Can I harvest poppy seeds from pods that have already split open?
Yes, but act fast! If pods have burst, collect seeds immediately by shaking them onto a tray or paper. For maximum viability, spread them out to dry in a cool, dry place (like a shaded windowsill). If the ground is already littered with seeds, you might still salvage some—but germination rates may drop.
What’s the best way to store harvested poppy seeds?
Store seeds in an airtight container (like a glass jar) in a cool, dark place (e.g., fridge or pantry). Label with the harvest date—poppy seeds stay viable for 2–3 years if kept dry. Add a desiccant packet to prevent moisture buildup, which can cause mold or spoilage.
What if my poppy pods turn black or moldy before harvesting?
Black or fuzzy pods signal rot or fungal infection, often from overwatering or poor airflow. If this happens, remove affected pods immediately to prevent spread. For future harvests, ensure plants have 6+ hours of sunlight daily and water at the base (not overhead). If pods are already ruined, focus on saving healthy ones or replanting next season.
Still stumped? Drop your question below—or tag us in your garden adventures!
Wrapping up and next steps
Harvesting dry poppy seed pods at the right moment ensures a bountiful yield while keeping your lawn or garden looking its best. 🌸 By recognizing the right stage—when pods crack open naturally but seeds remain plump—you’ll avoid waste and enjoy fresh, viable seeds for future planting.
Whether you’re saving seeds for next season or simply tidying up, this simple process turns a chore into a rewarding task.
Ready to put your new skills to work? Grab your tools, step outside, and start harvesting! Share your success with fellow gardeners—you’ve got this! 🌱