
Pruning
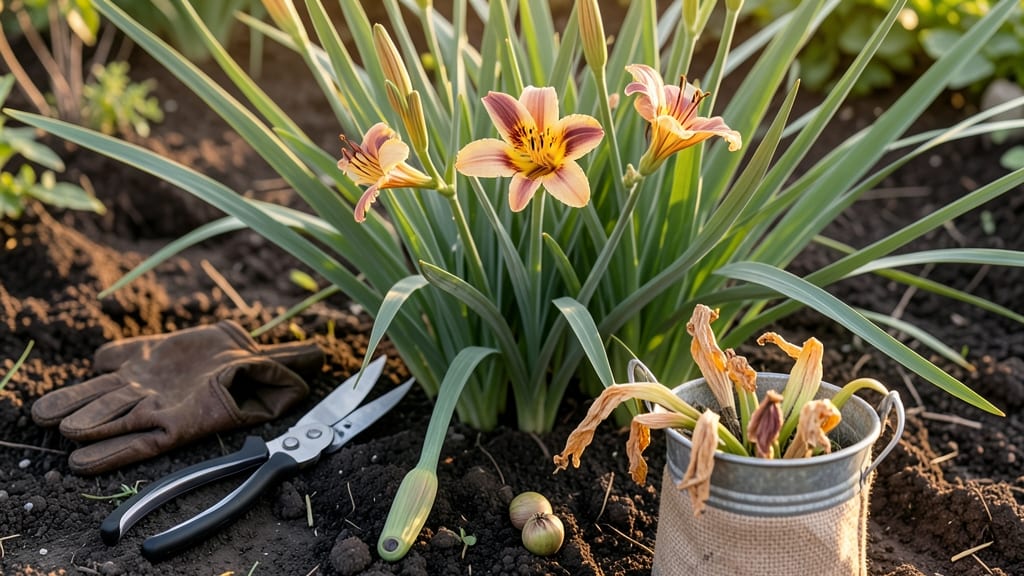
Deadheading daylilies isn’t just about tidy flowers—it’s the secret to nonstop blooms all season. 🌸 I’ve learned the hard way that skipping this step means fewer flowers and more seed pods stealing your plant’s energy.
The right technique keeps your daylilies flowering like crazy, even in late summer when most perennials call it quits.
You’ll need sharp pruners or clean scissors to cut spent blooms cleanly, about ½ inch above the next set of leaves. Pinching off flowers works too, but cutting prevents disease better.
The key is timing: deadhead right after blooms fade, but never when rain is forecasted—wet stems rot faster. This simple habit turns one-time bloomers into repeat performers.
What you’ll end up with is a bushier plant packed with fresh buds instead of leggy stems full of seed pods. My daylilies now bloom from June through September, and the foliage stays thick and healthy.
The best part? You’ll save time later when you’re not fighting to remove seed pods by hand.
For seed savers, leave a few pods on your best plants—just remove the rest. Store collected seeds in a cool, dry place until spring planting. Whether you’re pruning for more flowers or saving seeds, this method works for every daylily variety, from dwarf types to giant hybrids.
📚 In This Guide
- What you need
- Instructions
- Tips and common mistakes
- Wrapping up and next steps
What you need
- ● Pruning shears or sharp bypass pruners – Choose clean, sharp tools (4-6 inch blades) to avoid crushing stems or spreading disease. Disinfect with rubbing alcohol between cuts.
- ● Gloves – Garden-grade gloves (nitrile or leather) to protect hands from thorns and dirt.
- ● Garden waste bag or bucket – A 10-20 gallon container for collecting spent blooms and seed pods.
- ○ Compost bin or pile – For repurposing organic waste (optional but eco-friendly!).
- ● Hand pruners – For smaller, hard-to-reach blooms.
- ● Knee pads – If you’re working with low-growing varieties or large beds.
- ● Spray bottle with water – To mist tools and blooms before pruning (reduces dust and debris).
- ● Labeling tags – If saving seed pods for propagation (write variety names!).
Step-by-Step guide to deadheading daylilies for continuous blooms
Here's how I keep my daylilies flowering nonstop—no fancy tools, just the right timing and technique.
✂️ Step 1: Identify and Remove Spent Blooms
Start by pinching off individual spent blooms as soon as their petals begin to droop or brown. Daylilies bloom on scapes (flower stalks), and each stalk can produce multiple buds. I like to work in the morning when blooms are still crisp—this gives the plant energy to redirect toward new flowers rather than seed production.
Use clean, sharp pruners or even your fingers to grasp the bloom just above the first set of leaves below it. The goal is to remove only the flower, not the entire stalk. This prevents the plant from wasting energy on seed pods while still allowing the scape to produce more blooms. If you see a stalk with multiple buds still closed, leave it—those will open soon.
✂️ Step 2: Cut Back Stalk After Final Bloom
Once a scape has finished blooming—meaning all buds have opened and spent—grab your pruners and cut the entire stalk back to within 1-2 inches of the ground. This encourages the plant to send up new scapes from the base, which can produce another round of blooms later in the season. I always make the cut at a slight angle to prevent water from pooling on the stub.
Don’t worry if the foliage looks a bit ragged after cutting—daylilies are tough. The key is timing: if you cut too early, you might remove buds that haven’t opened yet. Wait until the last bloom on the stalk has faded completely before making the cut. This ensures you’re not sacrificing potential flowers.
🌱 Step 3: Remove Seed Pods to Encourage More Blooms
Daylilies produce seed pods after blooming, but these pods drain energy that could go toward more flowers. If you’re not saving seeds for propagation, snip off any seed pods as soon as they form. Look for small, green pods that appear at the base of spent blooms—these are easy to miss but critical to remove.
Use your fingers or small pruners to gently twist or cut off the pods. I like to do this in the late afternoon when the plant is less stressed from daytime heat. Removing seed pods early in the season gives your daylilies a huge energy boost for continuous blooming. If you’re growing daylilies for their foliage or want to save seeds, leave a few pods, but limit them to avoid weakening the plant.
☀️ Step 4: Monitor and Maintain for Long-Term Blooms
After deadheading, keep an eye on your daylilies for new scapes. In warm climates, you might see a second flush of blooms in late summer or early fall. Water deeply after pruning to help the plant recover and encourage new growth. I also add a light layer of compost or mulch around the base to retain moisture and protect roots from temperature swings.
Daylilies are drought-tolerant once established, but consistent moisture helps them bounce back after heavy pruning. If you notice yellowing leaves or limp scapes, it might be a sign of over-pruning or underwatering. Adjust your watering schedule to keep the soil evenly moist but not soggy. With regular deadheading, your daylilies can keep flowering well into fall—or even next spring in mild climates.
Tips & tricks for deadheading daylilies
Here's what nobody tells you about keeping your daylilies blooming all season long—these little tricks make all the difference.
Timing is Everything: I can't stress enough how important morning deadheading is. That crisp, cool morning air helps the plant recover faster, and the energy it would have spent on seed production goes straight to new blooms. If you miss morning, late afternoon is your next best bet—just avoid midday heat when the plant is already stressed. The goal is to remove spent blooms before they turn brown and start draining energy.
The Technique That Changed Everything: When cutting back the stalk in Step 2, I always make the cut at a 45-degree angle about 1-2 inches above the ground. This prevents water from pooling on the stub, which can lead to rot or disease. Also, use clean, sharp pruners—dull tools crush stems and create wounds that attract pests. If you're using your fingers, pinch just above the first set of leaves below the bloom to avoid removing potential buds.
Seed Pod Strategy: Those tiny green seed pods might look harmless, but they're energy vampires for your daylilies. Remove them as soon as they appear—even if you're not planning to save seeds. I like to do this in the late afternoon when the plant is less stressed from daytime heat. The energy saved from removing seed pods can produce up to 30% more blooms later in the season. If you're saving seeds, leave just 1-2 pods per stalk to avoid weakening the plant.
Post-Pruning Care: After deadheading, give your plants a good deep watering to help them recover. I always add a 1-inch layer of compost or mulch around the base to retain moisture and protect roots. This is especially important in hot climates where daylilies can dry out quickly. The mulch also helps regulate soil temperature, which encourages new growth. Just remember to keep the mulch away from the crown of the plant to prevent rot.
Pro Tips for Deadheading Daylilies And Seed Pods
- Here's what nobody tells you about keeping your daylilies blooming all season long—these little tricks make all the difference.
- Timing is Everything: I can't stress enough how important morning deadheading is.
- The Technique That Changed Everything: When cutting back the stalk in Step 2, I always make the cut at a 45-degree angle about 1-2 inches above the ground.
Frequently asked questions
Got questions about keeping your daylilies blooming like crazy? Here are some of the most common ones—plus quick answers to keep your garden thriving!
When is the best time to deadhead daylilies?
Deadhead as soon as blooms fade to the first brown or yellow stage. This prevents seed pod formation and redirects energy into new growth. For continuous bloomers, check flowers every 2–3 days during peak season (spring to fall).
Should I remove seed pods from daylilies?
Yes! Seed pods (those dried-up, papery pods) drain energy from your plant. Snip them off at the base with clean pruners. If you’re saving seeds for propagation, harvest them before they fully dry—but otherwise, remove them to encourage more blooms.
How often do daylilies need deadheading?
Frequency depends on your variety. Reblooming types (like ‘Stella de Oro’) may need daily checks in peak season, while once-blooming varieties only require deadheading after their initial flush. Aim to remove spent blooms within 24 hours of wilting for best results.
Can I just pull off dead blooms by hand?
Hand-pinching works for small gardens, but use clean fingers or gloves to avoid spreading disease. For larger clumps or stubborn stems, pruners are faster. Just avoid tugging—always cut just above a leaf node to prevent damage.
What if my daylilies stop blooming after deadheading?
Don’t panic! Over-pruning or cutting into the growing fan (the leaf base) can stress the plant. Focus on removing only spent blooms and seed pods, and fertilize lightly with balanced bloom booster (like 10-10-10) after deadheading. Yellowing leaves? Check for root rot or pests first.
Pro Tip:
Mark your calendar for late summer/early fall—this is prime time to clean up any lingering seed pods and trim back foliage. A quick prune now preps your daylilies for a stronger spring rebloom!
Wrapping up and next steps
Deadheading daylilies and removing seed pods is your secret weapon for nonstop, vibrant blooms all season! 🌸 By dedicating just a little time to pruning, you’ll encourage healthier growth, prevent unwanted spread, and keep your garden looking its best.
Now that you’re armed with the right tools and techniques, go ahead and give your daylilies the TLC they deserve—your future blooms will thank you!
Ready to take it further? Plan a monthly pruning schedule to stay on top of deadheading and enjoy a garden that’s always in peak form. Happy gardening! 🌿