
Lawn
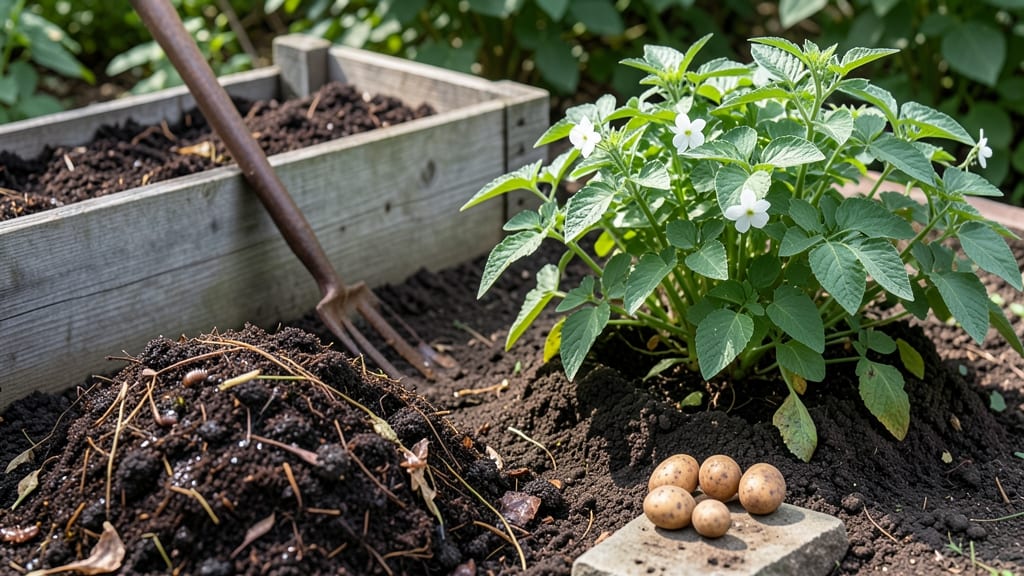
My first harvest using the compost for seed potatoes doubled what I’d grown before—no fancy fertilizer needed. 🌱 The secret lies in how you blend compost into the soil, not just tossing it in.
I learned this after years of struggling with stunted tubers, and now my plants produce heavy, disease-resistant potatoes with minimal effort.
You’ll need well-aged compost (never fresh, which burns roots) mixed at a 1:1 ratio with garden soil. The compost provides nutrients while improving drainage—the perfect balance for potatoes. Start by tilling in compost 4-6 weeks before planting, so it integrates fully.
By harvest time, you’ll see larger tubers, fewer pests, and plants that thrive even in less-than-ideal soil. The key is patience: compost works best when given time to break down before planting season.
This method works for both in-ground beds and containers, making it adaptable to any garden size. Let’s get those spuds growing!
📚 In This Guide
- What you need
- Instructions
- Tips and common mistakes
- Wrapping up and next steps
What you need
- ● Seed potatoes: Certified disease-free, organic seed potatoes (5–10 lbs, depending on yield goals). Choose varieties suited to your climate (e.g., Yukon Gold, Red Pontiac).
- ● Compost: Well-aged, nutrient-rich compost (5–10 gallons per 10 sq ft of garden bed). Aim for a balanced mix with a 2:1 ratio of browns (leaves, straw) to greens (grass clippings, veggie scraps).
- ● Garden bed or containers: For in-ground planting: Loose, well-draining soil (amend with compost if needed).
- ● For containers: 5–10 gallon pots with drainage holes (1–2 potatoes per container).
- ● Tools: Garden fork or trowel (for turning soil/compost).
- ● Hand pruners (for cutting seed potatoes into chunks, if needed).
- ● Watering can or hose (with a gentle spray nozzle).
- ● Potassium-rich additives: Wood ash (1 cup per 10 sq ft) or banana peels (composted) to boost potassium for tuber development.
- ● Mulch: Straw or grass clippings (2–3 inches) to retain moisture and suppress weeds.
- ● Plant markers: Sticks or labels to track varieties (especially useful if testing multiple types!).
- ● Soil test kit: To check pH (ideal range: 5.0–6.5) before planting.
Step-by-Step guide to growing seed potatoes with compost
Here's how to supercharge your potato harvest using compost—no synthetic fertilizers needed.
🌱 Step 1: Select and Prep Your Seed Potatoes
Choose certified organic seed potatoes—these are disease-free and ready to sprout. Place them in a bright, cool spot (60-65°F) for 4-6 weeks before planting. You'll see small, stubby shoots (1-2 inches long) emerge from the eyes. This pre-sprouting gives you a head start on growth.
Cut larger seed potatoes into chunks, ensuring each piece has at least 2-3 eyes (the little dimples where sprouts emerge). Let the cut pieces dry for 24 hours before planting. This prevents rot and gives you a clear view of where the sprouts will grow. I always label my seed potatoes by variety—after harvest, you'll forget which one was which!
💧 Step 2: Build a Nutrient-Rich Compost Mix
Compost is the secret weapon for seed potatoes. Mix equal parts compost (well-aged, dark, and crumbly) with garden soil to create a loose, fertile bed. Avoid fresh manure—it burns tender potato roots. I like to add a handful of wood ash (sparingly!) to the mix for potassium, which boosts tuber formation.
Test your mix by squeezing a handful. It should hold together lightly but not feel compacted. If it’s too dense, add more compost or a little perlite to improve drainage. Seed potatoes need well-draining soil—waterlogged conditions lead to rot. Spread a 2-inch layer of your compost-soil mix in the planting area and rake it smooth.
☀️ Step 3: Plant Sprouted Potatoes Deeply
Dig trenches or hills 4-6 inches deep, spacing them 12-18 inches apart for larger varieties. Place each seed potato chunk sprout-side up, about 4 inches deep. Cover lightly with soil, leaving the top 1-2 inches exposed. This ensures the sprouts stay above ground while the roots develop below.
Water gently after planting—just enough to settle the soil—but avoid soaking the area. Overwatering now can drown the delicate sprouts. As the plants grow, mound soil around the stems in stages (hill up), leaving only the top 6 inches exposed. This encourages more tuber formation and prevents greening (which makes potatoes toxic).
✂️ Step 4: Maintain Moisture and Monitor Growth
Keep the soil consistently moist but never soggy. Water deeply once a week, or more often in hot weather, until the top 2 inches of soil feel dry. Mulch with straw or grass clippings to retain moisture and suppress weeds. You’ll know your potatoes are thriving when the foliage reaches 12-18 inches tall and the stems thicken noticeably.
Watch for blossoms—they signal that tubers are forming underground. If the plants flower too early, they may produce fewer tubers. Pinch off early blooms if your variety tends to bolt. Harvest time comes when the foliage yellows and dies back, usually 90-120 days after planting. Dig carefully—potatoes near the surface are ready first, while deeper ones need more time.
🪴 Step 5: Cure and Store Your Harvest
After digging, let the potatoes cure in a dark, dry place for 1-2 weeks. This toughens the skins and reduces bruising. Store them in a cool (45-50°F), humid environment—a root cellar or even a cardboard box in a garage works. Check occasionally for soft spots or sprouts, which indicate spoilage.
Compost-enhanced potatoes keep longer and taste sweeter because the natural nutrients improve starch development. Save a few of the best ones for next year’s seed stock—just make sure they’re certified disease-free. The more compost you use, the richer your harvest. Next season, try adding a compost tea as a mid-season boost for even bigger yields!
Tips & tricks for perfect compost-enhanced seed potatoes
Here's what nobody tells you about maximizing your potato harvest with compost—these tricks make all the difference.
Sprouting Success: The 4-6 weeks of pre-sprouting at 60-65°F is non-negotiable for strong starts. I learned this the hard way after planting unsprouted potatoes that took twice as long to establish. Place them near a bright window but avoid direct sunlight—you want steady warmth, not heat stress. If your sprouts grow longer than 2 inches, they'll be more fragile when planting. Trim them back gently to 1-2 inches to prevent breakage during transplanting.
Compost Quality Check: Your compost-soil mix should crumble easily between fingers like damp sand—if it feels sticky or compacted, you've got too much clay or fresh organic matter. The 2-inch layer we spread is just the beginning: after the first hilling, add another 2-inch layer of compost around the stems. This feeds the growing tubers continuously. For even better results, mix in 1/4 cup of coffee grounds per plant at planting time—they add nitrogen and deter pests.
Hilling Technique: When you mound soil around stems in Step 3, don't just pile it randomly. Create gentle slopes rather than steep hills—this prevents water from pooling and encourages even tuber formation. Leave the top 6 inches exposed as instructed, but if you notice stems turning green, add more soil immediately. Green stems indicate sunlight exposure, which triggers toxic solanine production. The key is gradual hilling: do it in 2-inch increments every 2-3 weeks as plants grow.
Harvest Timing: The 90-120 day window is a guideline, not a rule. For "new potatoes" (small, tender tubers), dig carefully around the base of plants at 60 days—they'll be golf-ball sized and perfect for boiling. For full-sized potatoes, look for these signs: 50% of foliage yellowing, some leaves curling, and dry soil at 2 inches deep. Dig on a dry day so soil doesn't stick to the tubers. If you're unsure, dig one plant completely to check tuber size—this prevents overcooking or underharvesting.
Pro Tips for Compost For Seed Potatoes
- Here's what nobody tells you about maximizing your potato harvest with compost—these tricks make all the difference.
- Sprouting Success: The 4-6 weeks of pre-sprouting at 60-65°F is non-negotiable for strong starts.
- Compost Quality Check: Your compost-soil mix should crumble easily between fingers like damp sand—if it feels sticky or compacted, you've got too much clay or fresh organic matter.
Frequently asked questions
Can I use any compost for seed potatoes, or are there special types?
While most well-aged compost works, opt for rich, nutrient-dense varieties like worm castings or garden compost mixed with leaf mold. Avoid fresh manure or compost with high nitrogen—it can burn tender potato sprouts. Aim for a balanced, crumbly texture with a pH of 5.8–6.5 for best results.
How long before planting should I add compost to the soil?
Add compost 4–6 weeks before planting to let it integrate into the soil. This gives beneficial microbes time to activate and improves soil structure. For a quick fix, mix compost into the top 6–8 inches of soil or create a trench filled with compost and soil (50/50) to plant your seed potatoes directly into.
What if my compost smells bad or has weeds? Can I still use it?
If your compost smells sour or rotten, it’s not fully decomposed—let it age longer or mix in straw/dry leaves to balance moisture. For weeds, heat kills seeds, but if you spot sprouts, remove them before planting. A quick fix? Sift out debris or use a compost tea (steep compost in water for 24 hours, strain) to avoid transferring weeds.
Do seed potatoes need compost, or can I use regular fertilizer?
Compost is ideal because it improves soil health and provides slow-release nutrients. However, if you’re short on compost, a balanced 10-10-10 fertilizer (applied sparingly) works in a pinch. For organic growers, mix compost + kelp meal (for potassium) or bone meal (for phosphorus) at planting time.
Why are my seed potatoes rotting even with compost in the soil?
Rotting often signals too much moisture or poor drainage. Ensure your compost-soil mix is loose and well-draining—add perlite or coarse sand if needed. Also, avoid overwatering: seed potatoes need 1–1.5 inches of water per week, but soggy soil invites disease. If rot persists, test your soil’s pH (aim for 5.0–6.0) and consider a fungicide like copper spray.
Still stumped? Drop your question in the comments—we’re happy to help!
Wrapping up and next steps
Growing seed potatoes with compost isn’t just a gardening hack—it’s a game-changer for healthier plants and bigger harvests! 🌱 By enriching your soil with nutrient-packed compost, you’re giving your potatoes the perfect start, reducing waste, and even saving money.
Whether you’re a seasoned gardener or just starting out, this natural approach makes the process simpler, sustainable, and rewarding.
Ready to dig in? Start small—try a single compost-enhanced patch this season and watch your confidence (and potatoes!) grow. Happy planting! 🌟