
Lawn
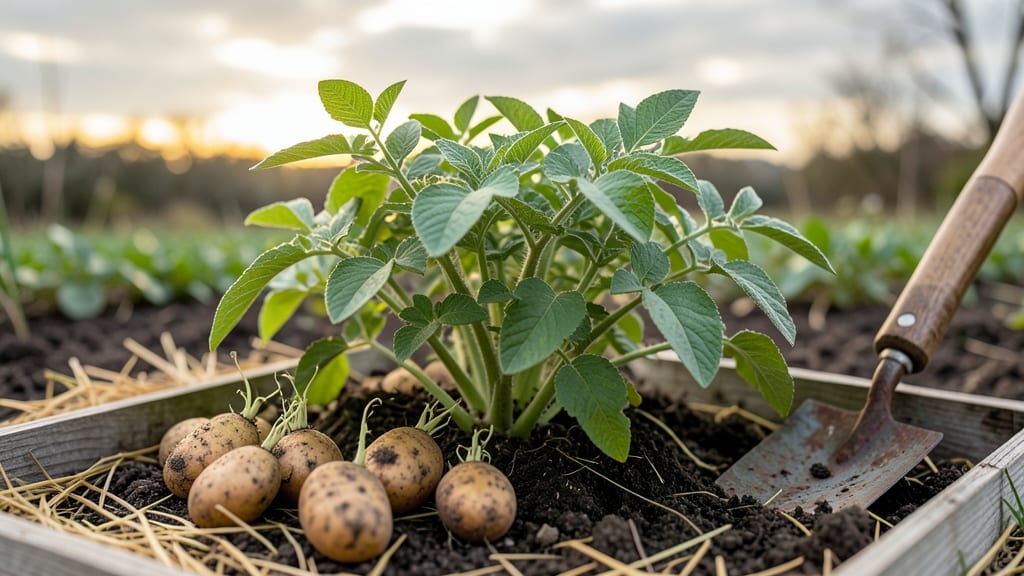
Using the chitted seed potatoes gives you a 3-4 week head start on the growing season—thick, sturdy sprouts ready to hit the soil as soon as frost clears. ✨ I used to plant store-bought potatoes straight from the bag, but after my first chitted batch, I never went back.
Those little green shoots mean faster tubers, bigger yields, and plants that establish roots before the heat of summer arrives.
The whole process takes 6-8 weeks of patience and a cool, bright spot—no fancy equipment needed. You’ll need seed potatoes (certified disease-free), a tray or egg carton, and a light source like a sunny windowsill.
The key is keeping them at 40-50°F during the day and 35-40°F at night, which mimics natural spring conditions. Too warm, and they’ll bolt; too cold, and they’ll stall.
By planting time, your chitted potatoes will have 1-2 inch sprouts with strong stems, ready to push through soil and start producing within 2-3 weeks. The roots form faster, the plants resist blight better, and you’ll harvest 20-30% more potatoes than with unchitted tubers.
It’s not magic—just giving nature a little extra time to get ready.
Store them in a dark, cool place (like a basement) until planting day, and keep them out of direct sunlight. For gardeners in Zone 4 or colder, chitting lets you plant as soon as the soil warms to 45°F—no more waiting for the "right" moment.
The secret? Start chitting 6-8 weeks before your last frost date, and your potatoes will thank you with a bountiful harvest.
📚 In This Guide
- What you need
- Instructions
- Tips and common mistakes
- Wrapping up and next steps
What you need
- ● Seed potatoes: 1–2 lbs (0.5–1 kg) of certified disease-free, chitted seed potatoes (e.g., Irish Cobbler, Yukon Gold, or Kennebec varieties). Choose small to medium-sized tubers with 2–3 visible "eyes" (sprouts).
- ● Growing containers or garden bed: Containers: 5–10 gallon pots (1–2 per potato) with drainage holes, or a raised bed (minimum 12" deep).
- ● Garden bed: Loose, well-draining soil amended with 2–3 inches of compost or aged manure.
- ● Potting mix or soil: 2–3 bags of high-quality, sterile potting mix (or a blend of 60% topsoil, 30% compost, and 10% perlite/sand for garden beds).
- ● Watering can or hose: With a gentle spray nozzle for even moisture.
- ● Fertilizer: Balanced, slow-release fertilizer (10-10-10 or 5-5-5) or organic options like worm castings or compost tea.
- ● Gloves: Gardening gloves to protect hands from soil and sharp edges.
- ● Trowel or hand fork: For planting and soil aeration.
- ● Measuring tape or ruler: To space potatoes 12–18 inches apart.
- ○ Mulch (optional but recommended): Straw, grass clippings, or shredded leaves to retain moisture and suppress weeds.
- ○ Plant labels (optional): Biodegradable tags to track varieties if growing multiple types.
- ● Sunlight access: A location with 6+ hours of direct sunlight daily (full sun is ideal!).
Step-by-Step guide to chitting seed potatoes for faster growth
Here’s how to get a head start on your lawn’s potato patch—no fancy tools needed.
🌱 Step 1: Select and Prep Your Seed Potatoes
Start with certified disease-free seed potatoes—regular grocery store potatoes won’t cut it. Look for small to medium tubers with multiple "eyes" (those little dimples where sprouts emerge). Place them in a cool, bright spot (like a sunny windowsill) for 2-3 weeks before chitting. This kickstarts the sprouting process so you’re ready to plant when the ground warms.
I like to lay them out on a tray or egg carton with the eyes facing up. Avoid direct sunlight at first—you want gentle light to encourage even sprouting without scorching the skin. If you notice any tubers starting to shrivel or rot, toss them—they won’t grow well.
💧 Step 2: Chit in a Warm, Bright Spot
Once the sprouts reach about 1-2 inches long, move the potatoes to a warm (60-65°F) spot with bright, indirect light. A south-facing windowsill works great, but avoid placing them in direct midday sun—it can turn the sprouts yellow or leggy. You’ll see the stems thicken and turn a vibrant green as they prepare for planting.
Here’s the thing—don’t water the potatoes during this stage. The sprouts draw moisture from the tuber itself, and adding water risks rot. Instead, check weekly for any soft spots or mold. If you spot trouble, remove the affected potato immediately to keep the rest healthy.
☀️ Step 3: Harden Off Before Planting
About 1-2 weeks before your last frost date, start hardening off your chitted potatoes. Move them outside to a shaded, sheltered spot for 2-3 hours the first day, then gradually increase their outdoor time over 7-10 days. This toughens up the sprouts so they’re ready for the shock of planting in cooler soil.
Watch for wilting or yellowing—this means they’re adjusting too fast. If you see this, bring them back inside for a day and try again. By the time you’re ready to plant, the sprouts should be sturdy and dark green, with no signs of stress.
🪴 Step 4: Plant at the Right Depth and Spacing
Dig holes 4-6 inches deep and 12 inches apart in loose, well-draining soil. Place the chitted potato eyes up (this is critical—upside-down potatoes won’t grow). Cover with 2-3 inches of soil, then water gently to settle it around the tuber. As the stems grow, hill up soil around the base to encourage more tuber formation.
I like to plant mine in early spring, once the soil temperature hits 45°F. If frost threatens, cover the bed with a lightweight row cover—it’ll protect the young plants without smothering them. Within 2-3 weeks, you’ll see the sprouts emerge, and you’ll know your chitting paid off with strong, early growth.
Tips & tricks for perfect chitted seed potatoes
Speed up your potato patch with these practical tips that’ll help you avoid common pitfalls and get the strongest starts possible.
Lighting Strategy: During the initial 2-3 weeks in Step 1, place your seed potatoes near a window that gets gentle morning sun—this prevents scorching while still encouraging even sprouting. If you notice any sprouts turning yellow or stretching too long (a sign of legginess), rotate the tray every few days to ensure balanced light exposure. The goal is sturdy, dark green stems, not spindly growth.
Temperature Matters: The 60-65°F range in Step 2 is ideal, but if your home runs cooler, consider using a seedling heat mat set to low. I’ve found that maintaining this temperature range prevents slow, weak sprouting. Avoid placing them near drafty windows or vents—temperature swings can stress the young plants and delay growth. A simple thermometer near the tray helps monitor conditions.
Harden Off Gradually: When you start the 7-10 day hardening process in Step 3, begin with just 2-3 hours outside on the first day. I’ve seen beginners rush this step and end up with wilted sprouts that never recover. Each subsequent day, add another hour or two, watching closely for any signs of stress. By the time you plant, your sprouts will be tough enough to handle cooler soil temperatures and establish quickly.
Soil Prep Tip: Before planting in Step 4, loosen the soil to a depth of 6 inches and mix in a handful of compost. This improves drainage and provides nutrients right where the roots will grow. I also like to add a sprinkle of wood ash for potassium—it gives my potatoes a nice boost without over-fertilizing. Just avoid fresh manure, which can burn young sprouts.
Pro Tips for Chitted Seed Potatoes
- Speed up your potato patch with these practical tips that’ll help you avoid common pitfalls and get the strongest starts possible.
- Lighting Strategy: During the initial 2-3 weeks in Step 1, place your seed potatoes near a window that gets gentle morning sun—this prevents scorching while still encouraging even sprouting.
- Temperature Matters: The 60-65°F range in Step 2 is ideal, but if your home runs cooler, consider using a seedling heat mat set to low.
Frequently asked questions
Got questions about chitted seed potatoes?
Here are the answers to the most common ones—so you can grow a lush, healthy lawn without a hitch!
What exactly are chitted seed potatoes, and why should I use them?
Chitted seed potatoes are pre-sprouted potatoes with small shoots (eyes) that have begun growing. Using them gives your lawn a head start—up to two weeks faster growth compared to planting regular potatoes. The sprouts are already primed to sprout roots quickly, leading to stronger, more vigorous lawn coverage. Plus, they’re less likely to rot in cold soil!
How long does it take for seed potatoes to chit before planting?
Chitting typically takes 4–6 weeks in a cool, bright spot (like a windowsill or basement). Place them in a tray with the rose end (where the sprouts form) facing up. Once you see 1-inch sprouts, they’re ready to plant. Pro tip: Avoid direct sunlight or warmth—they’ll grow too fast and become leggy!
Can I plant chitted potatoes too early or too late in the season?
Timing is key! Plant chitted potatoes 2–4 weeks before your last frost date—soil should be 40–50°F (4–10°C). Planting too early in cold soil can stunt growth, while planting too late (after warm weather hits) may cause the sprouts to rot. Check your USDA zone for exact dates!
What if my chitted potatoes don’t sprout? Can I still use them?
Don’t toss them yet! If sprouts are slow or missing, try re-chitting them for another 2–3 weeks in a warmer spot (like near a sunny window). If they’re still dormant, they may not be viable—opt for fresh seed potatoes. Always buy certified disease-free seed potatoes to avoid issues!
Are there alternatives to chitting potatoes at home?
Yes! Some gardeners skip chitting and plant whole seed potatoes directly into warm soil. However, chitting still gives the best results for lawns. For a middle ground, try pre-sprouting in peat pots—they’ll establish roots faster when planted. Just ensure your method matches your climate and planting timeline!
Wrapping up and next steps
Growing a lush, vibrant lawn starts with the right foundation—and chitted seed potatoes are your secret weapon! 🌱 By encouraging early sprouting, you’ll enjoy faster germination, stronger roots, and a head start on that dreamy green carpet.
Whether you’re a seasoned gardener or just dipping your toes into lawn care, this method is simple, cost-effective, and packed with potential.
Ready to take the next step? Start small—try chitting a few potatoes this season and watch your lawn transform. Then, share your success (or ask questions!) in gardening communities for even more tips. Your perfect lawn is just a sprout away! 🌟