
Propagation
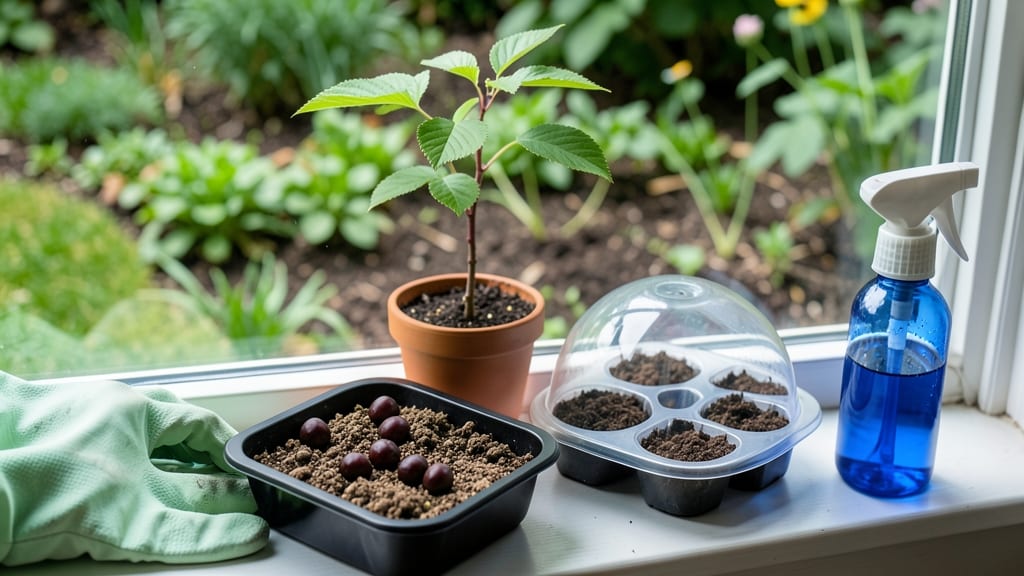
Growing a cherry tree from a cherry seed propagation sounds like magic—until you realize most seeds won’t produce fruit true to the parent. 🌱 But with the right 3-step method, you can break the dormancy barrier and coax those tiny pits into sturdy seedlings that might surprise you with edible cherries someday.
I’ve tried this with sour cherries, and while they won’t be identical to the store-bought variety, the process itself is shockingly simple once you know the tricks.
The secret starts with stratification—mimicking winter’s chill to trick the seed into thinking it’s time to grow. You’ll need a damp paper towel, a plastic bag, and patience (about 8-12 weeks of fridge time).
Skip this step, and you’ll end up with seeds that either rot or sprout too fast, leading to weak, leggy seedlings. Trust me, the waiting pays off—those first green shoots popping through the soil after months of dormancy feel like a tiny victory.
Once sprouted, transplant the seedlings into well-draining soil and give them full sun (at least 6 hours daily). They’ll grow slowly at first, but with consistent watering and a little fertilizer, you’ll watch them transform into 6-foot saplings in just a couple of years.
The real test comes when they flower—if they do—because sweet cherries rarely come true from seed, but sour varieties have a better shot.
This method works best for sour cherries (like Morello) and wild cherries, not sweet varieties. If you’re dreaming of backyard fruit, consider grafting later—but for now, enjoy the adventure of growing a tree from something as humble as a pit.
The journey’s half the fun, and those first leaves unfurling in spring? Pure reward.
📚 In This Guide
- What you need
- Instructions
- Tips and common mistakes
- Wrapping up and next steps
What you need
- ● Fresh cherry pits: 3–5 (from ripe, organic cherries—avoid store-bought if treated with chemicals).
- ● Small pots or containers: 3–5 (4–6 inches deep, with drainage holes). Use plastic nursery pots or even yogurt cups!
- ● Well-draining potting mix: 1 bag (sterilized, seed-starting blend or a mix of 50% peat/perlite + 50% compost).
- ● Plastic wrap or clear lid: To create a mini greenhouse effect (or a humidity dome).
- ● Spray bottle: For gentle watering (avoid soaking!).
- ● Patience (and a warm spot!): Cherry seeds need time—think weeks to months for germination.
- ● Stratification setup: A refrigerator (for cold treatment) or a seed stratification kit.
- ● Grow lights: LED or fluorescent (12–16 hrs/day) if natural light is weak.
- ● Seedling heat mat: (70–75°F) to speed up germination.
- ● Labels & marker: To track planting dates and varieties.
- ● Fertilizer (diluted): A balanced, water-soluble option (like 10-10-10) for later stages.
Step-by-Step instructions for cherry seed propagation
Here's how to transform a single cherry pit into a thriving seedling—no fancy tools required.
🌱 Step 1: Extract and Stratify the Seeds
Start by carefully removing the pit from a ripe cherry. Rinse it thoroughly to remove any remaining fruit residue, then let it dry completely for 24 hours—this prevents mold during stratification. Place the pit in a small container with a damp paper towel, then seal it in a plastic bag with a tiny air gap. Store it in your refrigerator's crisper drawer for 8-12 weeks.
Stratification mimics winter's cold period, breaking the seed's dormancy. Check the towel weekly—it should stay damp but not soggy. If you forget to monitor, you'll know it's too wet when the towel feels slippery or the pit develops fuzzy mold. After 8-12 weeks, the pit should show a tiny white root emerging—this means it's ready for planting.
🪴 Step 2: Plant the Stratified Seed
Fill a 4-inch diameter pot with sterile seed-starting mix (never garden soil—it's too dense and may carry pathogens). Press the mix down gently to create a firm but not compacted surface. Plant the stratified pit 1 inch deep, placing it horizontally with the pointed end facing downward. This orientation encourages upward root growth.
Lightly cover the pit with additional mix, then water gently until the soil feels evenly moist to the touch. Place the pot in a warm, bright location (a south-facing window or under a grow light set to 12-14 hours daily). Keep the soil consistently moist—not soggy, not dry—by watering whenever the top inch feels dry. Germination can take 4-12 weeks, depending on your climate.
☀️ Step 3: Nurture the Seedling to Transplant Size
Once the seedling emerges, move it to a sunny windowsill or under full-spectrum grow lights for 14-16 hours daily. You'll know it needs more light if the stem grows leggy and pale—this means it's stretching toward the light source. Harden off the seedling by placing it outside in a sheltered, shaded spot for 1-2 hours daily after 4-6 weeks of growth. Gradually increase outdoor time over 10-14 days to prepare it for transplanting.
Transplant the seedling into a larger pot (6-8 inches deep) or directly into the garden after the last frost date, when soil temperatures reach at least 60°F. Choose a location with full sun (6+ hours daily) and well-draining soil. Water deeply after transplanting to settle the roots, then maintain 1 inch of water weekly (adjust for rainfall). Cherry seedlings grow slowly—be patient, and you'll have a mature tree in 5-10 years.
Tips & tricks for perfect cherry seed propagation
Transforming a cherry pit into a thriving seedling requires patience and precision—here's what I've learned to make the process even smoother.
Stratification Success: The 8-12 week cold treatment in Step 1 is non-negotiable for breaking dormancy, but don't rush it. I've found that placing the sealed bag in the refrigerator's crisper drawer (where humidity is higher) creates the ideal microclimate. If you notice fuzzy mold after the 24-hour drying period, immediately remove the pit, rinse it with diluted hydrogen peroxide (1 part peroxide to 4 parts water), and let it dry again before restarting.
Planting Orientation Matters: When planting the pit horizontally in Step 2, the pointed end should face downward to encourage upward growth. I've had better success with this method than vertical planting—it mimics how seeds grow naturally in soil. Use a toothpick to mark the orientation if you're planting multiple pits to avoid confusion.
Lighting Strategy: For the critical 12-14 hours of daily light in Step 2, a simple LED grow light on a timer works wonders. Position it just 6 inches above the seedling to prevent leggy growth. If you're using natural light, rotate the pot daily so all sides get even exposure—this prevents the seedling from leaning toward one window.
Pro Tips for Cherry Seed Propagation
- Transforming a cherry pit into a thriving seedling requires patience and precision—here's what I've learned to make t...
- Stratification Success: The 8-12 week cold treatment in Step 1 is non-negotiable for breaking dormancy, but don't rus...
- Planting Orientation Matters: When planting the pit horizontally in Step 2, the pointed end should face downward to e...
Frequently asked questions
Got questions about growing cherries from seed?
You're not alone—this method takes patience and know-how. Here are answers to the most common queries to help you navigate pitfalls and boost your success rate.
How long does cherry seed propagation take from start to fruit?
Be patient! A seed-grown cherry tree typically takes 5–7 years to bear fruit, and even longer for consistent harvests. The wait is longer than grafting (which yields fruit in 2–3 years), but the reward of a unique, heirloom variety makes it worthwhile for adventurous gardeners.
Can I speed up germination? What’s the fastest way?
Yes! Stratification (mimicking winter) is key. Soak seeds in water for 24 hours, then place them in a damp paper towel in the fridge for 6–8 weeks. After stratification, plant them in moist soil at 60–70°F (15–21°C). Some gardeners swear by sandwiching seeds between damp paper towels for faster sprouting.
Will my seed-grown cherry tree produce fruit like the parent?
Probably not! Seed propagation is unpredictable—your tree may bear cherries, but they’ll likely differ in size, color, flavor, and even disease resistance. For true-to-parent results, grafting is the way to go. If you love experimentation, embrace the surprise!
Why aren’t my cherry seeds sprouting? Troubleshooting tips.
Common culprits include:
- No stratification: Seeds need cold treatment to break dormancy.
- Too dry/wet soil: Keep soil consistently moist (not soggy).
- Poor seed viability: Some cherry pits are sterile—test a few seeds to confirm.
- Temperature issues: Seeds need warmth (70°F+) to germinate.
If nothing sprouts after 3 months, try a fresh batch or check for mold.
Are there easier alternatives to growing cherries from seed?
Consider these low-effort options:
- Buy a grafted tree: Faster fruit production (2–3 years) with guaranteed varieties.
- Layering or cuttings: Clone your favorite cherry tree (though success varies by species).
- Rootstock grafting: Combine a hardy rootstock with a desirable scion for disease resistance.
Seed propagation is a fun challenge, but these methods save time and guarantee results.
Wrapping up and next steps
Growing cherries from seed is a rewarding journey that connects you to nature’s patience and resilience. While it takes time—years—to yield fruit, the process itself is a thrilling blend of science and art.
Start small, stay consistent, and soon you’ll be nurturing a tree that could one day bear sweet, homegrown cherries!
Ready to take the next step? Plant your seeds today and watch your green thumb grow stronger with each sprouting leaf. 🌱✨ Happy propagating!