
Lawn
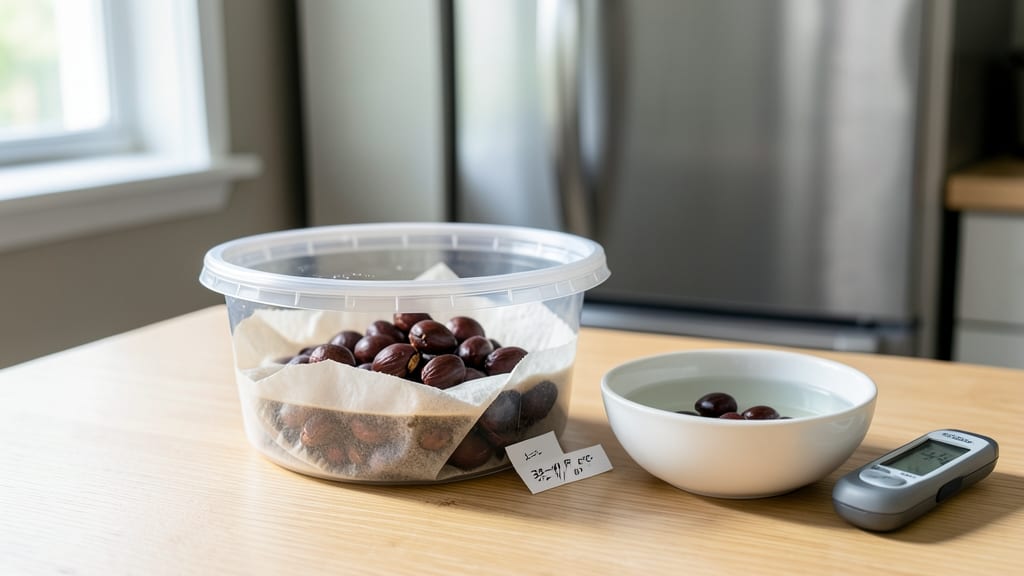
Cherry seed stratification unlocks the secret to next year's blossoms. 🌱 Without this cold treatment, most seeds stay dormant forever—even when planted in spring. I learned the hard way after watching dozens of seeds rot in the soil, until I discovered how a simple winter chill mimics nature's timing. The process mimics how wild cherries prepare for spring: seeds need 60-90 days of cold, moist conditions to break dormancy. You'll need a mix of moist sand or peat moss, a sealed container, and a refrigerator. No fancy equipment—just patience and a little science. By March, you'll see tiny roots forming, ready to transplant. The first true leaves appear in 4-6 weeks, and within a year, you could have a tree that flowers like the ones in your favorite orchard. The key is consistency—check moisture weekly and keep it cold. Works for sweet, sour, and tart cherries alike. Here's how to do it right the first time!
📚 In This Guide
- What you need
- Instructions
- Tips and common mistakes
- Wrapping up and next steps
What you need
- ● Ready to kickstart your cherry tree’s growth with cherry seed stratification? Here’s everything you’ll need to get started—no surprises, just success! 🌱
Step-by-step instructions for cherry seed stratification
Here's how to break dormancy and coax those stubborn cherry pits into sprouts.
🌱 Step 1: Extract and Clean the Seeds
Start by removing the pits from ripe cherries—never use store-bought seeds, as they're often treated to prevent germination. Rinse each pit under cool water to remove any remaining fruit flesh, then pat them dry with a paper towel. I like to leave them uncovered on a mesh screen overnight to air-dry completely; this prevents mold from forming during stratification.
Inspect each pit for cracks or soft spots—discard any damaged ones, as they won't survive the process. Healthy pits have a smooth, hard shell. Store them in a paper envelope or small breathable bag until ready for stratification. The key here is patience: rushing the drying step invites rot, while proper drying sets the stage for successful germination.
❄️ Step 2: Cold-Moist Stratification
Place the dried pits in a sealed plastic bag with a damp paper towel—just enough moisture so the towel feels like a wrung-out sponge. I add about 1 tablespoon of water to a quart-sized bag and shake it gently to distribute moisture evenly. The goal is consistent dampness, not sogginess.
Store the bag in your refrigerator's crisper drawer, where temperatures hover around 35-40°F. Check the pits weekly for mold or unpleasant odors—if you spot either, remove the pits immediately and start fresh. After 8-12 weeks, the seeds will begin breaking dormancy. You'll notice tiny cracks forming in the pit shells, signaling it's time to move to warmer conditions.
☀️ Step 3: Warm Up and Plant
Once the pits show cracks, remove them from cold storage and plant them ½ inch deep in a pot filled with sterile seed-starting mix. I use small 4-inch pots to give each seed its own space—crowding leads to weak seedlings. Water gently until moisture reaches the bottom of the pot, then place it in a warm spot with indirect light.
Germination can take 2-6 weeks at 70-75°F. Keep the soil consistently moist but never soggy—you'll know it's right when the surface feels damp but not wet to the touch. Be patient; some seeds may take longer, but don't give up until all signs of life have vanished.
🌿 Step 4: Transplant and Care for Seedlings
When seedlings reach 2-3 inches tall and develop their first true leaves, transplant them into individual 6-inch pots with well-draining potting mix. Harden them off by placing them outdoors in partial shade for 1 hour daily over 7-10 days, gradually increasing exposure. This prepares them for outdoor conditions without shock.
Once hardened off, plant them in a permanent location with full sun and rich, well-draining soil. Mulch around the base to retain moisture and regulate soil temperature. Cherry seedlings grow slowly at first, but with consistent care, they'll reward you with blooms in 3-5 years—proof that patience pays off in the garden.
Tips & tricks for perfect cherry seed stratification
Here's what nobody tells you about making cherry seeds sprout reliably—these tricks turn stubborn pits into thriving seedlings.
Selection Tip: Focus on pits from fully ripe cherries—they're more likely to germinate successfully. I've had the best luck with pits from sweet cherries rather than tart varieties. Avoid pits from store-bought cherries, as they're often treated with chemicals to prevent germination. For best results, collect pits from your own trees or organic sources where you know no treatments were applied.
Drying Strategy: The overnight air-drying in Step 1 is non-negotiable. I've tried skipping this step and ended up with moldy pits every time. Use a mesh screen or paper towel to catch any moisture drips, and spread the pits in a single layer. If you're in a humid climate, consider extending the drying time to 24 hours—just make sure they're completely dry to the touch before moving to cold stratification.
Moisture Control: That damp paper towel in Step 2 needs to stay consistently moist but never soggy. I test it by squeezing gently—if water drips out, it's too wet. Too much moisture creates the perfect environment for mold, while too little prevents the seeds from breaking dormancy. A quart-sized bag with 1 tablespoon of water works perfectly for about 10-12 pits—scale up proportionally if you're working with more.
Temperature Watch: The 35-40°F range in your fridge's crisper drawer is ideal, but every refrigerator varies. If your crisper runs warmer, move the bag to the main fridge compartment. For cooler fridges, place it on the bottom shelf. The goal is to mimic natural winter conditions that trigger germination. I've seen some gardeners use seed stratification systems, but your standard fridge works just fine with these adjustments.
Pro Tips for Cherry Seed Stratification
- Here's what nobody tells you about making cherry seeds sprout reliably—these tricks turn stubborn pits into thriving ...
- Selection Tip: Focus on pits from fully ripe cherries—they're more likely to germinate successfully. I've had the bes...
- Drying Strategy: The overnight air-drying in Step 1 is non-negotiable. I've tried skipping this step and ended up wit...
Frequently asked questions
Got questions about cherry seed stratification?
You’re not alone—this process can feel tricky, but we’ve got answers to help you grow those sweet blooms with confidence! Here’s what you need to know:
How long does cherry seed stratification need to last?
Most cherry seeds require 60–90 days of cold, moist stratification to break dormancy. Sweet cherries (like Prunus avium) often need the full 90 days, while tart cherries (like Prunus cerasus) may suffice with 60–75 days. Monitor moisture levels—seeds should stay damp but not soggy!
Can I stratify cherry seeds in the fridge instead of outdoors?
Use a zip-top bag with damp peat moss or paper towels, then place it in your fridge (33–41°F). Shake the bag gently weekly to prevent mold. This mimics winter conditions perfectly—just avoid freezer temps, which can damage seeds.
What if my seeds rot during stratification?
Rotting usually means too much moisture or poor airflow. Fix it by:
- Draining excess water
- Reseeding in fresh, lightly moist medium (like perlite or vermiculite)
- Adding a fungicide (like hydrogen peroxide) to the mix
Do I need to stratify cherry seeds every year?
Nope! Stratification is only for fresh seeds. Once germinated, save viable seeds in a cool, dry place (like a sealed container in the fridge) for up to 2–3 years. Older seeds may need extra cold time or won’t sprout reliably.
Are there alternatives if stratification fails?
If seeds refuse to germinate after stratification, try:
- Scarification: Lightly nick the seed coat with sandpaper to help water penetrate.
- Hormone treatment: Soak seeds in rooting hormone for 12 hours before planting.
- Buy grafted trees: For guaranteed results, opt for nursery-grown cherry trees (they skip the seed stage!).
Wrapping up and next steps
Mastering cherry seed stratification unlocks the secret to vibrant blooms and thriving trees next season! 🌱 By mimicking winter’s chill, you’ve given those tiny seeds the best shot at breaking dormancy and sprouting strong.
Whether you’re a patient gardener or a curious beginner, your efforts will pay off with lush, healthy growth.
Ready to take the next step? Plant your stratified seeds in well-draining soil and keep them cozy—soon, you’ll be watching tiny shoots emerge like magic! 🌿