
Lawn
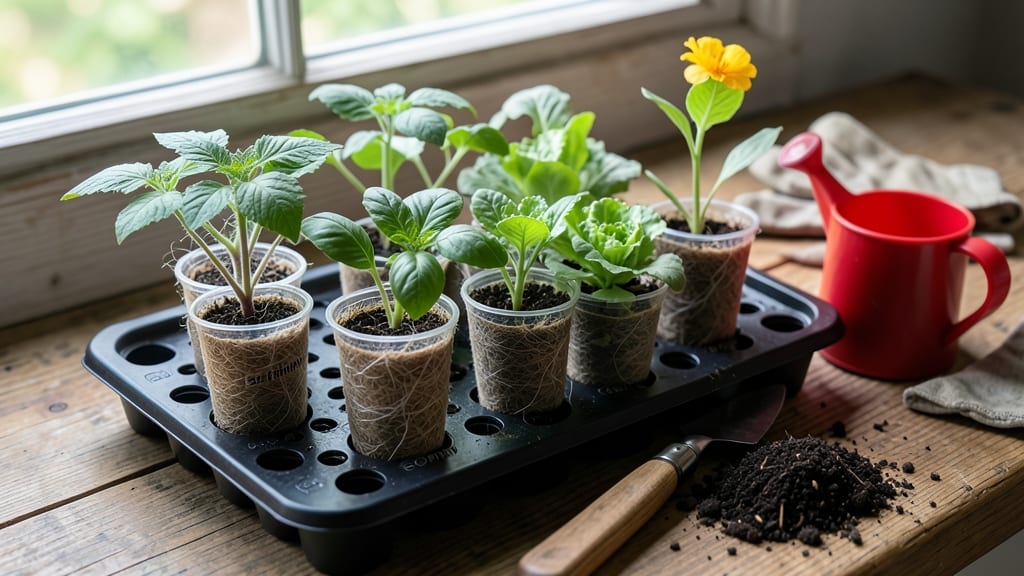
Biodegradable seed starters eliminate plastic waste while making transplanting shockingly easy. 🌱 I switched to these after watching my seedlings struggle when I moved them to soil—now my greens pop right out of their pots and keep growing without a hiccup. The best part?
No digging out dead starter pots or worrying about what to do with them afterward. You can make them from newspaper, coconut coir, or store-bought peat pots that dissolve right into the soil. My favorite is the newspaper method: just roll, fold, and fill with seed-starting mix.
It costs almost nothing and works for everything from herbs to tomatoes. The key is keeping them moist but not soggy—overwatering is the #1 way to kill seedlings before they even sprout. Once your seedlings have two sets of true leaves, you’ll transplant them straight into the garden.
The biodegradable pots break down in days, so roots don’t get tangled or stressed. I’ve seen my pepper plants go from tiny starters to bushy, productive plants in just a few weeks this way—no transplant shock in sight.
This method works for any garden, from raised beds to containers, and saves money while cutting plastic waste. Ready to try it? Here’s how to get started without any fuss.
📚 In This Guide
- What you need
- Instructions
- Tips and common mistakes
- Wrapping up and next steps
What you need
- ● Biodegradable seed starter pots: 10–20 units (size: 2–3 inches in diameter, 2–3 inches tall)
- ● Made from coconut coir, peat moss, or rice husks (ensure they’re labeled "seedling-safe").
- ● Potting soil: 1–2 gallons of seed-starting mix (lightweight, sterile, and well-draining).
- ● Seeds: Your choice of vegetables, herbs, or flowers (check seed packet for planting depth).
- ● Water: 1–2 cups (room temperature, gently applied with a spray bottle).
- ● Scissors or knife: For trimming pots (if needed) or cutting slits for easy transplanting.
- ● Plant labels: Biodegradable sticks or toothpicks + marker.
- ● Heat mat: For faster germination (especially for cool-weather crops).
- ● Clear plastic dome or zip-top bag: To create a mini greenhouse effect.
- ● Fertilizer: A balanced, water-soluble option (diluted to half-strength).
- ● Tray or shallow container: To hold pots and catch excess water.
Step-by-Step guide to making biodegradable seed starters
Here's how to create zero-waste seed starters that break down right into the soil.
🌱 Step 1: Gather Your Materials
You'll need newspaper strips (cut into 2-inch wide pieces), compost, and water. Avoid glossy paper—ink can inhibit germination. I like to use the Sunday comics section because it's thick and sturdy. Soak the newspaper strips in water for 10 minutes until they're pliable but not soggy. This makes them easier to handle and prevents tearing when you fold them.
While the paper soaks, mix equal parts compost and water in a bowl until it forms a thick, moldable paste. Think of it like cookie dough—it should hold together when squeezed but still be workable. This mixture will be the core of your biodegradable pots. Keep it covered with a damp towel to maintain moisture while you work.
🪴 Step 2: Assemble the Seed Starters
Lay a newspaper strip flat and place 1-2 seeds near the bottom, about 1 inch from the edge. For larger seeds like beans, place them directly on the paper. For tiny seeds like lettuce, sprinkle them lightly over the area. Fold the sides inward to form a small cup, then roll the strip tightly from the bottom up, leaving the top open. You'll want a 2-inch tall pot for most seeds—this gives roots enough room to develop before transplanting.
Once rolled, secure the pot by folding the top edge over itself once or twice. This keeps the shape intact while allowing easy access for watering. Place your assembled pots upright in a shallow tray or container. Fill the tray with 1 inch of water and let the pots soak for 5 minutes. This step ensures the paper and compost mixture absorbs enough moisture to kickstart germination.
☀️ Step 3: Plant and Maintain Until Transplanting
After soaking, drain any excess water from the tray. Your biodegradable pots are now ready for seeds! Plant 1-2 seeds per pot, pressing them gently into the damp compost mixture. Cover lightly with a sprinkle of additional compost—just enough to hide the seeds but not bury them too deeply. Most seeds need light to germinate, so keep the soil surface slightly exposed.
Place the tray in a warm, sunny spot where temperatures stay between 65-75°F. Keep the compost moist but not soggy—water lightly every 2-3 days or whenever the surface feels dry to the touch. You'll know germination is working when you see tiny green sprouts breaking through the paper in 5-14 days, depending on the seed type. Once seedlings have 2-3 true leaves, they're ready to transplant directly into the garden or larger pots.
When transplanting, simply place the entire pot into the soil and water gently. The paper will break down naturally, enriching the soil as the roots grow. No peeling or removing—just dig a hole, pop it in, and let nature do the rest. This method cuts down on waste and gives seedlings a gentle transition into their forever home.
Tips & tricks for perfect biodegradable seed starters
Here's what I learned after testing these starters for three growing seasons—tricks that make all the difference between flimsy pots and sturdy, reliable starters.
Paper Selection Matters: The Sunday comics section is my go-to because it's thick and sturdy, but any non-glossy newsprint works. Avoid magazines or glossy inserts—the ink can leach into your compost and inhibit seed growth. If you're using thinner paper, double up the layers to maintain strength. In Step 1, that 10-minute soak is crucial—it prevents tearing when you're rolling, but don't over-soak or the paper will lose its structure.
Compost Consistency is Key: The compost mixture should be like cookie dough—just firm enough to hold its shape when squeezed but still pliable. If it crumbles, add a little more water. If it's too sticky, mix in a bit more compost. In Step 1, when you're mixing equal parts compost and water, think of it as creating a scaffold for your seeds. Too wet, and the pots will fall apart; too dry, and they won't hold moisture properly.
Seed Placement Strategy: In Step 2, when you're placing 1-2 seeds near the bottom, position them about 1 inch from the edge to give roots room to grow downward. For seeds like lettuce that need light to germinate, sprinkle them lightly on top rather than pressing them into the compost. The 5-minute soak after assembly ensures the paper and compost bond properly—don't skip this, or your pots might fall apart during germination.
Temperature and Light Balance: While the instructions specify 65-75°F, I've found that placing the tray on a sunny windowsill during the day and moving it to a warmer spot at night can speed up germination. Keep the compost moist but not soggy—water lightly every 2-3 days, and you'll notice tiny sprouts breaking through the paper in just 5-14 days. The key is consistency: too much water causes rot, too little stunts growth.
Pro Tips for Biodegradable Seed Starters
- Here's what I learned after testing these starters for three growing seasons—tricks that make all the difference between flimsy pots and sturdy, reliable starters.
- Paper Selection Matters: The Sunday comics section is my go-to because it's thick and sturdy, but any non-glossy newsprint works.
- Compost Consistency is Key: The compost mixture should be like cookie dough—just firm enough to hold its shape when squeezed but still pliable.
Frequently asked questions
Got questions about biodegradable seed starters?
You’re not alone! Here are answers to the most common queries—from timing to troubleshooting—so you can grow with confidence and zero waste.
What are biodegradable seed starters made of?
Most biodegradable seed starters are crafted from natural, compostable materials like coir (coconut fiber), peat moss, or paper pulp. Some even use egg cartons or newspaper! These materials break down safely in soil, eliminating the need to transplant seedlings roughly. Always check the label for specifics—some blends include additives like chicken manure for extra nutrients.
How long do biodegradable seed starters take to decompose?
Decomposition time varies by material and soil conditions. Paper-based starters dissolve in 4–8 weeks, while coir or peat pots may take 3–6 months. Warmer, moist soil speeds up the process. Pro tip: Water them lightly before planting to kickstart breakdown. If you’re impatient, gently tear the pot open to encourage roots to explore the soil.
Can I reuse biodegradable seed starters?
Not recommended! These starters are designed for one-time use—reusing them can hinder seedling growth or introduce mold. However, you can repurpose empty pots as mini compost bins or seedling trays for herbs/spices (like basil or chives) if sterilized first. Just avoid reusing them for new seeds.
What if my seedlings outgrow the starter too quickly?
If roots escape the pot prematurely, don’t panic! Gently tease the roots outward and plant deeper into the soil. For stubborn cases, bury the entire pot—it’ll decompose while protecting roots. To prevent this, choose larger pots for slow-growing plants (like tomatoes) or opt for mesh pots that allow roots to expand early.
Are biodegradable starters better for the environment than plastic?
Absolutely!
Plastic pots contribute to 20 million tons of waste annually in the U.S. alone. Biodegradable starters eliminate this pollution and often enrich soil with nutrients as they break down. Plus, they reduce the risk of root circling (a common issue with plastic pots). For maximum eco-benefit, pair them with seedling trays made from recycled materials.
Bonus Tip: Speed up decomposition by mixing a handful of compost into the planting hole before inserting your seed starter. The microbes will give the process a helpful boost!
Wrapping up and next steps
Biodegradable seed starters offer a zero-waste, eco-friendly way to kickstart your gardening journey—no plastic, no guilt, just thriving plants! 🌱 Whether you’re a seasoned green thumb or a beginner, these simple, compostable starters make nurturing sprouts effortless while protecting the planet.
Ready to grow? Your next logical step? Grab your materials, pick a seed, and plant with confidence! The garden of your dreams is just a starter away.