
Propagation
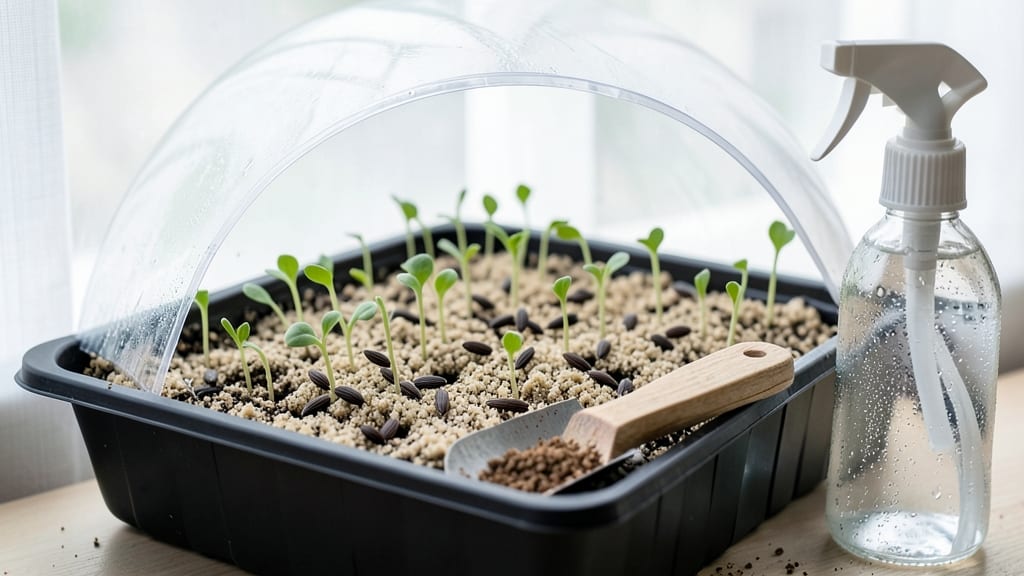
Zinnia seed germination needs a little chill to wake up properly—cold stratification turns stubborn seeds into vigorous seedlings in just 45 days. I’ve struggled with zinnia germination for years, but this method finally gave me the reliable starts I’ve always wanted. The secret? Mimicking winter’s natural process before spring planting.
You’ll need a shallow container, damp paper towels, and a zip-top bag to create the perfect mini-winter environment. Keep everything moist but not soggy—think of it like a damp sponge, not a swamp. Most gardeners overwater at this stage, which actually drowns the seeds before they’ve even sprouted.
After 3-4 weeks in the fridge, those seeds will burst with energy, ready to grow into bright, bushy plants. The seedlings stay stocky and strong, resistant to the leggy, weak growth that frustrates so many beginners.
By the time you transplant, you’ll have plants that look like they’ve been growing for months.
This trick works for both indoor starts and outdoor sowing—just adjust timing based on your last frost date. The best part? You’ll skip the frustration of patchy germination and get a garden full of cheerful blooms that last all summer long.
📚 In This Guide
- What you need
- Instructions
- Tips and common mistakes
- Wrapping up and next steps
What you need
- ● Zinnia seeds: 10–20 seeds (choose a variety like Benary’s Giant or Profusion for bold blooms).
- ● Seed-starting mix: 1–2 cups of sterile, well-draining potting soil (look for a mix labeled for seed starting).
- ● Containers: 2–4 small pots (3–4 inches deep) or
- ● 1 seed tray with individual cells (for organized planting).
- ● Cold-stratification supplies: 1 resealable plastic bag (quart-sized) or a damp paper towel.
- ● 1 refrigerator with a crisper drawer (kept at 35–40°F).
- ● Watering can or spray bottle: With a fine mist nozzle (to avoid disturbing seeds).
- ● Grow lights or sunny windowsill: A south-facing window or a LED grow light (12–16 hours/day).
- ○ Humidity dome or plastic wrap: Optional, but helpful for maintaining moisture.
- ● Seedling heat mat (60–70°F) to speed up germination post-stratification.
- ● pH test kit (ideal soil pH: 6.0–7.0 for zinnias).
- ● Fertilizer: A balanced, water-soluble fertilizer (diluted to ½ strength) for seedlings.
- ● Plant labels and markers to track varieties.
How to germinate zinnia seeds using cold stratification
Cold stratification unlocks zinnia seeds' dormancy—here's how to break through it reliably.
Prepare Seeds for Stratification
Zinnia seeds need 6-8 weeks of cold treatment to mimic winter conditions and break dormancy. Start by placing them in a resealable plastic bag with a moist paper towel—just damp enough that the towel feels like a wrung-out sponge. I like to fold the towel into thirds, place the seeds between the layers, and seal the bag tightly to trap moisture.
Label the bag with the seed variety and date—this prevents mix-ups when seeds germinate at different times. Store the bag in your refrigerator's crisper drawer where temperatures stay consistently between 35-40°F. The goal is to keep seeds evenly moist but not soggy; check weekly and mist with water if the towel feels dry to the touch.
Monitor and Rotate Seeds Weekly
After 2-3 weeks, open the bag and inspect the seeds. You'll notice some may have swollen slightly—this is normal and indicates stratification is working. If any seeds appear moldy (fuzzy white growth), remove them immediately and discard. Healthy seeds should look plump and firm.
Here's the thing—seeds need consistent contact with the moist towel, so I gently unfold the towel, rotate the seeds to a new position, and refold it. This prevents uneven moisture exposure and ensures all seeds receive equal treatment. Return the bag to the refrigerator and repeat this process every 7 days until you've completed the 6-8 week period.
Sow Stratified Seeds in Warmth
Once stratification is complete, fill biodegradable seedling pots (or small containers with drainage) with sterile seed-starting mix and moisten it until damp but not dripping. Press the soil down lightly to create a firm surface—this helps seeds stay in place when you plant them. Make a small ¼-inch deep hole with your finger or a pencil, and place 1-2 seeds per pot at the correct depth.
Cover the seeds lightly with additional mix, then water gently from the bottom by placing the pots in a tray of warm water for 10-15 minutes. This bottom-watering method prevents soil disturbance and ensures even moisture without displacing seeds. Place the pots in a warm, bright location (around 70-75°F)—a seedling heat mat helps maintain consistent warmth if your home runs cooler.
Provide Ideal Germination Conditions
Zinnia seeds typically germinate within 7-14 days after sowing, but some varieties may take up to 21 days. Keep the soil consistently moist—never soggy—by watering only when the top ¼ inch feels dry. A clear plastic dome or plastic wrap over the pots helps maintain humidity, but remove it as soon as you see the first green sprouts to prevent damping-off disease.
Place the pots under grow lights (14-16 hours daily) or in a south-facing window where they receive bright, indirect light. Avoid direct sunlight at this stage—it can overheat the seedlings. You'll know the light is sufficient when seedlings grow sturdy and dark green rather than leggy and pale. If stems stretch toward the light, move the pots closer to the source.
Transplant Seedlings After True Leaves Form
Once seedlings develop their first true leaves (the second set after the initial cotyledons), they're ready to transition to individual pots or the garden. Gently remove them from the seed-starting pots, taking care not to damage the delicate roots. Plant them in 3-inch pots filled with well-draining potting mix, burying them to the same depth they were growing in the seed pots.
Water lightly after transplanting and place the pots in a shaded, protected area for 3-5 days to help them adjust. Gradually introduce them to more sunlight over the next week. By the time they're ready for the garden, your zinnia seedlings will be 4-6 inches tall with 4-6 true leaves, giving them a strong head start for vibrant blooms.
Tips & tricks for cold-stratified zinnia success
These practical strategies will help you navigate the 6-8 week cold stratification process without losing patience or seeds.
Moisture Balance: The key to successful stratification lies in maintaining that perfect dampness—like a wrung-out sponge. I've learned the hard way that seeds left too dry won't germinate, while overly wet seeds risk mold. After sealing your bag, give it a gentle squeeze—it should feel like you're holding a damp washcloth, not a dripping sponge. If condensation forms on the bag's interior, you've got too much moisture; open it slightly to let some escape before resealing.
Temperature Consistency: While the refrigerator's crisper drawer maintains 35-40°F, some models have temperature fluctuations. I place a digital thermometer inside the bag during the first week to verify conditions. If your fridge runs warmer (common in some models), consider moving the bag to the main compartment where temperatures are more stable. The goal is to mimic natural winter conditions as closely as possible—consistent cold is what breaks dormancy.
Weekly Rotation Strategy: During your weekly checks in Step 2, I've found that rotating seeds isn't just about preventing uneven moisture—it's also about preventing seed-to-seed contact. When seeds touch each other, they can develop uneven moisture patterns and even stick together. After unfolding the towel, I spread seeds out on a clean surface, rotate them individually, and then redistribute them evenly before refolding. This simple step dramatically improves germination rates.
Light Preparation for Step 4: While you're waiting for germination, prepare your light source now. Most zinnia varieties need 14-16 hours of light daily, but standard household lighting won't cut it. I recommend setting up grow lights before you even start stratification. Position them about 2-3 inches above your seedling pots and test them for 15 minutes daily during the stratification period. This gives you time to troubleshoot any lighting issues before your precious seedlings emerge.
Pro Tips for Zinnia Seed Germination
- These practical strategies will help you navigate the 6-8 week cold stratification process without losing patience or...
- Moisture Balance: The key to successful stratification lies in maintaining that perfect dampness—like a wrung-out spo...
- Temperature Consistency: While the refrigerator's crisper drawer maintains 35-40°F, some models have temperature fluc...
Frequently asked questions
Got questions about getting your zinnia seeds to sprout like a pro? Here are some of the most common queries—plus the answers you need to succeed!
How long does it take for zinnia seeds to germinate?
With cold stratification, zinnia seeds typically germinate in 7–14 days after planting in warm soil (60–70°F). If seeds don’t sprout within 2–3 weeks, they may need more moisture or warmth. Patience is key—some varieties take up to 45 days to break dormancy!
Why aren’t my zinnia seeds sprouting?
Common culprits include dampness (rotting seeds), cold soil (wait until temps rise), or old seeds (viability drops after 2–3 years). Try pressing seeds lightly into soil (they need light to germinate!) and keep the surface moist. If mold appears, improve airflow or reduce watering.
Can I speed up zinnia germination?
Yes! Soak seeds in lukewarm water for 24 hours before planting to soften the outer shell. For faster results, use a seedling heat mat (70–75°F) or place trays in a sunny windowsill. Just avoid overheating—zinnia seeds hate soggy, cold conditions.
Do zinnia seeds need light to germinate?
Unlike some flowers, zinnia seeds require light to sprout—don’t bury them more than ¼ inch deep. After planting, place trays under grow lights or in a bright spot (south-facing window). Thin seedlings to 12–18 inches apart to prevent overcrowding.
What’s the best alternative if my seeds fail to germinate?
Try transplanting nursery starts (available at garden centers) or collect seeds from healthy blooms in your garden next season. For a quick fix, opt for self-blanching zinnia varieties like ‘Benary’s Giant’—they’re more forgiving with germination quirks!
Wrapping up and next steps
Mastering zinnia seed germination through cold stratification is a rewarding journey that unlocks vibrant blooms in just 45 days! 🌱 With the right conditions—moisture, temperature, and patience—you’ll transform tiny seeds into thriving plants.
Whether you’re a seasoned gardener or a beginner, this method proves that great results start with simple steps.
Now that you’re armed with the know-how, take the next step: grab your seeds, set up your stratification station, and watch your garden come to life! Share your progress or ask questions in the comments—we’d love to see (and cheer on) your zinnia success! 🌸