
Propagation
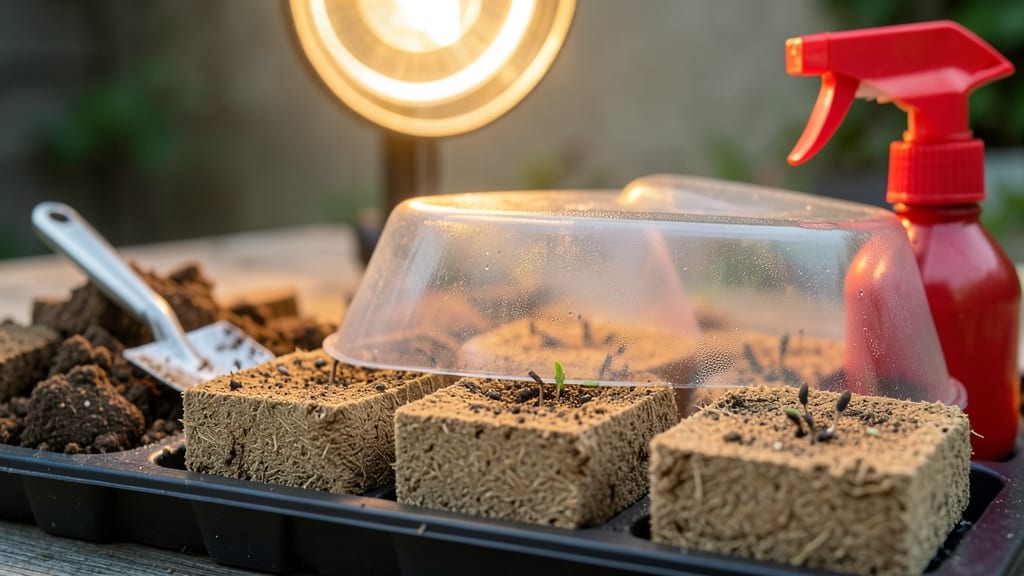
Starting seeds in soil blocks cuts germination time nearly in half—no transplant shock, no tangled roots, just strong plants ready for the garden. 🌱 I’ve tried every seed-starting method, and these blocks make the difference between fragile seedlings and robust plants that thrive from day one.
The secret lies in their perfect moisture balance and aeration, which mimics natural soil conditions better than any tray. You’ll need just three things: a soil block maker (or DIY molds), coco coir or quality seed-starting mix, and a tray to catch runoff.
No fancy equipment—just simple tools that pay off with faster growth and healthier roots. Most seeds germinate in 5-10 days instead of weeks, and you’ll avoid the heartbreak of transplant shock that kills so many seedlings. The payoff?
Plants that establish twice as fast, with roots that spread naturally instead of circling in pots. You’ll see the difference in just a few weeks—no more leggy, weak seedlings struggling to adapt.
Plus, the blocks break down in the soil, so you’re not digging up roots when it’s time to transplant. Works for veggies, herbs, and flowers alike, and even beginners master it in their first batch. Here’s how to get started without the guesswork.
📚 In This Guide
- What you need
- Instructions
- Tips and common mistakes
- Wrapping up and next steps
What you need
- ● Soil blocks: 1–2 inch diameter blocks (quantity depends on seeds—start with 10–20 for testing). Opt for peat-free, organic blocks (e.g., Jiffy Pellets or homemade clay-based blocks).
- ● Seed starting mix: 1–2 gallons of lightweight, sterile potting mix (avoid garden soil—it’s too dense!). Look for labels like "seed starting mix" or "organic potting soil."
- ● Seeds: Your chosen varieties (check seed packets for spacing/depth needs).
- ● Water: Room-temperature, filtered or rainwater (chlorine-free!).
- ● Tray or container: A shallow tray with drainage holes (e.g., a seedling flat or repurposed plastic container).
- ● Misting bottle or spray nozzle: For gentle hydration (avoid overwatering!).
- ● Small hand trowel or spoon: To press seeds into blocks gently.
- ○ Humidity dome or plastic wrap: Optional, but helps retain moisture for delicate seeds.
- ● Grow lights or sunny windowsill: 12–16 hours of light daily (LED grow lights are ideal).
- ● Labels & marker: To track seed varieties and planting dates.
- ○ Heat mat (optional): For warm-season crops (e.g., peppers, tomatoes) to speed germination.
- ● 🔥 Pre-soak blocks: Soak dry blocks in water for 10–15 minutes before planting to ensure even moisture.
- ● 🌡️ Consistency is key: Keep soil blocks moist but not soggy—think "damp sponge," not "mud puddle."
- ● ✨ Label early: Mistakes happen! Mark blocks before seeds sprout to avoid mix-ups.
Step-by-Step instructions for starting seeds in soil blocks
Here's how I get seedlings off to a flying start with minimal fuss.
🌱 Step 1: Prepare Your Soil Blocks
Start by mixing 4 parts peat moss with 1 part perlite and 1 part coco coir—this creates the perfect airy, moisture-retentive blend. I like to add a handful of worm castings for extra nutrients, though it's optional. Add just enough water to make the mix damp enough to hold together when squeezed, but not dripping wet.
Use your hands to form the mixture into 1.5-inch diameter blocks, pressing gently but firmly. The blocks should feel sturdy enough to hold their shape when lifted, but still soft enough to break apart if needed. I make about 30 blocks per batch, enough for a small seed-starting tray. Let them dry slightly for 12 hours so they're firm but not rock-hard.
💧 Step 2: Prep and Plant Your Seeds
Fill a shallow tray with 1/4 inch of water and let your soil blocks soak up moisture from the bottom for 10-15 minutes. This bottom-watering method ensures even hydration without crushing the delicate blocks. While they soak, I like to make small indentations in the top of each block—just deep enough to hold a seed without burying it too deeply.
Place 1-2 seeds per block, pressing them gently into the indentation. Cover lightly with a pinch of the same soil mix, just enough to secure the seeds. Label each block with the seed type and planting date—trust me, you'll forget which is which in a week. Keep the tray covered with a clear plastic lid or plastic wrap to maintain humidity while the seeds germinate.
☀️ Step 3: Create Ideal Germination Conditions
Seeds need warmth and consistency to sprout. I place the tray on a seedling heat mat set to 75-80°F—this boosts germination speed dramatically. Without one, keep the tray in a warm spot like on top of the fridge. You'll see sprouts in 5-10 days, depending on the seed type, but the key is patience and keeping the blocks moist.
Check daily and mist with water if the blocks feel dry to the touch. The plastic cover should stay foggy—if it's clear, add a few more minutes of misting. Once 50% of seeds have sprouted, remove the cover immediately to prevent damping-off. Strong seedlings will have thick stems and vibrant green leaves—anything leggy or pale needs more light.
🌿 Step 4: Transition to Light and Care
Move the tray under grow lights as soon as sprouts appear, keeping them 2-3 inches away from the light source. Soil blocks don't need transplanting, so you can leave them in the tray or pop them into individual pots. I prefer the tray method for the first 2-3 weeks to keep everything organized.
Water from the bottom again by placing the tray in 1/4 inch of water for 15 minutes. Let the blocks drain completely before returning to the tray. Fertilize lightly with a half-strength liquid fertilizer after 2 weeks to encourage strong root development. You'll know they're thriving when new leaves appear every 5-7 days.
⏰ Step 5: Harden Off and Transplant
Two weeks before your last frost date, start hardening off your seedlings. Move them outside for 1 hour daily, gradually increasing time over 7-10 days. Choose a sheltered spot to avoid strong winds, and bring them back inside at night if temperatures drop below 50°F.
Once seedlings tolerate full outdoor conditions, it's time to transplant. Soil blocks can go straight into the garden—they'll break down naturally, enriching the soil as roots spread. Plant blocks 12-18 inches apart, depending on the plant, and water deeply. You'll see faster establishment because the roots are already well-developed in the blocks.
Tips & tricks for perfect soil block seedlings
Here's what I learned after years of experimenting with these blocks—your seedlings will thank you.
The Moisture Secret: In Step 2, those 10-15 minutes of bottom-watering are crucial. I've found that using a shallow tray with just 1/4 inch of water prevents soggy blocks while ensuring even moisture. Pro tip: If your blocks feel light after soaking, give them another 2-3 minutes—they should feel damp but not dripping. This prevents the common mistake of overwatering, which can cause damping-off disease.
Block Consistency Matters: When shaping your 1.5-inch blocks in Step 1, aim for uniform size and firmness. I press them until they hold their shape when lifted, but still break apart easily with gentle pressure. Too soft? Add a bit more peat moss. Too hard? Mix in a splash more water. This consistency ensures even germination across all blocks.
Germination Speed Hacks: For those 5-10 days of germination in Step 3, here's my trick: After seeds sprout, I remove the plastic cover immediately when 50% have sprouted—not before. This prevents damping-off while maintaining humidity for the laggards. I also place a small fan on low setting near the tray to create gentle airflow, which strengthens stems and prevents leggy seedlings.
Light Positioning: In Step 4, those 2-3 inches from grow lights might seem arbitrary, but it's critical. I adjust the distance daily—closer for shorter seedlings, farther as they grow. Watch for leaves turning toward the light (phototropism). If they're stretching too much, move the lights up or add a second light source. This ensures strong, stocky plants ready for transplanting.
Pro Tips for Soil Blocks Seed Starting
- Here's what I learned after years of experimenting with these blocks—your seedlings will thank you.
- The Moisture Secret: In Step 2, those 10-15 minutes of bottom-watering are crucial.
- Block Consistency Matters: When shaping your 1.5-inch blocks in Step 1, aim for uniform size and firmness.
Frequently asked questions
Got questions about soil blocks for seed starting? You’re not alone—this method is game-changing but can feel unfamiliar at first. Below, we tackle the most common concerns to help you grow with confidence!
What are the biggest advantages of using soil blocks over traditional seed trays?
Soil blocks eliminate transplant shock by letting roots grow undisturbed in a perfectly sized starter. They also reduce waste (no plastic pots!) and improve drainage—no soggy seedlings here. Plus, they’re easy to handle and can be planted directly into the ground or containers without root disruption.
How long does it take for soil blocks to dry and harden enough to use?
Most soil block mixes take 24–48 hours to fully dry and harden at room temperature. If your climate is humid, speed things up by placing them in a well-ventilated area or using a fan. Never use them until they’re rock-hard—soft blocks will crumble when handling seeds.
Can I reuse soil blocks for multiple growing seasons?
While soil blocks aren’t reusable (they break down over time), you can repurpose the leftover mix! Crumble old blocks into compost or use them as a nutrient-rich topsoil amendment. For new blocks, start fresh with a high-quality mix to ensure optimal germination.
What’s the best temperature range for germinating seeds in soil blocks?
Most seeds thrive between 65–75°F (18–24°C), but check your seed packet—some (like peppers or tomatoes) prefer warmer temps (75–85°F / 24–29°C). Use a seedling heat mat if your space is chilly, and avoid placing blocks near drafts or direct sunlight until sprouts emerge.
My soil blocks are cracking or breaking—what went wrong?
Cracking usually means uneven drying or too much heat. Fix it by:
- Mixing in more clay or perlite (10–20%) for stability.
- Avoiding direct sunlight while drying—use indirect light or shade.
- Sealing cracks with a bit of water before planting (they’ll firm up as they dry).
Wrapping up and next steps
Starting seeds in soil blocks is a game-changer for gardeners—it’s fast, efficient, and kinder to your plants! 🌱 With minimal transplant shock and zero waste, you’ll enjoy stronger seedlings that thrive from day one.
Whether you’re a beginner or a seasoned green thumb, this method simplifies the process while boosting your success rate.
Ready to level up your seed-starting game? Grab your supplies, follow the steps, and watch your garden grow with confidence! 🌿 Next up: Experiment with different soil mixes or try growing your favorite herbs—your future harvests will thank you!