
Propagation
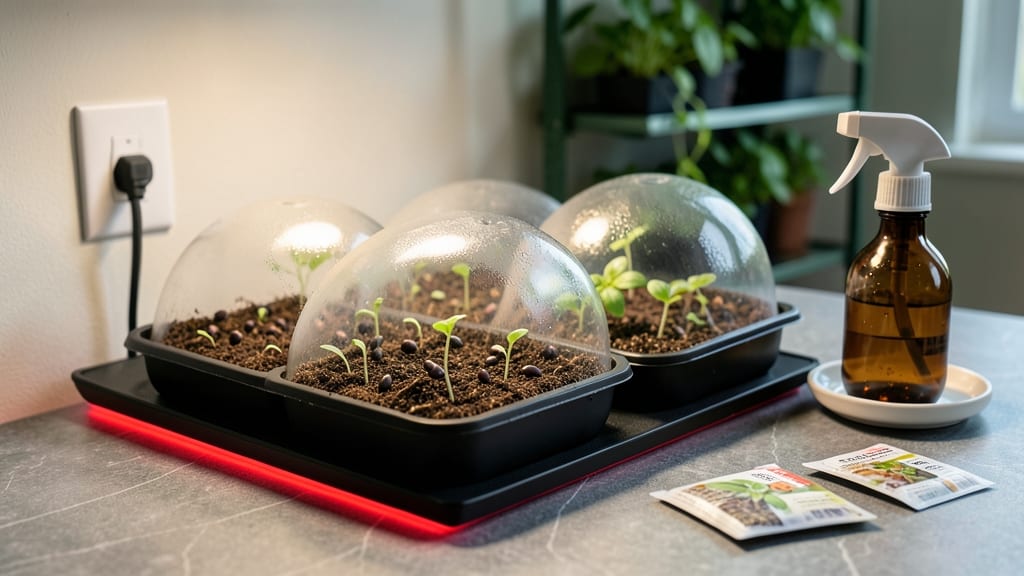
Warming mats cut seed germination time in half—no more waiting weeks for those first green shoots to peek through. 🌱 I remember my first batch of slow-starting tomatoes: the disappointment of waiting three weeks for sprouts when they could’ve been up in ten days.
That’s where these simple, plug-in mats change the game. They work by providing consistent bottom heat—just like nature would under leaf litter or compost piles. Most seeds germinate best at 70-85°F, and these mats keep your seed trays in that sweet spot without overheating. The best part?
No more guesswork about whether your basement is too cold or your windowsill too hot. You’ll see tiny radicle roots breaking through soil within 5-7 days instead of two weeks, and seedlings emerge stronger and more uniform.
The setup is foolproof: just place the mat under your seed trays, plug it in, and let it do the work while you monitor moisture. For beginners, I recommend 10-inch mats paired with clear plastic domes to retain humidity.
Experienced gardeners might opt for larger mats with adjustable thermostats for precise control over different seed types. Here’s how to use them without common pitfalls like mold or uneven heat.
📚 In This Guide
- What you need
- Instructions
- Tips and common mistakes
- Wrapping up and next steps
What you need
- ● Seed starting warming mat – Choose a mat sized to fit your seed trays (e.g., 10"x20" for standard trays). Look for adjustable heat settings (70°F–100°F) and thermostatic control for precision.
- ● Seed trays or containers – Plastic, biodegradable, or nursery trays with drainage holes (e.g., 1020-cell trays for small seeds, 2" pots for larger seeds).
- ● Growing medium – Seed-starting mix (sterile, lightweight, and well-draining). Avoid garden soil—it’s too dense!
- ● Seeds – High-quality, fresh seeds (check packet for cold stratification or heat requirements).
- ● Watering can or spray bottle – Fine mist setting to avoid disturbing seeds.
- ○ Clear plastic dome or plastic wrap – Optional but highly recommended for humidity (cover trays until germination).
- ● Heat mat thermometer – Double-check temperature accuracy (e.g., digital probe thermometer).
- ● Grow lights or LED bulbs – If starting indoors, provide 12–16 hours of light daily.
- ● Humidity tray – Elevate trays on a tray filled with water and pebbles for extra moisture.
- ● Labeling supplies – Toothpicks + markers or plant tags to track varieties.
How to use seed starting warming mats for faster germination
Here's how to harness precise warmth for speedy, reliable sprouts—no guesswork involved.
🌱 Step 1: Select the Right Mat for Your Setup
A warming mat should match your seed tray size and power source. I recommend a 10x20-inch mat for standard 1020 trays, as it provides even heat across all cells. Look for mats with adjustable thermostats—75-85°F is ideal for most seeds, though some like peppers prefer 80-85°F. Avoid cheap mats with single heat settings; they often overheat and scorch seedlings.
Place the mat on a flat, stable surface like a shelf or countertop. If using under a tray, ensure the mat's edges extend 1 inch beyond the tray on all sides to prevent heat loss. I always test the mat's temperature with a thermometer before planting—some run 10°F hotter than their labeled setting.
💧 Step 2: Prep Your Seed Trays and Soil
Fill your seed trays with moistened seed-starting mix (not garden soil) to the rim, then press down gently to remove air pockets. The mix should feel like a damp sponge—squeeze it, and it should hold its shape but not drip. I like to add a thin layer of vermiculite on top before sowing; it retains moisture and helps regulate soil temperature.
Water the trays thoroughly from the bottom up—place them in a shallow tray of water for 10-15 minutes until the surface feels uniformly damp. Overhead watering can displace seeds or create uneven moisture. Once prepped, place the trays on the warming mat and turn it on. You'll see condensation form on the tray's underside within 30 minutes—that's your sign the heat is working.
☀️ Step 3: Sow Seeds and Monitor Heat Consistently
Plant seeds according to their packet instructions, but use a toothpick to create ¼-inch-deep holes for precise depth. Cover lightly with additional mix, then mist the surface with a spray bottle until barely damp. The goal is to keep the soil warm but not soggy—excess moisture at high temperatures invites damping-off.
Check the soil temperature daily with a seedling thermometer. Most warming mats fluctuate ±2°F, so adjust the thermostat if readings dip below 70°F or exceed 90°F. I set mine to 78°F for a balance between speed and safety. Watch for condensation on the tray's underside—if it disappears within 1 hour, the mat isn't providing enough heat.
⏰ Step 4: Germinate and Transition to Light
Germination times vary, but you'll typically see sprouts in 3-7 days with a warming mat (vs. 10-14 days without). Once 50% of seeds have sprouted, remove the trays from the mat immediately—continued heat without light causes "leggy" seedlings that flop over. Move them under grow lights positioned 2-4 inches above the plants.
Here's the thing—don't rush this transition. I've seen growers move seedlings too soon, and the stems collapse under their own weight. Wait until you see first true leaves (not the initial seed leaves) before adjusting light distance. If seedlings still look etiolated (pale and stretched), lower the lights incrementally over 2 days.
✂️ Step 5: Harden Off and Transplant
Two weeks before your last frost date, start hardening off seedlings by placing them on the warming mat for 2-3 hours daily in indirect light. This mimics outdoor temperature swings and toughens stems. Gradually increase exposure, but keep them off the mat during this period—room temperature is sufficient for hardening.
Transplant when seedlings have 2-3 sets of true leaves and soil temperatures outside reach 55°F**. Dig holes slightly larger than the root ball, place seedlings in, and firm soil around the base. Water deeply at the base—never overhead—to avoid disturbing the roots. The warming mat's precision heat ensures your seedlings are robust enough to handle the garden's unpredictability.
Tips & tricks for perfect seed starting with warming mats
Precision heat is your secret weapon—here's how to maximize it without common pitfalls.
Heat Consistency: The 78°F setting I recommend is a sweet spot, but every mat behaves differently. I've seen some run 10°F hotter than advertised—always test with a thermometer before planting. For seeds like peppers that prefer 80-85°F, consider a secondary mat with a dedicated thermostat rather than adjusting a single unit, which can throw off other trays.
Moisture Management: The 10-15 minutes bottom-watering method in Step 2 is crucial, but don't overdo it. If condensation disappears from the tray underside within 1 hour of turning on the mat, your soil is drying too fast. Add a humidity dome or mist lightly—warming mats accelerate evaporation, and soggy soil invites damping-off.
Transition Timing: That 2-day light adjustment period after seeing first true leaves is non-negotiable. I've seen growers skip this and end up with seedlings that topple like Jenga towers. Start with lights 4 inches away and lower ½ inch daily—this gradual approach strengthens stems without shocking them.
Harden Off Strategy: The 2-3 hours daily on the warming mat during hardening mimics outdoor conditions better than room temp alone. Place trays near a south-facing window during this time to combine light exposure with the mat's warmth. Just remember: the mat's job here is to simulate temperature swings, not provide continuous heat.
Pro Tips for Seed Starting Warming Mats
- Precision heat is your secret weapon—here's how to maximize it without common pitfalls.
- Heat Consistency: The 78°F setting I recommend is a sweet spot, but every mat behaves differently.
- Moisture Management: The 10-15 minutes bottom-watering method in Step 2 is crucial, but don't overdo it.
Frequently asked questions
Got questions about seed starting warming mats? You’re not alone! Here are some of the most common concerns—plus straightforward answers to help you get the best results.
How do warming mats speed up germination?
Warming mats provide consistent, gentle heat (typically 65–85°F) that mimics the conditions seeds need to break dormancy. Without them, some seeds—especially cool-season varieties like lettuce or peas—may take weeks longer to sprout. The heat boosts metabolic activity, helping tiny roots and shoots emerge faster and more uniformly.
When should I use a warming mat?
Use a warming mat from the moment you sow seeds until they’ve germinated and developed their first true leaves (usually 5–14 days, depending on the plant). For slow germinators like tomatoes or parsley, extend use for 2–3 weeks. Once seedlings are sturdy, transition them to a cooler, well-lit area to prevent legginess.
Can I use a warming mat without a heat mat pad?
No—warming mats require a heat mat pad (the electrical component) to function. Think of it like a space heater for your seed tray: the mat is the surface, and the pad is the power source. Always plug the pad into a surge protector and never leave it unattended while in use.
What if my seeds aren’t germinating even with a warming mat?
Check these troubleshooters first:
- Moisture: Keep soil consistently damp (not soggy). Mist lightly if the top layer dries out.
- Depth: Some seeds (like carrots) need light to germinate—plant them shallowly or on top of soil.
- Freshness: Old seeds (over 1 year) may have lost viability. Test with a seed viability test.
- Temperature: Use a seedling heat mat thermometer to confirm the mat is in the ideal range (most mats auto-regulate, but verify!).
Are there alternatives to warming mats for small spaces?
Yes! For tiny setups, try:
- DIY heat source: Place seed trays on top of a low-wattage nightlight or a heated towel (like a heated pet pad) set to 70°F.
- Bottom watering: Use a heat mat alternative by floating trays over a bowl of warm water (maintain 75–80°F).
- Greenhouse effect: Cover trays with plastic wrap to trap warmth (but monitor for condensation/mold).
Wrapping up and next steps
Seed starting warming mats are a game-changer for gardeners eager to jumpstart their growing season with precision heat and faster germination. Whether you're a beginner or a seasoned pro, these mats simplify the process, ensuring your seeds thrive from day one.
Ready to take the next step? Grab a warming mat, follow the tips you’ve learned, and watch your seedlings sprout like magic! 🌱✨
Start small—test a few seeds, refine your setup, and soon you’ll be a germination expert. Happy growing!