
Propagation
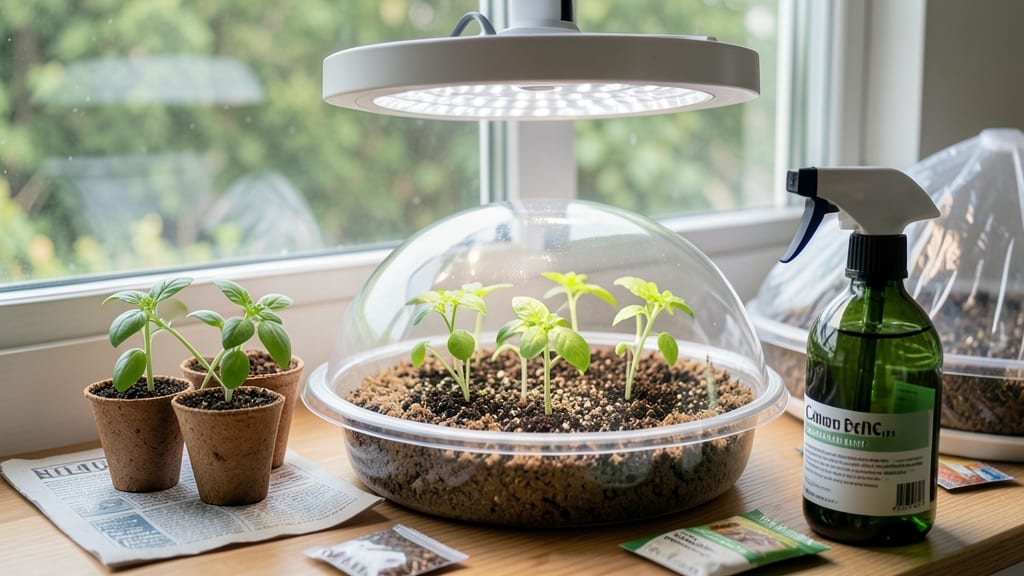
A seed starting kit with light turns your kitchen counter into a mini greenhouse—no sunny windowsill required. ✨ I’ve used mine for three seasons now, and the difference between these sturdy seedlings and the weak, leggy ones from my first attempt is night and day.
The built-in grow lights mean no more stretching toward the window or burning under harsh overhead bulbs.
Setup takes less than 15 minutes—just snap the light into place, fill the tray with moistened seed-starting mix, and tuck your seeds in. The kit handles the tricky part: consistent light from day one.
Most beginners struggle with overwatering or uneven light, but this system keeps everything balanced. Even my basil, which usually bolts by May, stays compact and green until transplanting.
By week three, you’ll have stocky seedlings ready to handle outdoor conditions—no shock when you move them outside. The light spectrum mimics natural sunlight, so plants grow strong instead of reaching for nonexistent rays.
Plus, you can start seeds 6-8 weeks before last frost, giving you a head start on the growing season.
Best for leafy greens, herbs, and compact veggies like peppers or tomatoes. If you’ve ever lost seedlings to weak light or mold, this kit changes the game. Let’s get those seeds sprouting right!
📚 In This Guide
- What you need
- Instructions
- Tips and common mistakes
- Wrapping up and next steps
What you need
- ● Grow lights: Full-spectrum LED or fluorescent bulbs (12-24W per tray, 6000K-7000K color temp for seedlings). Recommended: 2-4 bulbs for a 10"x20" tray.
- ● Seed starting trays: 1-2 plastic or biodegradable trays (10"x20" or similar) with cell inserts (72-200 cells).
- ● Growing medium: Seed-starting mix (sterilized, lightweight, and well-draining). Quantity: ~1-2 cubic feet per tray.
- ● Seeds: High-quality, fresh seeds of your choice (check packet for light requirements—some need darkness to germinate!).
- ● Light fixture or DIY frame: Adjustable height fixture (12"-18" above seedlings) or a sturdy frame (e.g., PVC pipes, wood) to mount lights.
- ○ Timer: 16-hour on/8-hour off (for most seedlings). Optional: Smart plug for automation.
- ● Watering can or spray bottle: Fine mist nozzle to avoid disturbing seedlings.
- ○ Heat mat (optional but helpful): For cold-starting seeds (e.g., peppers, tomatoes). Temp: 70-85°F.
- ● Humidity dome: Keeps moisture in during germination (remove after sprouts appear!).
- ● pH meter/test kit: Ensures growing medium is in the ideal range (5.8-6.2 for most seeds).
- ● Fertilizer: Diluted seedling fertilizer (½ strength) or liquid seaweed extract for a boost.
- ● Reflective material: Aluminum foil or Mylar under trays to maximize light efficiency.
- ● Labeling system: Toothpicks + markers to track seed varieties and planting dates.
How to use a seed starting kit with light for healthy seedlings
Here’s my go-to method for using a built-in grow light kit—it’s foolproof for strong, leggy-free seedlings.
🌱 Step 1: Set Up the Tray and Add Starting Mix
Unpack your seed starting kit and place the tray on a flat, stable surface. Most kits come with a clear lid or built-in humidity dome—leave it off for now. Fill the tray with the included seed starting mix (or your preferred sterile mix) until it’s about ½ inch below the rim. I like to tap the tray gently to settle the soil without compacting it too much.
Moisten the mix lightly with a spray bottle until it feels like a damp sponge—not soggy, just evenly damp. The goal is to create a perfect environment where seeds can germinate without drowning. If your kit includes a moisture meter, aim for 40-50% humidity at this stage.
💧 Step 2: Sow Seeds at the Right Depth and Cover
Follow the seed packet instructions for depth—usually 2-3 times the seed’s diameter. For tiny seeds like lettuce, a light press with your finger works; for larger seeds like beans, use a toothpick to make a small hole. I plant 2-3 seeds per cell (if your kit has individual cells) to ensure at least one germinates, but thin later.
Cover the seeds lightly with more mix, then mist again until the surface looks dark and slightly damp. Place the clear lid or humidity dome back on the tray to trap warmth and moisture. Keep it in a spot with room temperature (70-75°F)—a sunny windowsill or under a heat mat if included in your kit.
☀️ Step 3: Activate the Grow Light at the Right Time
Once seeds sprout (usually 5-10 days, depending on the plant), remove the lid and position the built-in grow light 2-3 inches above the seedlings. Most kits have adjustable arms—lower it if leaves look pale or stretch toward the light. Seedlings need 14-16 hours of light daily, so set a timer if your kit doesn’t have an automatic function.
Watch for first true leaves (the second set after the initial cotyledons)—this is your cue to monitor light distance closely. If stems grow thin and leggy, the light is too far away. If leaves burn or turn yellow, it’s too close. Adjust until seedlings grow compact and dark green.
🌿 Step 4: Thin and Care for Seedlings
When seedlings have 2-3 sets of true leaves, thin to the strongest one per cell using scissors (snip at soil level to avoid disturbing roots). Water gently from the bottom by placing the tray in ½ inch of water for 10 minutes—this prevents fungal issues from overhead moisture.
Fertilize lightly with a diluted liquid fertilizer (half-strength) after the first true leaves appear. I use a water-soluble blend every 2 weeks to avoid burning tender roots. Keep the grow light on a schedule, and rotate the tray a quarter turn daily so seedlings grow straight, not lopsided.
⏰ Step 5: Harden Off Before Transplanting
Two weeks before your last frost date, start hardening off seedlings by moving the tray outside for 1-2 hours daily in a shaded spot. Gradually increase time and sun exposure over 7-10 days
Seedlings are ready for transplant when they’ve developed 4-6 true leaves and their stems are sturdy. Dig holes slightly larger than the root ball, plant at the same depth they were in the tray, and water deeply. The built-in grow light kit has done its job—now it’s time to let them thrive in the garden!
Tips & tricks for perfect seedling growth with built-in lights
Here’s what I’ve learned after growing dozens of batches—these tricks ensure your seedlings thrive from seed to transplant.
Light Distance Matters: That 2-3 inch distance from the grow light isn’t just a suggestion—it’s critical. I’ve seen seedlings stretch like rubber bands when the light was too far, and crispy leaves when it was too close. Use a ruler to measure, and adjust every time you check on them. The light should be close enough to see a slight shadow on the soil when held at arm’s length.
Humidity Control: The 40-50% humidity range in Step 1 is your sweet spot, but don’t rely on guesswork. If your kit has a humidity dome, leave it on until you see sprouts. After that, remove it to prevent fungal issues. For extra insurance, place a small tray of water near the seedlings—it’ll create natural humidity without drowning your mix.
Rotation is Non-Negotiable: That daily quarter-turn rotation in Step 4 isn’t just for show—it prevents seedlings from growing lopsided toward the light. I mark the tray with a tiny dot to track rotations, and trust me, you’ll notice the difference when transplanting. Uneven growth makes for weaker plants in the garden.
Fertilizer Timing: Wait for those first true leaves before fertilizing—this is non-negotiable. I’ve seen seedlings burn when people fertilize too early. Use that half-strength dilution religiously, and consider a seaweed-based fertilizer for the first feeding. It’s gentler on tender roots and packed with growth hormones your seedlings will love.
Pro Tips for Seed Starting Kit With Light
- Here’s what I’ve learned after growing dozens of batches—these tricks ensure your seedlings thrive from seed to transplant.
- Light Distance Matters: That 2-3 inch distance from the grow light isn’t just a suggestion—it’s critical.
- Humidity Control: The 40-50% humidity range in Step 1 is your sweet spot, but don’t rely on guesswork.
Frequently asked questions
What’s the best time to start seeds with a light kit?
Most gardeners start seeds 6-8 weeks before the last frost date in their zone. For example, if your last frost is April 15, begin in mid-February. Leafy greens (like lettuce) can start earlier, while tomatoes and peppers need more time. Check your seed packet for specific recommendations!
Do I need a separate timer for the grow lights?
Yes! Seedlings thrive on 12-16 hours of light daily. A simple plug-in timer (or a smart bulb with scheduling) works perfectly. Most seed starting kits include one, but if yours doesn’t, a $10 timer from a hardware store solves the problem. Pro tip: Avoid 24/7 light—it can cause leggy, weak seedlings!
Can I use regular LED bulbs instead of a dedicated grow light?
While some full-spectrum LED bulbs work, they’re not ideal for seed starting. Grow lights (especially T5 fluorescents or red/blue LEDs) provide the specific wavelengths seedlings need to grow strong. If you’re on a budget, a clip-on LED grow light (like those for herb gardens) is a cheap alternative.
Why are my seedlings stretching toward the light?
This is called etiolation, and it happens when seedlings don’t get enough light. Move them closer to the bulb (2-4 inches away) or increase light hours. If they’re already close, your light may be too weak—upgrade to a higher-wattage grow bulb or add a second light. Bonus fix: Rotate trays daily for even growth!
How often should I water seedlings with a light kit?
Keep soil consistently moist but not soggy. Water from the bottom (using a tray) to avoid disturbing roots, and mist lightly if using a heat mat. Most seedlings need water every 2-3 days, but check daily—overwatering is a common killer! Pro tip: Use a spray bottle for delicate seedlings like herbs.
What if my grow light stops working mid-season?
Don’t panic! If your light fails, move seedlings to the brightest window (south-facing gets the most light). For emergencies, a full-spectrum desk lamp (like a Philips GoLITE) can bridge the gap. If seedlings are already 2-3 inches tall, they can survive a few days without light—but act fast to prevent stretching!
Wrapping up and next steps
Starting seeds with a seed starting kit with light is your secret weapon for healthier, faster-growing seedlings! 🌱 Whether you're a beginner or a seasoned gardener, built-in grow lights give your plants the perfect head start—no guesswork, no wasted time.
With the right setup, you’ll enjoy stronger, more resilient plants ready for transplanting in no time.
Now that you’re armed with the knowledge, it’s time to take action! Grab your kit, follow the steps, and watch your garden dreams bloom. Ready to grow? Start today!