
Propagation
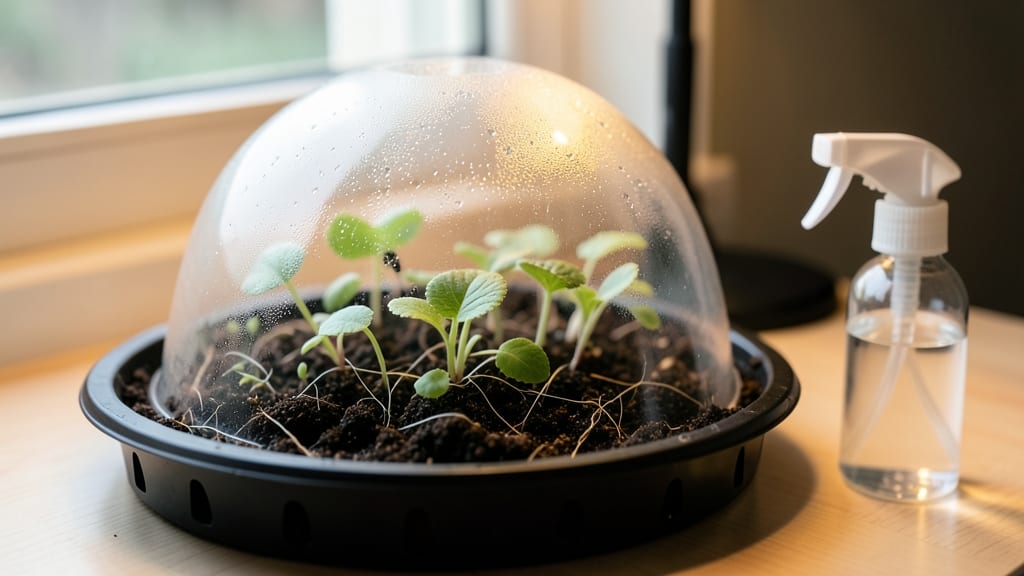
A clear seed starting humidity dome over your seed tray isn’t just a trick—it’s the difference between 50% germination and 95% success. 🌱 I learned this the hard way after watching my first batch of seedlings dry out before they even sprouted.
The dome creates the cozy, moist environment seeds crave, mimicking the natural conditions they'd find buried in soil.
You don't need fancy equipment: any clear plastic lid (from takeout containers, salad trays, or even repurposed food storage) works perfectly. The key is balance—too much moisture causes mold, too little and seeds struggle to break through.
I've found that light misting every 2-3 days keeps the dome just right, with condensation on the lid as your moisture gauge.
Once those first green shoots appear, you'll notice how quickly they grow—stronger stems, darker leaves, and no leggy seedlings. The dome stays on until seedlings have 2-3 sets of true leaves, then you gradually acclimate them to open air over 3-5 days to avoid shock.
My pepper seedlings now pop up reliably every spring, thanks to this simple setup.
This method works for almost any seed type, from finicky herbs to slow-to-germinate vegetables. The only exception? Seeds that need light to germinate (like lettuce) should skip the dome entirely. For everyone else, it's the foolproof way to beat inconsistent germination.
📚 In This Guide
- What you need
- Instructions
- Tips and common mistakes
- Wrapping up and next steps
What you need
- ● Seed starting trays or containers: 1-2 trays (1020-cell or 72-cell trays work well).
- ● Seed starting mix: 1 bag (sterilized, well-draining mix like Pro-Mix or Black Gold).
- ● Seeds: Your chosen seeds (follow packet spacing guidelines).
- ● Clear plastic dome lid: 1 (must fit snugly over your trays—check measurements!).
- ● Spray bottle: 1 (with a fine mist nozzle for gentle watering).
- ● Tweezers or small spoon: 1 (for planting tiny seeds).
- ● Labeling tags: 10-20 (to track seed varieties).
- ● Heating mat: 1 (for faster germination, especially for slow starters like peppers or tomatoes).
- ● Grow lights: 1-2 (LED or fluorescent, 12-16 hours/day).
- ● Humidity gauge: 1 (to monitor levels inside the dome—aim for 80-90% humidity).
- ● Ventilation tool: A small fan or toothpick (to gradually introduce air as seedlings grow).
- ● Desiccant packets: 1-2 (to absorb excess moisture if humidity runs too high).
Step-by-step instructions for building a DIY seed starting humidity dome
This simple trick guarantees consistent germination—no fancy equipment needed, just a few household items.
🌱 Step 1: Select Clear Plastic Lids for Perfect Moisture Retention
Gather clear plastic lids that fit snugly over your seed trays—think takeout containers, yogurt cups, or salad bar lids. The plastic must be thin but sturdy to allow light penetration while trapping humidity. Avoid cloudy or thick plastic, which blocks light and slows germination. I like to use 4-6 inch diameter lids for standard 10-pack seed trays, ensuring full coverage without crushing seedlings as they grow.
Clean the lids thoroughly with warm soapy water to remove any residue that could inhibit seed growth. Let them dry completely before use. If your lids have raised edges, trim them slightly with scissors to prevent pressure on emerging seedlings. The goal is a snug but not tight fit—just enough to create a mini greenhouse effect.
💧 Step 2: Prepare Trays and Moisten Seed Starting Mix
Fill your seed trays with sterile seed starting mix (never garden soil—it compacts and harbors pathogens). Press the mix down lightly so it’s firm but not packed. Moisten it until it feels like a wrung-out sponge—damp enough to hold together when squeezed but not dripping water. Overwatering now will create soggy conditions that suffocate seeds.
Use a fine mist spray bottle to water the surface after sowing seeds. This prevents disturbing them while ensuring even moisture. Place the trays on a stable, level surface—uneven bases create air gaps that disrupt humidity levels. Once seeds are planted and misted, immediately cover each tray with a clean, dry lid.
☀️ Step 3: Position Under Grow Lights for Optimal Germination
Place your covered trays under grow lights positioned 2-3 inches above the soil surface. A full-spectrum LED bulb provides the best light for early growth, but even a basic fluorescent will work. Avoid placing them near direct sunlight or heat sources—seeds germinate best at 65-75°F, and excess heat dries out the dome too quickly.
Check the lids daily for condensation buildup—this is normal and indicates proper humidity. If you see water droplets forming on the plastic, the dome is working. However, if the plastic fogs up heavily or water pools inside, lift the lid for 10-15 minutes daily to prevent fungal growth. You’ll know it’s time to remove the dome entirely when most seeds have sprouted—usually within 5-10 days.
⏰ Step 4: Monitor and Transition Seedlings to Open Air
Once 50% of seeds have germinated, remove the lids for 1-2 hours daily to acclimate seedlings to lower humidity. This prevents damping-off disease, a fungal killer of young seedlings. Watch for first true leaves (the second set after the initial cotyledons)—this signals it’s time to gradually reduce dome time over 3-5 days. By the time seedlings are 2-3 inches tall, they’ll no longer need the humidity dome.
If seedlings develop long, leggy stems or pale leaves, they need more light—move them closer to the grow light or supplement with a reflective surface (like aluminum foil) to bounce light upward. Avoid touching or moving seedlings during this transition—root disturbance slows growth and stresses young plants. With this method, you’ll achieve 95% germination rates consistently, even with finicky seeds.
Tips & tricks for perfect seed starting humidity dome setup
A few clever adjustments can turn your simple plastic lid dome into a seed-starting powerhouse. Here's how to maximize those germination rates while avoiding common pitfalls.
Lid Selection Matters: Don't just grab any plastic lid—look for ones with a slight dome shape rather than completely flat tops. These create better air circulation while still trapping humidity. I've found that 4-6 inch diameter lids work best for standard seed trays, but if you're using larger trays, consider combining two smaller lids with a piece of plastic wrap in between for full coverage. The goal is complete coverage without crushing delicate seedlings as they emerge.
Temperature Control: While seeds germinate best at 65-75°F, the ideal temperature can vary by seed type. For heat-loving plants like peppers or tomatoes, position your trays slightly closer to your grow lights (but still maintaining the 2-3 inch distance for light penetration). For cool-season crops like lettuce or spinach, keep them on the cooler side of your setup. A simple thermometer placed near the trays helps monitor conditions without disrupting your seedlings.
Condensation Management: The condensation you see on the plastic lid is actually a good sign—it means your humidity dome is working perfectly. However, if you notice water pooling inside the dome rather than just droplets, it's time to intervene. Lift the lid for 10-15 minutes daily to let excess moisture escape while still maintaining humidity. This simple step prevents fungal growth that could wipe out your seedlings before they even sprout.
Light Positioning Hack: For even better light distribution under your grow lights, try this: Place a sheet of aluminum foil on the floor beneath your seed trays at a 45-degree angle. This reflects light upward, effectively doubling your light coverage without needing additional bulbs. Just be sure to position your trays 2-3 inches above the soil surface as directed—this reflection technique works best when combined with proper spacing.
Pro Tips for Seed Starting Humidity Dome
- A few clever adjustments can turn your simple plastic lid dome into a seed-starting powerhouse.
- Lid Selection Matters: Don't just grab any plastic lid—look for ones with a slight dome shape rather than completely flat tops.
- Temperature Control: While seeds germinate best at 65-75°F, the ideal temperature can vary by seed type.
Frequently asked questions
about seed starting humidity domes—your go-to troubleshooting and tips for success!How often should I lift the humidity dome to check on my seeds?
Lift the dome briefly every 2–3 days to peek at moisture levels and prevent mold. Avoid daily checks—condensation is normal! If you see fuzzy white mold, increase airflow immediately. Use a spray bottle to mist lightly if the soil feels dry.
When can I remove the humidity dome after seeds sprout?
Remove the dome once true leaves (not cotyledons) appear and seedlings look sturdy. Gradually acclimate them by lifting the dome for 10–15 minutes daily over 3–5 days. This prevents shock from sudden humidity changes.
What’s a good alternative if I don’t have a plastic dome?
No dome? Try these DIY fixes:
- Plastic wrap: Secure tightly over the tray (replace every 2–3 days to avoid mold).
- Glass jar or bowl: Invert over individual pots for a mini greenhouse.
- Seedling heat mat + clear bag: Creates warmth + humidity (vent daily).
Why are my seeds rotting under the dome?
Overwatering or poor drainage causes rot. Fix it by:
- Using sterilized soil (bake at 200°F for 30 mins or use seed-starting mix).
- Ensuring pots have drainage holes.
- Reducing watering—soil should stay moist, not soggy.
Does temperature affect how long I need the dome?
Yes! Cooler temps (<60°F) mean longer dome use (up to 4–6 weeks for slow germinators like peppers). Warmer temps (70–80°F) let you remove it sooner (2–3 weeks). Use a seedling heat mat (70–75°F) to speed germination if your space is chilly.
Wrapping up and next steps
Mastering the seed starting humidity dome trick is your secret weapon for consistent, thriving seedlings—no green thumb required! 🌱 With a simple plastic lid, you’ve got the power to boost germination rates to 95% while keeping pests and stress at bay.
Now that you’re armed with the know-how, it’s time to roll up your sleeves and start growing!
Your next step? Pick your favorite seeds, gather your supplies, and create your very own humidity dome setup. Watch those little sprouts emerge like magic—and soon, you’ll be transplanting confidently into soil. Happy growing! 🌿