
Lawn
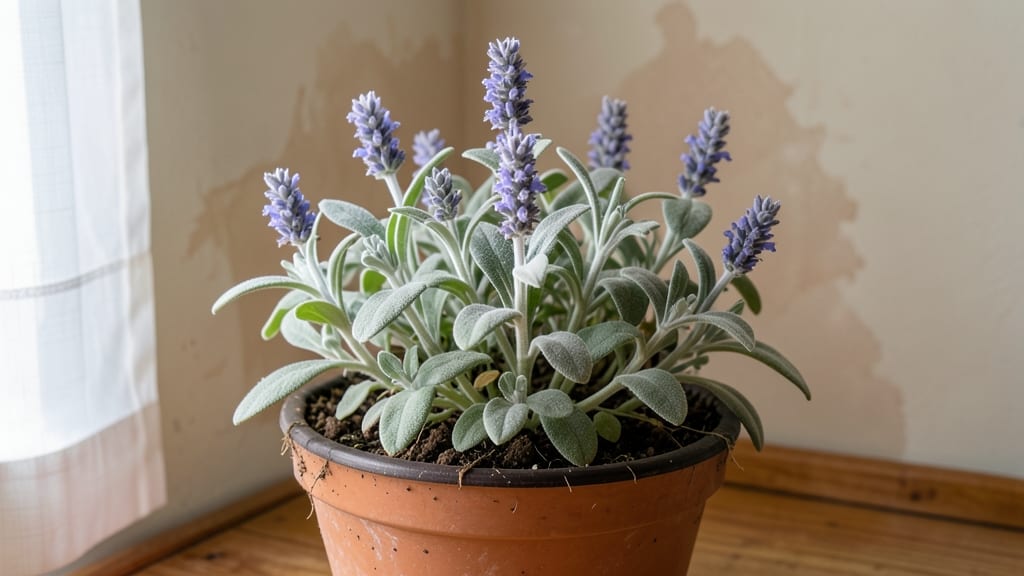
Harvesting sage seed pods at the right moment means next year’s garden will burst with fragrant purple blooms. 🌿 I’ve learned the hard way—wait too long, and the pods shatter, losing every seed to the wind.
The key is timing: collect them when they turn from green to a papery brown, just before they split open naturally. You’ll need a pair of sharp pruners, paper bags for drying, and a cool, dark place to store seeds until planting.
Culinary sage and ornamental varieties both follow the same process, though ornamental types often produce more abundant seed pods. Once dried, you’ll have seeds that stay viable for 2-3 years if stored properly.
Stratification isn’t required for sage, but a quick cold treatment (4-6 weeks in the fridge) can boost germination rates. Plant seeds in well-draining soil, barely covering them, and keep the soil consistently moist until sprouts appear in 2-4 weeks.
This method works for both garden beds and containers, making it perfect for gardeners with limited space. The payoff? A head start on next season’s sage plants, ready to thrive without the wait of starting from cuttings.
📚 In This Guide
- What you need
- Instructions
- Tips and common mistakes
- Wrapping up and next steps
What you need
- ● Fresh sage seed pods: Harvested from mature, healthy Salvia plants (aim for 10–20 pods, depending on your needs).
- ● Pruning shears or sharp scissors: For cleanly snipping pods from stems.
- ● Paper bags or breathable mesh sacks: 2–3 bags (1–2 ft in size) to hold pods during drying.
- ● Drying rack or clean, flat surface: Ensure it’s well-ventilated (e.g., a wooden tray or screen).
- ● Plastic zip-top bags or airtight containers: For long-term storage (quart-sized bags work well).
- ○ Moisture control tools: Silica gel packets (optional but helpful for humidity-sensitive pods).
- ○ Small fan (optional, for faster drying).
- ● Stratification supplies (for cold treatment): Refrigerator or cold frame (set to 35–45°F).
- ● Moistened peat moss or perlite (enough to lightly cover seeds).
- ● Labeling tags: To track harvest dates or stratification progress.
- ● Desiccant packs: For extra dryness during storage.
- ● Garden journal: To log notes on pod maturity, drying times, or germination success.
- ● Humidity monitor: If storing in a less-controlled environment.
Step-by-step instructions for harvesting, drying, and stratifying sage seed pods
Here's how to turn this year's sage blooms into next season's thriving plants—no fancy tools needed.
🌿 Step 1: Harvest Seed Pods at Peak Ripeness
Wait until the sage seed pods turn from green to a deep, papery brown—this usually happens in late summer or early fall. Gently twist the pods off the stems by hand, being careful not to damage the delicate capsules. I like to harvest on a dry morning when the pods are fully mature but before they split open naturally.
Place the harvested pods in a single layer on a clean, dry surface like a baking sheet or newspaper. You'll want them spread out so air can circulate freely. If you miss the perfect ripeness window, don't worry—just wait until the pods are fully brown before proceeding.
💧 Step 2: Dry the Seed Pods Completely
Let the pods dry in a warm, dry place for about 7-10 days. I usually choose a spot with good airflow, like a sunny windowsill or a well-ventilated shelf. The goal is to dry them thoroughly so the seeds inside remain viable and don't mold.
Check daily for any signs of moisture or mold. If you see any dampness or fuzzy growth, spread them out again or move them to a drier location. Once the pods feel completely dry and brittle to the touch, they're ready for the next step. You'll hear a slight crinkling sound when you handle them—this is your cue that they're fully dried.
✂️ Step 3: Extract the Seeds from Dried Pods
Place the dried pods in a paper bag and gently crumple the bag to break open the capsules. Shake the bag vigorously for about 30 seconds—this will release the tiny seeds inside. The seeds are so small that they'll float around like dust, so do this step outdoors or in a well-ventilated area.
Once the seeds are out, carefully pour the contents onto a clean piece of paper or a fine mesh screen. Use a soft brush or your fingers to separate the seeds from the chaff. Store the seeds in a labeled envelope or small container in a cool, dry place until you're ready to stratify them.
🌱 Step 4: Stratify the Seeds for Better Germination
Mix the sage seeds with a damp sand and peat moss blend (equal parts) in a small container. Cover the mixture with a lid or plastic wrap and place it in the refrigerator for 4-6 weeks. This cold treatment mimics the natural winter period and helps break seed dormancy.
Check the mixture every few days to ensure it stays moist but not soggy. After the stratification period, plant the seeds in well-draining soil and keep them lightly moist until germination, which can take 2-4 weeks. You'll see tiny green sprouts pushing through the soil—this is your reward for the patience!
☀️ Step 5: Plant Stratified Seeds for Next Season
Once the seeds have sprouted, transplant them into individual pots or directly into the garden bed. Sage thrives in full sun and well-draining soil, so choose a spot that gets at least 6-8 hours of sunlight daily. Keep the soil consistently moist but not waterlogged during the early growth stages.
As the seedlings grow, thin them out to give each plant enough space. Sage plants can get quite bushy, so spacing them about 18-24 inches apart ensures they have room to flourish. With proper care, you'll have a robust sage plant ready for next year's harvest or culinary use.
Tips & tricks for perfect sage seed pod harvesting
A few simple tricks will help you maximize your yield and ensure healthy germination for next year's sage plants.
Harvest Timing: I can't stress this enough—harvest those pods when they're fully brown but before they split open naturally. The perfect window is usually late summer to early fall, but if you miss it, don't panic. Just wait until they're completely dry and brown. The key is to catch them at that crispy, papery stage when they'll crinkle slightly between your fingers. This ensures the seeds inside are fully mature and viable.
Drying Strategy: The 7-10 day drying period in Step 2 is your best defense against mold. I've learned the hard way that rushing this step leads to fuzzy, unusable seeds. Place a small fan nearby to create gentle airflow—this speeds up drying without creating drafts that could scatter your pods. If your kitchen gets humid, consider using a dehumidifier or moving the pods to a different room. A good test is to gently squeeze a pod—if it feels completely dry and makes that satisfying crinkling sound, you're ready for the next step.
Seed Extraction: That 30-second shake in Step 3 might seem quick, but it's crucial. Shake too long and you'll lose seeds to the wind, but too short and you won't release all the tiny seeds hiding inside. I find it helps to hold the bag at a slight angle and shake it in quick, upward motions—this helps the seeds float upward and out of the bag. Work in a well-ventilated area or even outside to avoid inhaling the fine seed dust, which can irritate lungs. A fine mesh screen works wonders for separating seeds from chaff without losing any of that precious harvest.
Pro Tips for Sage Seed Pods
- A few simple tricks will help you maximize your yield and ensure healthy germination for next year's sage plants.
- Harvest Timing: I can't stress this enough—harvest those pods when they're fully brown but before they split open nat...
- Drying Strategy: The 7-10 day drying period in Step 2 is your best defense against mold. I've learned the hard way th...
Frequently asked questions
Got questions about harvesting, drying, or storing sage seed pods? You’re not alone! Here are some of the most common queries—and their answers—to help you master the process like a pro.
When is the best time to harvest sage seed pods?
Harvest sage seed pods when they turn from green to light brown and begin cracking open naturally—usually late summer to early fall. Avoid harvesting too early (green pods won’t yield viable seeds) or too late (seeds may scatter or sprout prematurely). Aim for a dry, sunny day to prevent moisture from ruining your harvest.
How long does it take to dry sage seed pods?
Drying time varies, but most sage seed pods are ready in 1–2 weeks if hung in a well-ventilated, dry space (like a mesh bag or paper bag) out of direct sunlight. Test for readiness by gently squeezing a pod—if it crumbles easily, the seeds are dry. Speed up the process with a dehydrator (set to 95°F) for 24–48 hours.
Can I use store-bought sage seeds instead of harvesting my own?
While harvesting your own sage seed pods ensures genetic consistency, store-bought seeds work fine for most varieties. Just check the packet for cold stratification requirements (some sage seeds need a chilling period to germinate). If you’re growing for culinary or medicinal use, local or heirloom seeds may offer better flavor profiles.
What’s the best way to stratify sage seeds for germination?
Sage seeds benefit from cold stratification to mimic winter conditions. Mix seeds with damp sand or peat moss in a sealed container, then refrigerate for 4–6 weeks. Keep the mix slightly moist (not soggy) and check weekly. Once stratified, sow seeds in well-draining soil, 1/4-inch deep, and keep them moist until sprouts appear (usually in 2–4 weeks).
My sage seed pods won’t open—what should I do?
If pods stay closed, they may need more drying time or a gentle nudge. Try placing them in a paper bag with a few crumpled sheets of newspaper for a few days—the friction can encourage them to crack. Avoid heat or force, as this can damage the seeds. If pods remain stubborn, they might not be fully mature yet—try harvesting a few weeks later.
Wrapping up and next steps
Harvesting, drying, and stratifying sage seed pods is a rewarding way to ensure next year’s vibrant blooms—while adding a touch of self-sufficiency to your garden! 🌱 With the right tools and patience, you’ll unlock a simple, sustainable cycle that benefits both your plants and the planet.
Ready to put your new skills to work? Start by gathering fresh seed pods this fall and follow the steps to create a thriving garden for seasons to come.
Pro tip: Share your success with fellow gardeners—you might inspire them to try it too! 🌿