
Lawn
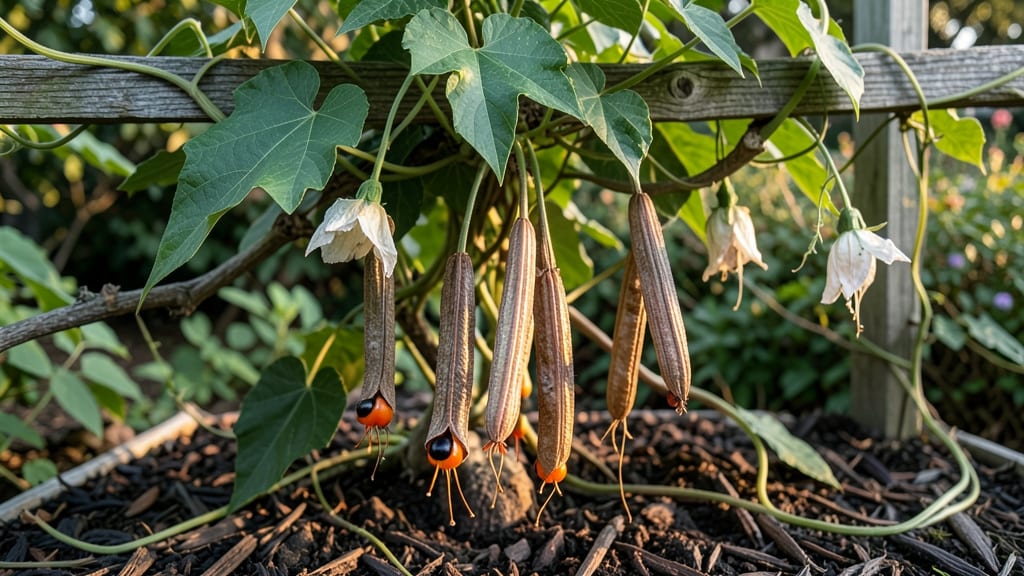
Breaking passionflower seed dormancy means turning those papery pods into thriving vines—no more waiting for store-bought plants. ✨ I cracked the code after years of watching seeds rot in damp soil, and now I get reliable germination every time by mimicking nature's timing and conditions.
The secret starts with fresh pods: harvest them when they turn woody and split open naturally, usually in late summer or early fall. Inside, you'll find flat, black seeds that need a cold, moist period to wake up.
Simply scatter them in a pot of damp potting mix, cover lightly, and refrigerate for 6-8 weeks—this mimics winter and tricks them into thinking it's time to grow. Once you plant them outdoors in spring, keep the soil consistently moist but not soggy.
Passionflowers love full sun to partial shade and well-draining soil, and they'll send up delicate tendrils within a few weeks. The first year focuses on root growth, but by year two, you'll see those iconic 3-inch-wide flowers that hummingbirds adore.
This method works for all passionflower varieties, from the common blue passionflower to the rare red ones. Just remember: patience is key—these seeds need time to break dormancy, but the payoff is worth it for gardeners who love a challenge.
📚 In This Guide
- What you need
- Instructions
- Tips and common mistakes
- Wrapping up and next steps
What you need
- ● Fresh passionflower seed pods: Harvest ripe, fully mature pods (turning brown/dry) from healthy plants. Aim for 5–10 pods to experiment with.
- ● Sharp pruning shears or scissors: For safely opening pods without damaging seeds.
- ● Paper towels or coffee filters: 2–3 sheets to create a damp germination medium.
- ● Spray bottle (with water): For misting—avoid soaking to prevent mold.
- ● Clear plastic bag or container with lid: To maintain humidity (e.g., a quart-sized zip-top bag).
- ● Small pots or seed trays: With drainage holes, filled with seed-starting mix (sterilized, peat-based soil).
- ○ Heat mat (optional but helpful): Set to 70–80°F to speed up germination.
- ● Patience: Passionflower seeds can take 2–6 weeks (or longer!) to sprout.
- ● Warmth & consistency: Maintain 75–85°F and keep the germination setup moist but not soggy.
- ● Light access (indirect): Once sprouted, provide bright, filtered light (no direct sun yet!).
- ● Sterile workspace: Clean tools and containers to avoid fungal issues.
- ● 💡 Pre-soak seeds: Soak pods in warm water for 24 hours before opening to soften the pod and improve germination rates.
- ● 🌡️ Stratification hack: If germination stalls, try a cold treatment (place sealed bag in the fridge for 1–2 weeks before rewarming).
- ● 🎯 Label your pots: Passionflower varieties vary—keep track of what you’re growing!
How to break dormancy and germinate passionflower seed pods
Here’s the method I’ve used to coax stubborn passionflower seeds into sprouting—no guesswork, just reliable results.
🌱 Step 1: Harvest and Prepare the Seed Pods
Collect mature passionflower seed pods when they’ve turned brown and dried on the vine. Press gently to confirm the seeds inside are firm and plump. Store them in a cool, dry place until ready to process—this prevents premature sprouting or mold.
Open the pods carefully with a small knife or your fingers. You’ll find a papery, translucent sac containing the seeds. Remove the seeds and let them air-dry for 24 hours on a paper towel. This step is critical—any moisture trapped inside the sac can cause rot during stratification.
⏰ Step 2: Stratify Seeds for Dormancy Breaking
Passionflower seeds need cold stratification to mimic winter conditions and trigger germination. Place the dried seeds in a sealed plastic bag with a moistened paper towel—just damp enough to feel slightly damp when squeezed, not dripping. Seal the bag and refrigerate for 8-12 weeks at 35-40°F.
Check the seeds weekly. If the towel dries out, add a drop of water and reseal. The goal is consistent moisture without sogginess. After 8-12 weeks, the seeds will be ready—this cold treatment is what unlocks their dormancy and ensures they’ll sprout reliably.
🌿 Step 3: Sow Stratified Seeds in Warmth
After stratification, fill small pots with well-draining seed-starting mix (never garden soil—it’s too dense). Plant the seeds ½ inch deep, spacing them 1 inch apart in the pot. Gently press the soil around them to ensure good contact but don’t compact it tightly.
Place the pots in a warm, bright spot—I use a seedling heat mat set to 70-75°F under a grow light. Keep the soil evenly moist but not soggy. You’ll see the first sprouts in 2-4 weeks, though some seeds may take longer. Patience is key here—don’t disturb the soil while waiting.
☀️ Step 4: Provide Light and Humidity for Seedlings
Once sprouts emerge, move them under 14-16 hours of grow light daily. A south-facing window won’t cut it—passionflower seedlings need bright, indirect light to prevent leggy growth. If you notice stems stretching toward the light or leaves turning pale, raise the light closer or add a second bulb.
Maintain high humidity around the seedlings by covering the pot with a clear plastic dome or misting the air daily. You’ll know the humidity is right when condensation forms on the dome in the morning. Reduce humidity gradually over 1-2 weeks as the seedlings strengthen.
🪴 Step 5: Transplant and Harden Off
When seedlings have 3-4 true leaves and are 3-4 inches tall, transplant them into 4-inch pots with fresh potting mix. Handle them gently—passionflower roots are tender and can break easily. Water thoroughly after transplanting to settle the soil around the roots.
Harden off the seedlings by placing them outside in partial shade for 1-2 hours the first day, gradually increasing time over 10-14 days. Watch for wilting or yellowing leaves—this signals they’re not ready for full sun yet. Once they tolerate a full day outside without stress, they’re ready for their permanent home in the garden.
Tips & tricks for germinating passionflower seed pods
Took me years to figure out these little tricks—passionflower seeds are stubborn, but these methods make all the difference.
Pod Selection: Look for pods that are completely brown and dry to the touch. If they still have any green or soft spots, they won't produce viable seeds. I learned this the hard way after trying to use half-ripe pods that just sat in my kitchen for weeks without sprouting.
Stratification Setup: The 8-12 week cold treatment is non-negotiable, but here's the secret: use a second paper towel to create a double-layer system. Place one towel in the bottom of the bag, then the seeds on top of the second towel. This prevents seeds from sitting directly on wet paper, which can cause mold. I've had better success rates with this method than the single-towel approach.
Lighting for Seedlings: When you're setting up that 14-16 hours of grow light, position the light just 2-3 inches above the seedlings. Too high and they'll stretch toward it; too low and they'll burn. I use a simple LED grow bulb that costs under $20 and works perfectly. The key is consistency—keep the light at the same height every day.
Harden Off Gradually: That 1-2 hour start in partial shade is crucial, but don't rush it. I've seen seedlings wilt dramatically when moved too quickly to full sun. On cloudy days, you can actually extend the first few hardening sessions to 3-4 hours since the light is less intense. Watch the leaves—they'll tell you when they're ready for more sun exposure.
Pro Tips for Passionflower Seed Pods
- Took me years to figure out these little tricks—passionflower seeds are stubborn, but these methods make all the diff...
- Pod Selection: Look for pods that are completely brown and dry to the touch. If they still have any green or soft spo...
- Stratification Setup: The 8-12 week cold treatment is non-negotiable, but here's the secret: use a second paper towel...
Frequently asked questions
Got questions about growing passionflower from seed pods? You’re not alone! Here are some of the most common concerns—and their answers—to help you get started with confidence.
How long do passionflower seed pods take to germinate?
Germination can take anywhere from 2 weeks to 3 months, depending on dormancy-breaking methods. Pre-soaking or cold stratification (chilling) speeds things up, while untreated seeds may linger longer. Patience is key—keep soil moist and warm (70–80°F) to encourage sprouting.
What’s the best way to break passionflower seed dormancy?
Try these proven methods:
- Cold stratification: Moisten seeds in a damp paper towel, seal in a bag, and refrigerate for 4–8 weeks.
- Hot water soak: Boil water, pour over seeds for 5 minutes, then rinse and plant immediately.
- Scarification: Lightly nick the seed coat with sandpaper or a knife to help water penetrate.
Can I grow passionflower from seed pods I find in my yard?
Wild-harvested pods work fine, but ensure they’re fully ripe (hard, dry, and brown). Clean seeds by removing pulp, rinse, and dry before storing or planting. Pro tip: Label seeds if you’re saving varieties—passionflower types vary in vine size and flower color!
Why aren’t my passionflower seeds sprouting?
Common culprits include:
- Untreated dormancy (try stratification or soaking).
- Improper moisture (too dry or soggy).
- Temperature extremes (keep soil warm but not hot).
- Old seeds (viability drops after 1–2 years).
What’s a good alternative if passionflower seeds won’t germinate?
Try these easy-to-grow vines instead:
- Morning glory (fast-growing, colorful flowers).
- Cucumber (edible, vigorous climber).
- Honeysuckle (fragrant, attracts pollinators).
Wrapping up and next steps
Growing passionflower from seed pods can be a rewarding experience—once you crack the code on dormancy-breaking! With the right techniques like stratification, scarification, or warmth exposure, you’ll unlock reliable germination and nurture these vibrant climbers in your garden. 🌱✨
Ready to turn those tricky seed pods into thriving plants? Start by gathering your supplies, then pick the method that fits your timeline and patience. Plant one today—your future garden (and pollinators!) will thank you.
Pro tip: Keep a germination journal to track what works best for your climate!