
Lawn
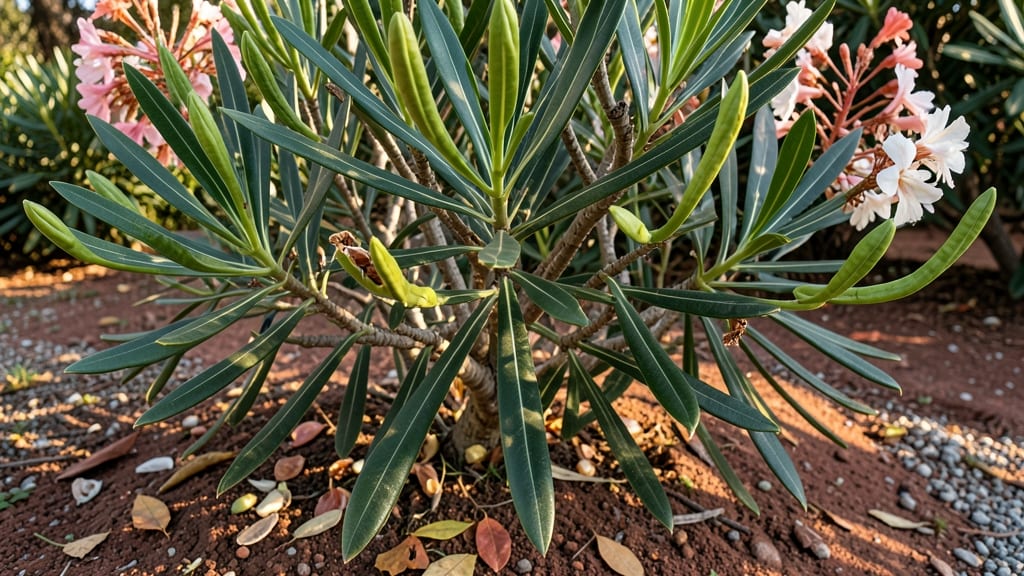
Handling oleander seed pods means unlocking a toxic-but-beautiful plant’s next generation—with patience and proper precautions. ✨ These velvety pods split open when ripe, revealing seeds that can grow into striking shrubs, but every step demands caution (oleander sap is dangerous if ingested or handled carelessly).
The process starts with harvesting mature pods in late summer or early fall, then drying them completely before cracking them open. I learned the hard way that rushing this step leads to moldy seeds—so let them air-dry for 2-3 weeks in a shaded, well-ventilated spot.
Once dried, the seeds germinate best in warm conditions (70-80°F) with consistent moisture, but expect a 30-60 day wait before those first green shoots appear. The payoff? Vigorous young plants that’ll thrive in your landscape—just keep them out of reach of pets and kids.
This method works for expanding your collection or sharing plants with fellow gardeners. Just remember: gloves and a mask are your best friends when handling these pods!
📚 In This Guide
- What you need
- Instructions
- Tips and common mistakes
- Wrapping up and next steps
What you need
- ● Ripe oleander seed pods: Harvest only when fully brown and dry (typically late summer to fall). Aim for at least 10-15 pods for reliable germination.
- ● Pruning shears or sharp scissors: For cleanly cutting pods from stems without damaging the plant.
- ● Paper bags or breathable mesh sacks: To collect and transport pods (avoid plastic—it traps moisture).
- ● Newspaper or paper towels: For drying and separating seeds (1-2 sheets per batch).
- ● Small bowls or shallow containers: For sorting seeds (2-3 containers in different sizes).
- ○ Spray bottle with water: For lightly misting seeds during germination (optional but recommended).
- ● Seed starting trays or small pots: With drainage holes (6-8" trays or 2-3" pots per 50 seeds).
- ● Potting mix: Well-draining, sterile mix (e.g., cactus/succulent blend). Avoid garden soil—it can harbor pathogens.
- ● Plastic wrap or humidity dome: To create a mini greenhouse effect while seeds germinate.
- ● Labeling tags and marker: To track seed varieties and planting dates.
- ● Gloves: Oleander sap can irritate skin—nitrile gloves are a safe bet.
- ● Hair dryer (low heat): For speeding up seed drying (use on cool setting!).
- ● Grow lights: If germinating indoors without natural sunlight (LED or fluorescent, 12+ hours/day).
- ● Fungicide (e.g., hydrogen peroxide 3%): Diluted to 1:9 ratio with water for seed soaking (prevents mold).
- ● Journal or app: To log germination progress (e.g., Gardenate or a simple notebook).
Step-by-Step guide to harvesting and processing oleander seed pods
Here's how I handle oleander seed pods—from harvest to germination—with the precision needed for reliable results.
🌿 Step 1: Identify and Harvest Mature Pods
Oleander seed pods turn from green to tan or light brown when mature—this is your cue to harvest. Gently twist the pods from the stem; they should release easily when ready. Avoid cutting stems, as this can damage the plant. I harvest on a dry morning when pods are firm but not brittle, ensuring maximum seed viability.
Collect pods in a paper bag or mesh container to allow airflow. If pods are still green, leave them on the plant another 7-10 days—immature seeds won’t germinate. Look for pods that split open slightly at the seams; these contain the best-quality seeds. Wear gloves, as oleander sap can irritate skin.
💧 Step 2: Dry and Extract Seeds
Spread the harvested pods in a single layer on a paper towel or mesh screen in a warm, dry, shaded area (ideally 70-75°F). Avoid direct sunlight, which can scorch the pods and reduce seed quality. Turn pods every 2-3 days to ensure even drying—this takes 2-4 weeks depending on humidity.
Once pods are completely dry and brittle, crack them open with your fingers or a small hammer. Seeds will rattle inside when ready. Sift the debris through a fine mesh strainer, collecting only the flat, dark brown seeds. Discard any seeds with holes or signs of insect damage. Store viable seeds in a paper envelope in a cool, dry place for up to 6 months.
⏰ Step 3: Stratify Seeds for Germination
Oleander seeds require stratification to break dormancy. Place seeds in a sealed plastic bag with a damp paper towel and refrigerate for 4-6 weeks at 35-40°F. Check weekly—if the towel dries out, mist it lightly and reseal the bag. Stratification mimics winter conditions, signaling seeds it’s safe to sprout.
After stratification, remove seeds and sow them ¼ inch deep in a well-draining seed-starting mix (oleander hates soggy roots). Use small pots or a seed tray with drainage holes. Keep the soil moist but not wet—oleander seedlings rot quickly if overwatered. Place the tray in bright, indirect light (no direct sun yet) at 70-75°F.
☀️ Step 4: Germinate and Transplant Seedlings
Germination takes 3-6 weeks—be patient. Once seedlings emerge, move them to a south-facing window or under grow lights for 12-14 hours of light daily. Oleander seedlings grow slowly at first but develop thick, waxy leaves as they mature. Thin to the strongest seedling per pot if multiple sprouts appear.
When seedlings reach 3-4 inches tall and have 3-4 sets of true leaves, harden them off by placing outdoors in partial shade for 1-2 hours daily, gradually increasing exposure over 10-14 days. Transplant to the garden or larger pots after the last frost, spacing them 6-8 feet apart—oleander grows large and needs room to thrive.
✂️ Step 5: Maintain Young Plants
Newly transplanted oleander needs consistent moisture but no standing water. Water deeply once weekly, letting the soil dry slightly between waterings. Fertilize lightly with a balanced 10-10-10 formula every 6-8 weeks in spring and summer. Avoid heavy feeding—oleander prefers lean soil.
Watch for aphids or scale insects, common early pests. Treat infestations immediately with neem oil or insecticidal soap. Prune leggy growth to encourage bushiness, but avoid heavy pruning until the plant establishes roots. With patience, your seedlings will mature into drought-tolerant, fragrant shrubs in 2-3 years.
Tips & tricks for perfect oleander seed pod processing
Working with oleander seed pods requires patience and precision—here's how to avoid common pitfalls and maximize your success with these delicate plants.
Pod Maturity Cues: In Step 1, when harvesting, look for pods that have turned completely tan or light brown and show slight splitting at the seams. These visual cues indicate maximum seed viability. I've learned the hard way that harvesting too early means immature seeds that won't germinate—wait for that perfect tan color and slight opening. The firmness test is also crucial: pods should feel firm but not brittle when gently squeezed.
Drying Environment: For Step 2, creating the ideal drying conditions is everything. While the instructions specify 70-75°F, I've found that maintaining consistent airflow is just as important as temperature. Place your drying setup near a fan or in a breezy location to prevent mold growth. If you notice any condensation forming on the pods during the 2-4 week drying period, increase ventilation immediately—this is your first sign of potential mold development.
Stratification Consistency: During the critical 4-6 week stratification period in Step 3, consistency is key. I recommend using a small refrigerator drawer for better temperature control at 35-40°F rather than relying on the main fridge compartment, which can fluctuate. Place a thermometer inside the bag to monitor temperatures—anything above 45°F can break dormancy prematurely and reduce germination rates. The damp paper towel should stay moist but not dripping; if it feels damp to the touch, you're in the ideal range.
Seedling Light Transition: When moving seedlings to direct light in Step 4, gradual exposure is essential. Start with just 2-3 hours of morning sun on the first day, then increase by 1 hour each subsequent day. I've seen seedlings go from healthy to scorched overnight when moved too quickly to full sun. The 12-14 hours of light requirement should be achieved gradually over 7-10 days rather than all at once—this mimics natural acclimation and prevents leaf burn.
Pro Tips for Oleander Seed Pods
- Working with oleander seed pods requires patience and precision—here's how to avoid common pitfalls and maximize your...
- Pod Maturity Cues: In Step 1, when harvesting, look for pods that have turned completely tan or light brown and show ...
- Drying Environment: For Step 2, creating the ideal drying conditions is everything. While the instructions specify 70...
Frequently asked questions
Got questions about oleander seed pods? You’re not alone! Here are some of the most common queries—plus straightforward answers to help you navigate harvesting, drying, and germination like a pro.
When do oleander seed pods ripen and become ready for harvest?
Oleander seed pods typically ripen in late summer to early fall (August–October, depending on your climate). Look for pods that turn from green to brown or tan and start splitting open—this is your cue! Harvest them before they fully burst to avoid losing seeds to birds or wind.
How long does it take for oleander seeds to germinate?
Under ideal conditions (warmth, moisture, and light), oleander seeds usually sprout within 14–30 days. For faster results, pre-soak seeds in warm water for 24 hours before planting. Patience is key—some seeds may take up to 60 days to break dormancy.
Are oleander seed pods toxic? Should I wear gloves when handling them?
Yes, all parts of the oleander plant—including seed pods—are highly toxic
. Wear thick gloves (like rubber or nitrile) and avoid touching your face or skin. Wash hands thoroughly after handling. Never ingest or burn the pods, as fumes and residue can be dangerous to pets and humans.
What’s the best way to store dried oleander seeds for long-term use?
Store seeds in a cool, dry place (like a sealed glass jar or airtight container) with a desiccant packet to prevent moisture. Keep them in the fridge (35–40°F) for up to 2 years or freeze them for even longer storage. Label clearly—oleander seeds are not for casual use!
Can I grow oleander from seed pods if I don’t have a greenhouse?
Start seeds in small pots indoors (6–8 weeks before your last frost) under grow lights. Once seedlings are 3–4 inches tall, transplant them outdoors in well-draining soil after the threat of frost has passed. Oleander thrives in full sun and heat, so a sunny patio or garden bed works great.
Wrapping up and next steps
Oleander seed pods may seem intimidating, but with the right knowledge, you can turn them into a rewarding gardening project! Remember to harvest pods carefully, dry them thoroughly, and monitor germination patiently—each step brings you closer to growing these stunning, hardy plants.
Whether you're a seasoned gardener or just starting out, oleander seed pods offer a chance to nurture beauty with your own hands.
Ready to take the next step? Start by gathering your supplies and follow the timeline to ensure your seeds sprout successfully. Happy gardening! 🌱✨