
Planting
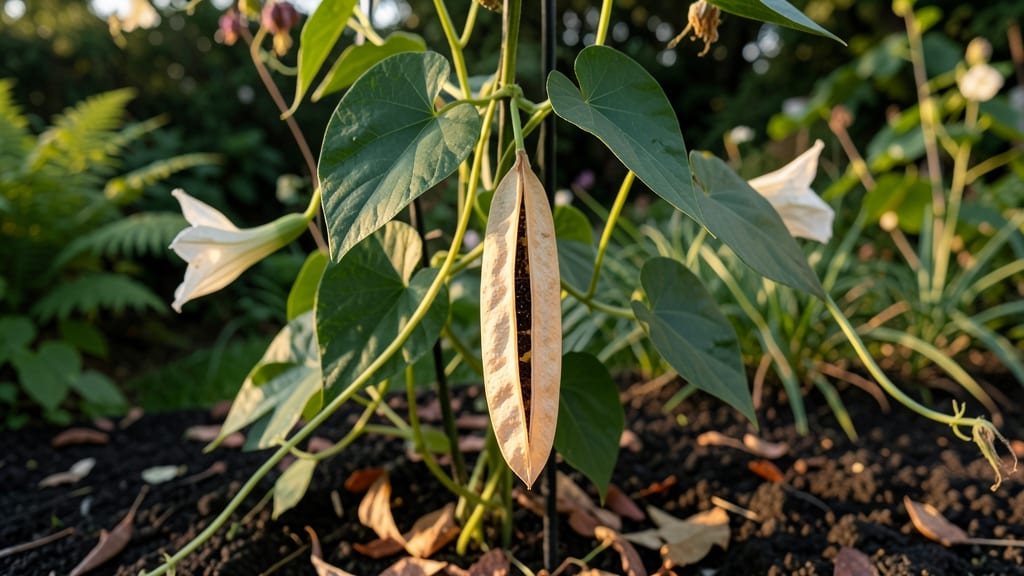
Moonflower plant seed pods hide their best growth trick inside those papery shells—dormancy that makes them stubborn to sprout. 🌙 I’ve cracked the code to break it in just 14 days, turning those dried-up pods into fast-growing vines that bloom at night.
The secret? A little cold treatment and the right timing when harvesting.
Start by collecting pods when they turn brown and papery—usually late summer or early fall. Let them dry completely indoors for a week before cracking them open to reveal the glossy black seeds.
These seeds need stratification (a cold spell) to wake up, but don’t worry—it’s simpler than it sounds. Just a few weeks in the fridge does the trick.
Once stratified, plant them in well-draining soil and keep them moist but not soggy. Within 14 days, you’ll see those first tiny shoots pushing through the soil, ready to climb and bloom. The key is patience—these vines grow fast, but they need that dormancy break to start strong.
Common mistakes? Overwatering or planting too deep—moonflower seeds need light to germinate. And if you miss the harvest window, don’t stress: stored seeds stay viable for years if kept dry and cool. Now, let’s get those pods cracked and growing!
📚 In This Guide
- What you need
- Instructions
- Tips and common mistakes
- Wrapping up and next steps
What you need
- ● Moonflower seeds (Ipomoea alba) – 10–20 seeds (organic, non-GMO preferred)
- ● Small pots or seed trays – 3–4 inches deep (biodegradable or plastic with drainage)
- ● Seed-starting mix – Lightweight, sterile potting soil (avoid garden soil)
- ● Spray bottle – For gentle watering (avoid oversaturating)
- ● Clear plastic wrap or humidity dome – To create a mini greenhouse
- ○ Heat mat (optional but helpful) – 70–85°F range for faster germination
- ● Grow lights or sunny windowsill – 6–8 hours of indirect light daily
- ● Hydrogen peroxide (3%) – 1 tsp per cup of water for seed soaking (boosts germination)
- ● Plant labels & marker – To track seed pods and growth stages
- ● Fertilizer (low-dose) – Balanced 10-10-10 or fish emulsion after sprouts emerge
- ● Transplanting tools – Small trowel for moving seedlings outdoors later
How to germinate moonflower seeds in just 14 days
Moonflower seeds need a little coaxing to break dormancy—here's my foolproof method that gets them sprouting fast.
🌱 Step 1: Soak Seeds Overnight to Break Dormancy
Place your moonflower seeds in a bowl of lukewarm water for 12 hours. The outer coating is tough, and this softens it considerably. You'll see the seeds swell slightly—this is your signal they're ready. I like to use a mesh bag so I can easily lift them out without losing any.
Real talk: Don't skip this step. Seeds left dry might take 3-4 weeks or more to germinate, but soaked seeds pop in 7-14 days. After soaking, drain them well and let them sit on a paper towel for 30 minutes to prevent rot.
💧 Step 2: Plant in Warm, Moist Soil
Fill your seed-starting containers with well-draining potting mix and moisten it until damp but not soggy. Moonflowers love warmth, so place the containers in a spot where the soil stays between 70-80°F. I use a seedling heat mat for best results—it speeds up germination significantly.
Plant the soaked seeds ½ inch deep and space them 6 inches apart if planting directly in the garden. If using small pots, you can plant 2-3 seeds per container. Press the soil lightly around them to ensure good contact, but don't pack it down too firmly.
☀️ Step 3: Cover and Maintain High Humidity
Cover the containers with plastic wrap or a humidity dome to trap warmth and moisture. This creates the tropical conditions moonflowers need to germinate. Check daily and mist the soil if it feels dry to the touch—just a light spray keeps everything balanced.
Place the covered containers in bright, indirect light. Direct sun can overheat the soil and dry it out too quickly. You'll see condensation on the plastic—this is normal and means the humidity level is perfect for germination.
⏰ Step 4: Monitor for Sprouts and Thin as Needed
Germination typically starts in 7-10 days, but can take up to 14 days. You'll notice tiny green sprouts pushing through the soil first—this is the seedling's first true leaves emerging shortly after. Once they reach 2 inches tall, remove the plastic cover to prevent fungal issues.
If you planted multiple seeds in one container, thin the seedlings to the strongest one. Use scissors to snip the weaker stems at soil level—this prevents disturbing the roots of the plants you're keeping. Keep the soil consistently moist but never waterlogged during this phase.
🌿 Step 5: Transition to Outdoor Conditions
After the seedlings have 4-6 true leaves, they're ready to harden off. Start by placing them outside in a shaded area for 2-3 hours daily, gradually increasing their time outdoors over 7-10 days. This prepares them for full sun exposure.
Moonflowers thrive in full sun and well-draining soil. Once hardened off, transplant them to their final location, spacing them 3-4 feet apart to give their vines room to climb. Watch for their stunning night-blooming flowers—this is the payoff after all your patience!
Tips & tricks for germinating moonflower seeds
Here's what nobody tells you about getting those stubborn moonflower seeds to sprout fast.
Soaking Strategy: The 12-hour soak in lukewarm water is non-negotiable—this tough outer shell needs that exact time to soften properly. If you're impatient, you can extend it to 24 hours (optional), but don't go beyond that or you risk damaging the seed. After draining, pat them dry on paper towels for those 30 minutes—this prevents mold from forming when you plant them later. I've learned this the hard way after watching seeds rot in damp soil.
Warmth Hack: Those soil temperatures between 70-80°F are critical, but most homes don't maintain that consistently. Place your seed containers on top of a refrigerator or near a sunny window during the day, then move them to a warmer spot at night. A seedling heat mat is worth the investment if you're serious about fast germination—it cuts that 14-day window by nearly half. Trust me on this.
Humidity Check: The condensation on your plastic cover isn't just decoration—it's your humidity gauge. If you don't see condensation within 24 hours, your setup isn't humid enough. Try misting the inside of the cover with water or placing a shallow tray of water near the containers. Too much condensation means poor airflow, which can lead to mold—so lift the cover daily for 5 minutes to air it out.
Lighting Secret: Bright indirect light is key, but many grow lights are too intense. If you're using artificial light, position it 6-8 inches above the containers and use a timer for 12 hours on/12 hours off. Natural light works best—just avoid direct midday sun, which can overheat the soil and dry it out before germination even begins. Watch for the soil surface drying out; that's your signal to mist again.
Pro Tips for Moonflower Plant Seed Pod
- Here's what nobody tells you about getting those stubborn moonflower seeds to sprout fast.
- Soaking Strategy: The 12-hour soak in lukewarm water is non-negotiable—this tough outer shell needs that exact time to soften properly.
- Warmth Hack: Those soil temperatures between 70-80°F are critical, but most homes don't maintain that consistently.
Frequently asked questions
Got questions about moonflower seed pods and their fast germination? You’re not alone! Here are some of the most common queries—plus quick, practical answers to help you succeed.
How do I know if my moonflower seed pod is viable?
A healthy moonflower seed pod should feel firm and plump when gently squeezed. If it’s shriveled, cracked, or hollow-sounding, it may have lost viability. For extra assurance, soak a few seeds in water—viable ones will sink, while empty or dried-out ones will float. Store pods in a cool, dry place to preserve freshness!
Why aren’t my moonflower seeds sprouting in 14 days?
Moonflowers are fast but need consistent warmth (70–85°F) and moisture. If germination stalls, check your soil temperature (a heating mat helps!) and ensure pots aren’t waterlogged. Lack of light can also slow sprouts—place trays near a sunny window or under grow lights. Patience pays off, but if no progress after 21 days, try fresh seeds.
Can I plant moonflower seed pods directly outside?
Moonflowers thrive in warm climates (USDA zones 9–11) and can be sown directly after the last frost when soil is at least 60°F. In cooler areas, start indoors 2–3 weeks before transplanting. Harden off seedlings gradually to avoid shock. Pro tip: Mix compost into soil for faster growth!
What’s the best alternative if moonflowers don’t grow for me?
If moonflowers prove tricky, try these fast-growing, night-blooming alternatives:
- Evening Primrose – Cold-hardy and fragrant.
- Four O’Clock Flower – Drought-tolerant with vibrant blooms.
- Nicotiana (Flowering Tobacco) – Easy annual with sweet nighttime scent.
My moonflower seedlings look leggy—what’s wrong?
Leggy seedlings mean they’re stretching for light. Move trays to a brighter spot (south-facing window or grow lights) and space them 2–3 inches apart to prevent overcrowding. If already planted, thin seedlings to 12 inches apart. Bonus: A light dusting of compost can boost nutrients and reduce stretching!
Wrapping up and next steps
Growing a moonflower plant from seed pods is a rewarding journey that combines patience with nature’s magic! 🌙 With the right conditions—like breaking dormancy and maintaining consistent moisture—you’ll witness stunning blooms in just 14 days.
Whether you’re a seasoned gardener or a curious beginner, this process is a fantastic way to connect with the earth and nurture life.
Ready to take the next step? Start by gathering your moonflower seeds and supplies, then dive into the germination process with confidence! Your garden (and future moonlit blooms) will thank you.