
Lawn
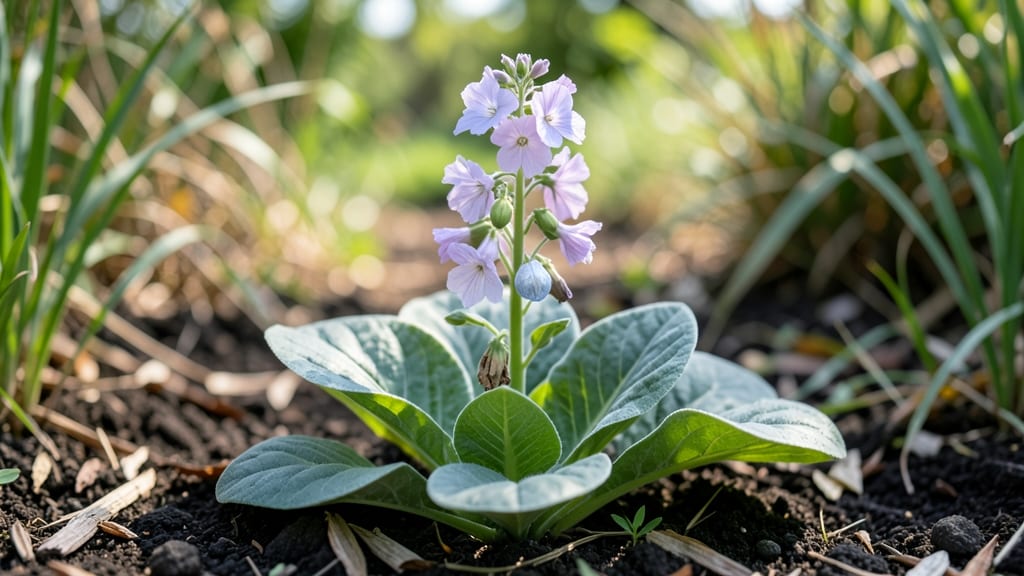
Those translucent moonflower seed pods are nature's most elegant dried decoration—and they grow from a plant that's shockingly easy to cultivate. 🌿 I've been growing Lunaria annua (commonly called honesty plant) for years, and its silvery-blue seed pods never fail to impress, whether left on the plant or dried for winter arrangements.
The secret to success starts with well-drained soil and 6+ hours of sunlight daily—this plant thrives where many perennials struggle. You'll get those signature heart-shaped blooms in spring, followed by the iconic seed pods that mature by midsummer. Even in partial shade, the plants stay healthy and productive.
Once the pods turn translucent (usually by late summer), you can leave them on the plant for winter interest or harvest them to dry. They make stunning dried floral arrangements that last for years, plus they're edible (though not particularly tasty).
The pods themselves become a conversation piece in any garden. This hardy biennial grows 2-3 feet tall, making it perfect for cottage gardens, borders, or even as a cut flower. Here's how to grow yours from start to stunning dried decor!
📚 In This Guide
- What you need
- Instructions
- Tips and common mistakes
- Wrapping up and next steps
What you need
- ● Dried Lunaria seed pods: 3–5 mature pods (harvested after they’ve turned brown and papery). Pro tip: 💡 Collect pods from healthy plants in late summer or early fall for best results!
- ● Well-draining potting mix: 1–2 gallons (or enough to fill your chosen container). Use a blend designed for annuals or herbs.
- ○ Small pots or seed trays: 4–6 (4–6 inches deep) with drainage holes. Optional: Biodegradable peat pots work too!
- ● Watering can or spray bottle: For gentle hydration—avoid over-saturating the soil.
- ○ Gloves (optional but recommended): Lunaria pods can be slightly prickly when dry!
- ● Scissors or pruning shears: To carefully snip open dried pods (sterilize with rubbing alcohol first!).
- ● Tweezers or toothpick: For gently extracting tiny seeds from the pods.
- ● Sunny windowsill or grow light: Lunaria loves 6+ hours of sunlight daily.
- ● Humidity dome or plastic wrap: To create a mini greenhouse for seedlings (remove once sprouts appear).
- ● Fertilizer (balanced, 10-10-10 or similar): A light dose once seedlings are 2–3 inches tall.
- ● Seed-starting heating mat: Speeds up germination (ideal for cooler climates).
- ● Epsom salt (magnesium sulfate): A pinch in water every 4 weeks boosts leaf health.
- ● Decorative container: Lunaria’s silver pods make stunning dried arrangements—think mason jars or hanging baskets!
- ● Journal or labels: Track planting dates and growth stages for future reference.
How to grow Lunaria from dried seed pods
Here’s how to coax those delicate moonflower blooms from last year’s pods—no seeds needed.
🌱 Step 1: Collect and Prepare the Seed Pods
Wait until the seed pods—those papery silver spheres—turn completely brown and dry on the plant. Gently twist them off the stems and let them cure indoors for 1-2 weeks in a dry, airy spot. This ensures they’re fully mature and ready to open.
Once dry, place the pods in a brown paper bag and store them in a cool, dark place until you’re ready to plant. The pods will naturally split open over time, revealing the tiny black seeds inside. You’ll know they’re ready when the outer shell cracks easily with a light squeeze.
💧 Step 2: Plant the Seeds in Well-Draining Soil
Fill small pots or seed trays with well-draining potting mix—lunaria hates soggy roots. Scatter the seeds on the surface instead of burying them; they need light to germinate. Press them lightly into the soil so they stay in place but don’t cover them.
Mist the soil gently with water until it’s evenly moist but not wet. Place the pots in a warm spot (65-75°F) with indirect light. Germination can take 2-4 weeks, so be patient. Keep the soil lightly moist—never soggy—until you see tiny green sprouts.
☀️ Step 3: Transplant Seedlings to a Sunny Spot
Once seedlings have 2-3 sets of true leaves, they’re ready to move outdoors. Choose a location with full sun—at least 6 hours daily—and well-draining soil. Lunaria thrives in average garden soil but won’t tolerate waterlogged conditions.
Dig small holes slightly larger than the root ball and space them 12-18 inches apart. Transplant in the early morning or on a cloudy day to reduce stress. Water deeply right after planting to help the roots settle in.
✂️ Step 4: Maintain and Enjoy the Blooms
Water lunaria 1-2 times per week, letting the soil dry slightly between waterings. Once established, it’s quite drought-tolerant. In late summer, you’ll see clusters of delicate lavender or white flowers followed by those iconic silver seed pods.
Deadhead spent blooms to encourage more flowers, but leave some pods to dry on the plant for next year’s seeds. The dried pods add winter interest to arrangements and make great dried floral decorations.
🌿 Step 5: Overwinter and Propagate
Lunaria is a biennial, meaning it blooms the first year and sets seed pods the second. In colder climates, mulch the base with 2-3 inches of straw to protect roots over winter. In spring, new leaves will emerge, and you’ll get another round of stunning blooms.
If you want more plants, simply collect the dried seed pods again and repeat the process. Lunaria self-seeds easily, so you might find volunteers popping up in future springs—just thin them to avoid overcrowding.
Tips & tricks for perfect Lunaria moonflower blooms
Growing these elegant moonflowers from dried pods is easier than you think—just watch for these key details.
Pod Ripeness Matters: Those 1-2 weeks of curing are non-negotiable. Pods that aren't fully brown and dry won't split properly, and you'll end up with uneven germination. I learned this the hard way after planting premature pods that stayed stubbornly closed—no seeds meant no flowers! Place them in a paper bag to catch any seeds that do release early, but don't rush the process.
Light Requirements: Lunaria seeds need light to germinate, so resist the urge to bury them. Press them gently into the surface of your well-draining mix—just enough to keep them in place. The 65-75°F warmth and indirect light during germination create the perfect environment for those tiny sprouts to push through. Too much direct light at this stage can dry out the delicate seeds faster than you'd expect.
Transplanting Timing: Wait for those 2-3 sets of true leaves before moving seedlings outdoors—this ensures they're strong enough to handle the transition. I've seen gardeners rush this step and end up with leggy, weak plants that struggle to establish. When you do transplant, do it on a cloudy day or early morning to minimize stress on the delicate roots.
Winter Protection: That 2-3 inches of straw mulch in colder climates isn't just decoration—it's survival insurance. The mulch acts like a blanket, protecting the roots from freezing temperatures while still allowing moisture to penetrate. In my zone 5 garden, this simple step has kept my lunaria coming back reliably for three years in a row.
Pro Tips for Lunaria Seed Pods
- Growing these elegant moonflowers from dried pods is easier than you think—just watch for these key details.
- Pod Ripeness Matters: Those 1-2 weeks of curing are non-negotiable. Pods that aren't fully brown and dry won't split ...
- Light Requirements: Lunaria seeds need light to germinate, so resist the urge to bury them. Press them gently into th...
Frequently asked questions
Got questions about Lunaria seed pods?
You’re not alone! Whether you’re curious about their care, growth, or creative uses, here are some of the most common queries—and their answers—to help you make the most of these enchanting moonflower blooms.
How long do Lunaria seed pods take to grow from seed to mature plant?
Lunaria plants typically take 10–12 weeks to mature from seed, depending on your climate. In cooler regions, germination may take 2–4 weeks after sowing, while warmer areas can see faster growth. Patience pays off—those iconic silver moon-shaped pods appear in late summer or early fall!
When is the best time to plant Lunaria seeds?
For optimal results, plant Lunaria seeds in early spring (after the last frost) or late summer (6–8 weeks before the first frost). They thrive in cool weather and can even overwinter in mild climates. Avoid planting in extreme heat, as it may stress young seedlings.
Why aren’t my Lunaria seed pods opening or turning silver?
If your pods stay green or refuse to open, check these common culprits:
- Insufficient sunlight: Lunaria needs full sun (6+ hours daily) for proper maturation.
- Over-fertilizing: Too much nitrogen promotes leafy growth over pod development.
- Drought stress: Keep soil consistently moist but not soggy during the growing season.
Can I use Lunaria seed pods for crafts, or do they lose their shape when dried?
Once fully dried, Lunaria pods retain their unique moon-like shape and make stunning decorations. Hang them in bundles for winter wreaths, use them in dried flower arrangements, or even craft seed paper. Just ensure they’re completely dry (no moisture left) before handling to prevent mold.
Are there alternatives to Lunaria if I want similar-looking seed pods?
If you love the aesthetic but want options, try these pod-producing plants with a similar vibe:
- Honesty (Lunaria annua): The classic choice—same genus, different varieties!
- Love-in-a-Mist (Nigella): Delicate lace-like foliage and unique seed heads.
- Poppy (Papaver): Some varieties produce papery seed pods with artistic appeal.
Wrapping up and next steps
Lunaria seed pods—those enchanting, moon-shaped blooms—bring a touch of whimsy and sustainability to your garden. Whether you’re drawn to their unique beauty, eco-friendly charm, or creative potential, these pods are a rewarding addition to any outdoor space.
Now that you’re equipped with the know-how, why not plant a few this season and let their magic unfold? Start small, experiment with colors, and enjoy the joy of growing something truly special! 🌙✨