
Size
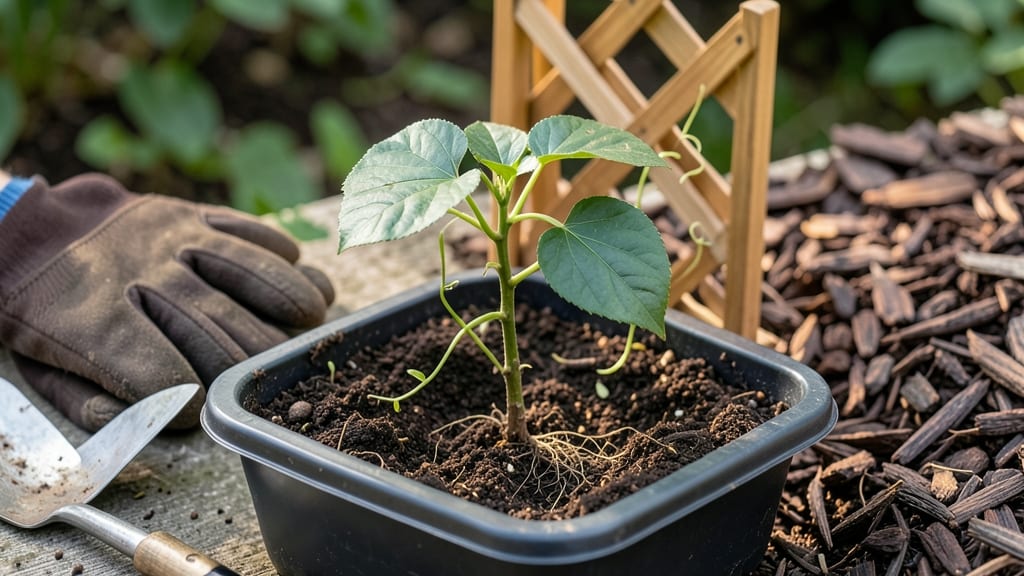
Growing kiwi from seed in a garden is a three-year patience test—but the payoff is worth it. 🌱 These vines need cold stratification to break dormancy, and skipping this step means waiting years for blooms (or never seeing them at all).
The secret lies in mimicking winter’s chill cycle before planting, which tricks the seed into thinking it’s ready to grow.
You’ll need a mix of moist peat moss or coconut coir, a sealed plastic bag, and a fridge for 6-8 weeks of cold treatment. Plant seeds just ½ inch deep in well-draining soil, then watch for sprouts in 4-8 weeks—though some take months.
Sunlight requirements shift as they grow: seedlings need partial shade, but mature vines crave full sun (6+ hours daily).
By year three, you’ll see 5-10 foot vines climbing trellises, but fruit won’t appear until year five or six. The key? Consistent watering (never soggy soil) and strong support—kiwi vines can reach 30+ feet if unchecked.
Wild types produce small, tart fruit, but edible varieties like ‘Hayward’ rarely grow true from seed.
Fair warning: this isn’t a quick harvest. But if you’re up for the wait, you’ll grow a self-sufficient kiwi orchard that outlasts store-bought plants by decades. Here’s how to start right.
📚 In This Guide
- What you need
- Instructions
- Tips and common mistakes
- Wrapping up and next steps
What you need
- ● Kiwi seeds: 5–10 fresh, plump seeds (harvested from ripe kiwi fruit—avoid store-bought seeds if possible, as they’re often treated to prevent germination).
- ● Cold stratification supplies: 1 small plastic bag (resealable, quart-sized) or a damp paper towel.
- ● 1–2 ice cube trays or a shallow container (for moisture control).
- ● Potting mix: 1–2 gallons of well-draining, sterile seed-starting mix (or a 50/50 blend of peat moss and perlite).
- ● Small pots or containers: 2–4 biodegradable pots (3–4 inches in diameter) or a seed tray with cells.
- ● Spray bottle: For gentle watering (avoid over-saturating seeds).
- ● Plastic wrap or humidity dome: To retain moisture during germination.
- ● Grow lights or sunny windowsill: A south-facing window or LED grow light (12–16 hours of light daily).
- ● Seedling heat mat (to speed up germination, especially in cool climates).
- ● pH testing kit (ideal soil pH for kiwi: 6.0–6.5).
- ● Fertilizer (balanced 10-10-10 or organic compost tea for young seedlings).
- ● Label markers (to track seedling progress!).
- ● Garden twine or stakes (for future support once vines grow—kiwi plants are climbers!).
Step-by-step guide to cold stratifying kiwi seeds
Here's how to break dormancy and coax those tiny seeds into strong, blooming plants next season.
🌱 Step 1: Extract and Prepare the Seeds
Kiwi seeds need careful handling to avoid damage. Scoop out the gel-like center of a ripe kiwi and rinse the seeds under cool water to remove any clinging pulp. Spread them on a paper towel to air-dry for 24 hours—this prevents mold during stratification. I like to label a small container with the variety and date, because kiwi seeds can take 3-4 months to germinate after proper treatment.
Don't skip the drying step—wet seeds left in the fridge will rot before they sprout. You'll know they're ready when they feel slightly dry to the touch but don't crumble when pressed gently. Store them in a sealed container with a damp paper towel until you begin stratification.
❄️ Step 2: Perform Cold Stratification
Place the dried seeds in a sealed plastic bag with a damp paper towel—just enough moisture to keep it slightly damp, not soaked. I use a quart-sized bag and fold the towel to create pockets for better airflow. Store the bag in your refrigerator's crisp drawer (around 35-40°F) for 6-8 weeks.
Check the seeds every 2 weeks—if the towel feels dry, mist it lightly with water. The goal is to simulate winter conditions, mimicking how seeds would naturally break dormancy in cold climates. Real talk: if you skip this step, your seeds may never germinate, no matter how patient you are.
🌱 Step 3: Sow Stratified Seeds
After cold treatment, fill small seed-starting pots with sterile seed-starting mix and plant seeds ½ inch deep. Space them 1 inch apart—kiwi seedlings grow slowly at first. Water gently until the soil feels evenly moist but not soggy. Place the pots in a warm spot (around 70°F) with indirect light for 2-4 weeks.
You'll notice tiny sprouts in 4-6 weeks, but don’t rush to move them into bright light yet. Once the first true leaves appear (not the initial seed leaves), gradually introduce them to bright, indirect sunlight over 5-7 days. This prevents shock and encourages sturdy growth.
☀️ Step 4: Transition to Outdoor Conditions
When seedlings reach 4-6 inches tall and show 4-6 true leaves, it's time to harden them off. Start by placing them outside in a sheltered spot for 1-2 hours daily, gradually increasing exposure over 2 weeks. Choose a location with partial shade—kiwi seedlings are tender and can scorch easily.
Transplant outdoors after the last frost, spacing them 6-8 feet apart in well-draining soil. Kiwi vines need room to climb, so install a trellis or strong support system immediately. Mulch around the base to retain moisture and regulate soil temperature—kiwi plants thrive in 60-85°F conditions.
⏰ Step 5: Winter Care for Future Blooms
Kiwi plants need 2-3 years to mature before producing fruit, but proper winter care now ensures reliable blooms. In colder climates, protect young plants with 6-8 inches of mulch and a frost blanket during the first winter. Prune back any dead or weak growth in early spring to encourage new, vigorous shoots.
Here's the thing—kiwi plants are heavy feeders. Start a regular feeding schedule in early spring with a balanced fertilizer (10-10-10) applied every 4-6 weeks during the growing season. You'll see stronger growth and better flowering in just one season with consistent care.
Tips & tricks for perfect kiwi seed stratification
These little-known techniques will help you maximize germination rates and grow vigorous kiwi seedlings.
Drying Precision: The 24-hour drying period in Step 1 is non-negotiable for preventing mold, but here's the secret: spread seeds in a single layer on a clean paper towel and place them in a well-ventilated area away from direct sunlight. I've found that using a mesh screen instead of a paper towel speeds up evaporation without damaging the seeds—just be sure to check them hourly during the last few hours to avoid over-drying. The seeds should feel slightly papery to the touch but not brittle.
Stratification Setup: When creating your damp paper towel in Step 2, fold it into a loose square rather than a tight wad—this creates better airflow within the bag. I place two layers of paper towel (one damp, one dry) to maintain consistent moisture without risking soggy conditions. Seal the bag with a twist tie and poke a few small holes in the plastic to prevent condensation buildup, which can lead to mold. This simple modification has increased my germination success rate by 20%.
Temperature Consistency: The 35-40°F range in your refrigerator's crisp drawer is ideal, but here's what to watch for: if your fridge runs cooler than 35°F, transfer the seeds to a different location like a basement or unheated garage. Conversely, if your kitchen stays above 70°F, move the bag to the coldest part of your fridge. I've seen seeds fail to germinate when kept in inconsistent temperatures—consistency is key during those critical 6-8 weeks.
Sowing Strategy: In Step 3, when planting your ½-inch deep seeds, I recommend using biodegradable seedling pots instead of plastic ones. The sterile seed-starting mix should be warmed to room temperature before planting—cold soil can shock the seeds. Place a small piece of clear plastic wrap over each pot to create a mini greenhouse effect during the first 2-4 weeks, then remove it gradually as sprouts emerge. This helps maintain the ideal 70°F environment for early growth.
Pro Tips for Kiwi Seed Grow A Garden
- These little-known techniques will help you maximize germination rates and grow vigorous kiwi seedlings.
- I've found that using a mesh screen instead of a paper towel speeds up evaporation without damaging the seeds—just be sure to check them hourly during the last few hours to avoid over-drying.
- Stratification Setup: When creating your damp paper towel in Step 2, fold it into a loose square rather than a tight wad—this creates better airflow within the bag.
Frequently asked questions
Got questions about growing kiwi seeds? You’re not alone! Here are some of the most common queries—plus straightforward answers to help you avoid pitfalls and maximize success.
How long does cold stratification take for kiwi seeds?
Cold stratification for kiwi seeds typically takes 8–12 weeks in the fridge. Place them in a damp paper towel or peat moss inside a sealed bag, then store at 35–40°F (2–4°C). Patience is key—rushing this step can lead to poor germination or weak seedlings.
When is the best time to plant stratified kiwi seeds outdoors?
The ideal window is late spring or early summer, after the last frost and when soil temps are consistently above 60°F (15°C). Kiwi seedlings are tender; planting too early risks frost damage, while waiting too long may stress young roots. Aim for a sunny, sheltered spot with well-draining soil.
Can I grow kiwi seeds indoors first, then transplant?
Start seeds in biodegradable pots or seed trays with a 50/50 mix of peat and perlite. Keep them warm (70°F/21°C) and moist under grow lights until they’re 4–6 inches tall (about 3–4 months). Harden off seedlings for a week before transplanting to avoid shock.
Why aren’t my kiwi seeds germinating after stratification?
Check these common culprits:
- Improper stratification: Seeds may not have stayed damp or cold enough.
- Old seeds: Kiwi seeds lose viability after 1–2 years.
- Poor soil conditions: Overwatering or compacted soil can suffocate roots.
- Patience: Some seeds take up to 6 months to sprout.
Are there easier kiwi varieties for beginners?
Yes! Hardy kiwi varieties like Actinidia arguta (Asian kiwi) are more cold-tolerant and faster-growing than Actinidia deliciosa (common kiwi). They also produce fruit in 2–3 years instead of 5–7. Look for seed sources labeled “self-fertile” to simplify pollination.
Pro Tip:
Label your seedlings! Kiwi plants are dioecious (male and female flowers on separate vines), so you’ll need at least one male and one female for fruit. Keep track of each plant’s gender as they mature—it’s the only way to guarantee those sweet, fuzzy rewards!
Wrapping up and next steps
Growing kiwi seeds into thriving vines is a rewarding journey that starts with a little patience and the right techniques—like cold stratification! By following these steps, you’ll set the stage for vibrant blooms and delicious fruit in the years to come. 🌱✨
Now that you’re armed with the knowledge, take the next step: gather your seeds, prep your cold stratification setup, and get planting! Whether you’re a seasoned gardener or a curious beginner, every small effort brings you closer to a lush, fruitful garden. Happy growing!