
Propagation
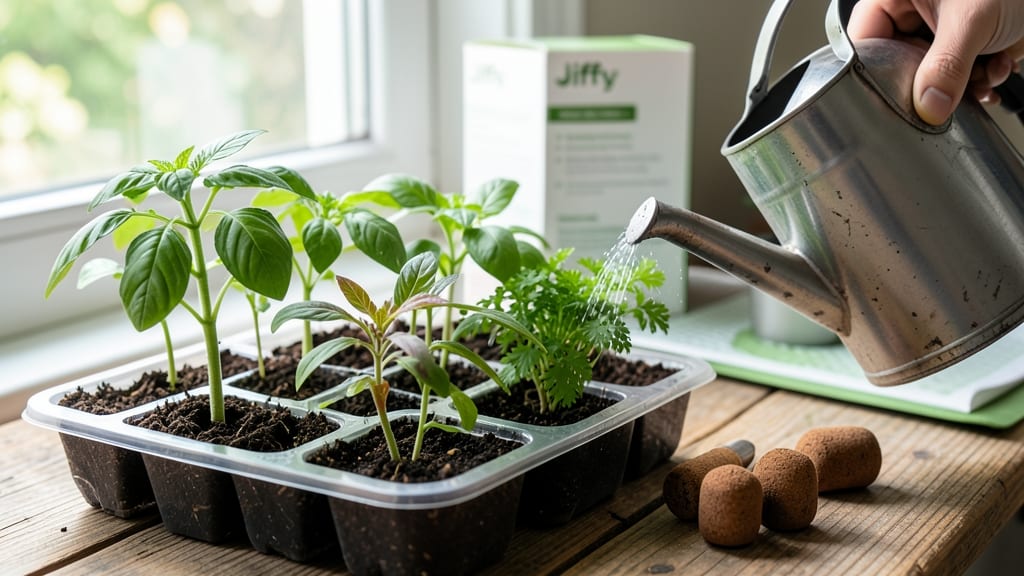
My Jiffy seed starting kit transformed my seedling success rate from hit-or-miss to reliably lush in just seven days. These compressed peat pellets dissolve into perfect little pots when watered, creating the ideal environment for seeds to sprout without fuss—no measuring soil, no guessing moisture levels.
The magic happens when you plant your seeds directly into the moistened pellets, then nestle them into a tray. Keep it warm (around 70°F) and covered with plastic wrap until you see those first green shoots—usually within 3-5 days.
The compact size makes them perfect for small spaces, and the biodegradable pots eliminate transplant shock. You’ll end up with sturdy seedlings ready for their final home, all without the mess of traditional seed-starting methods.
The key is patience—don’t rush the process, and keep an eye on moisture to avoid damping-off. Works for everything from tomatoes to herbs, and scales from a single seed to a full tray. Here’s how to make it work for you!
📚 In This Guide
- What you need
- Instructions
- Tips and common mistakes
- Wrapping up and next steps
What you need
- ● Jiffy Seed Starting Kit: 1 pack (typically contains 100+ peat pellets or seed pods)
- ● Seeds: Choose fast-growing varieties (e.g., lettuce, herbs, or flowers—check the kit’s compatibility)
- ● Water: Room-temperature, preferably rainwater or distilled (avoid tap water with high chlorine)
- ● Tray or Container: A shallow tray with drainage holes (or a repurposed container like a baking dish)
- ● Scissors or Knife: For opening seed pods (if using Jiffy pods instead of pellets)
- ○ Spray Bottle (optional but helpful): For gentle watering without disturbing seeds
- ● Grow Lights or Sunny Windowsill: Ensure 6–8 hours of light daily (south-facing window or LED grow lights work best)
- ● Plant Labels: To track seed types and planting dates
- ● Fertilizer (Diluted): A mild, water-soluble fertilizer (e.g., fish emulsion) after sprouts appear
- ● Humidity Dome or Plastic Wrap: To retain moisture while seeds germinate
- ● Heat Mat (Advanced): For faster germination of cold-sensitive seeds (e.g., peppers, tomatoes)
Step-by-step instructions for using a Jiffy seed starting kit
Here’s how to get your seeds sprouting in just 7 days with minimal effort—no fancy tools or guesswork required.
Prepare the Jiffy Pellets for Planting
Start by placing the 4 Jiffy pellets in a shallow tray or bowl. Pour warm water over them until fully saturated—you’ll know they’re ready when they expand to about 2 inches in diameter and feel firm to the touch. Let them soak for 10-15 minutes, then drain any excess water. The pellets should hold their shape but not be dripping wet.
While they soak, fill the bottom of your seed-starting tray with 1-2 inches of water to create a humid environment. This helps maintain moisture while the seeds germinate. Place the expanded pellets into the tray—this keeps them grouped together for easy watering and monitoring.
Plant the Seeds at the Right Depth
Follow the seed packet’s instructions for planting depth, but as a general rule, place seeds twice as deep as their diameter. For small seeds like lettuce or basil, a light press with your finger is enough. Larger seeds, like beans, need a slightly deeper hole—about ¼ inch down. I like to use a toothpick to make a small hole for precision.
Cover the seeds lightly with a tiny bit of the peat pellet material—just enough to shield them from light. Press gently to ensure good soil-to-seed contact. If you’re planting multiple seeds in one pellet (like herbs), space them ½ inch apart to avoid overcrowding later. Label each pellet with the seed type and date to keep track.
Create the Ideal Germination Environment
Place the tray in a warm, bright location—ideally between 70-75°F. A seedling heat mat helps speed up germination, especially for slower starters like tomatoes. Keep the pellets moist by misting them lightly with water once daily, or cover the tray with a clear plastic dome to retain humidity. Check daily for condensation—if the inside of the dome is foggy, you’re doing it right.
Seeds need darkness to germinate, so avoid placing them under grow lights yet. Instead, keep them in a shaded spot until you see the first signs of sprouts—usually 3-7 days. Once the seedlings emerge, remove the dome and move them to bright, indirect light to prevent leggy growth. You’ll know they’re ready when the first true leaves (not the initial seed leaves) appear.
Care for Seedlings Until Transplanting
After germination, water the seedlings from the bottom by adding water to the tray—this prevents disturbing the delicate roots. Keep the soil evenly moist but not soggy—you’ll see the top layer dry out slightly between waterings. Fertilize lightly with a diluted liquid fertilizer (half-strength) when the first true leaves appear, but avoid overdoing it—young seedlings are sensitive to salt buildup.
When seedlings develop 2-3 sets of true leaves, they’re ready to transition to stronger light. Gradually introduce them to direct sunlight or a grow light 12-14 hours a day. Harden them off for 5-7 days before transplanting by placing them outside in a sheltered spot for increasing lengths of time. This toughens them up for their new home in the garden or larger pots.
Tips & tricks for perfect Jiffy seed starting
Here's what nobody tells you about making these pellets work like a pro—these little tricks save time and headaches.
The Soak Test: After those 10-15 minutes of soaking, squeeze one pellet gently—it should feel like a damp sponge, not a dripping rag. If it's still hard, give it another 5 minutes. Over-soaking can wash away nutrients, while under-soaking means poor root development. I've ruined batches both ways, so trust the squeeze test!
Labeling Hack: Use masking tape and a permanent marker to label each pellet with both the seed type and date. Place the tape on the outside edge of the tray so you can see it without disturbing the pellets. This prevents mix-ups when you're checking for sprouts daily—nothing worse than forgetting what's what after a week!
Light Transition: When moving seedlings from darkness to light after germination, do it gradually over 2-3 days. Start with just 2 hours of indirect light daily, then increase by 2 hours each day. This prevents shock and leggy growth. I've seen seedlings stretch like rubber bands when moved too quickly—this method keeps them sturdy.
Fertilizer Timing: Wait until you see those first true leaves (not the initial seed leaves) before adding any fertilizer. That's when the seedlings have enough energy to use nutrients. I use a fish emulsion at half-strength because it's gentle but effective—regular fertilizers can burn tender new leaves.
Pro Tips for Jiffy Seed Starting Kit
- Here's what nobody tells you about making these pellets work like a pro—these little tricks save time and headaches.
- The Soak Test: After those 10-15 minutes of soaking, squeeze one pellet gently—it should feel like a damp sponge, not...
- Labeling Hack: Use masking tape and a permanent marker to label each pellet with both the seed type and date. Place t...
Frequently asked questions
Got questions about using a Jiffy Seed Starting Kit? You’re not alone! Here are answers to the most common ones to help you grow like a pro—no guesswork required.
Can I use a Jiffy Seed Starting Kit indoors or outdoors?
A Jiffy Seed Starting Kit works beautifully indoors under grow lights or on a sunny windowsill. For outdoor use, plant them directly in soil once seedlings sprout (no transplant shock!). Just avoid frost—these kits thrive in warm, consistent temps (65–75°F).
How long until seeds germinate in a Jiffy Seed Starting Kit?
Most seeds sprout in 5–7 days with the kit’s moisture-retaining coco coir. Fast-germinating varieties (like lettuce or radishes) may pop up in 3–5 days, while slower ones (tomatoes, peppers) take up to 10–14 days. Keep them warm and hydrated for best results!
Do I need to water the Jiffy Seed Starting Kit every day?
Nope! The kit’s pre-moistened coco coir holds water like a sponge. Water only when the top feels dry (about every 2–3 days), and avoid soggy soil—overwatering drowns seeds. A spray bottle keeps things gentle.
What if my seeds don’t sprout? Troubleshooting tips?
Try these fixes:
- Check seed viability: Test old seeds by soaking them in water—if they sink, they’re likely good.
- Warmth matters: Place the kit on a seedling heat mat (70–80°F) for faster germination.
- Light exposure: Some seeds (like peas) need darkness to sprout—cover them until you see sprouts.
- Fresh start: If all else fails, replant with new seeds in a fresh kit!
Are there eco-friendly alternatives to Jiffy Seed Starting Kits?
Try:
- Peat-free pots: Use biodegradable coconut fiber or recycled paper pots.
- DIY coco coir: Mix shredded coconut coir with compost for a custom starter.
- Egg cartons: Poke holes in the bottom, fill with soil, and transplant seedlings later.
Jiffy kits are convenient, but these options work too—just monitor moisture closely!
Wrapping up and next steps
Ready to transform your gardening dreams into a lush, thriving reality with minimal effort? The Jiffy Seed Starting Kit makes it effortless—no soil mess, no guesswork, just fast germination in just 7 days!
Whether you're a beginner or a seasoned green thumb, this kit is your ticket to bountiful harvests without the fuss.
Now that you’re equipped with all the tips and tricks, take the next step—grab your kit, pick your seeds, and let nature do the magic! 🌱✨ Your garden’s future starts today!