
Lawn
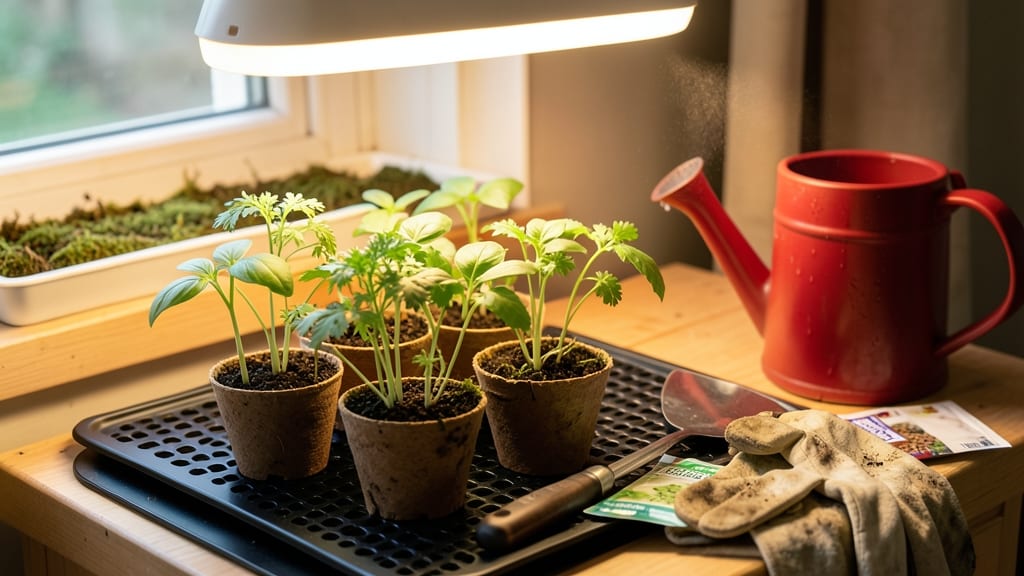
Jiffy seed starter trays how to use turn tiny seeds into sturdy seedlings in half the time of traditional methods—no fancy equipment needed. 🌱 I’ve used them for years to get my tomatoes, peppers, and herbs off to a flying start, and the results are always bold, healthy plants ready for transplanting. The secret lies in their pre-moistened peat pellets that expand into perfect little pots, keeping roots cozy and roots happy. Start by soaking the dry pellets in water for 10-15 minutes until they double in size—this is where the magic happens. Then, pop them into the tray, make a tiny dimple with your finger, drop in your seed, and cover it with a sprinkle of soil. Water gently, and within days, you’ll see those first tiny green shoots breaking through. The best part? No more wrestling with damp soil or struggling to keep seedlings from toppling over. By the time your seedlings have 2-3 sets of true leaves (usually 3-4 weeks after planting), they’ll be ready to graduate to bigger pots or the garden. The trays’ built-in drainage prevents mold and rot, and their compact size makes them perfect for small spaces. Just avoid overcrowding—each pellet should hold 1-2 seeds max for the best results. Works for almost any vegetable, flower, or herb, from finicky lettuce to stubborn tomatoes. The key is patience and consistency—keep the soil moist but not soggy, and soon you’ll have a seedling army ready to conquer your garden. Ready to give it a try?
📚 In This Guide
- What you need
- Instructions
- Tips and common mistakes
- Wrapping up and next steps
What you need
- ● Jiffy Seed Starter Trays – Choose a pack with 50-100 individual peat pots (depending on your needs). Look for 72-cell or 128-cell trays for optimal space.
- ● Potting soil or seed-starting mix – 2-3 cups (sterilized, lightweight, and well-draining). Avoid garden soil—it’s too dense!
- ● Seeds – Your preferred variety (check the seed packet for depth/spacing guidelines).
- ● Water spray bottle or small watering can – A gentle spray keeps seeds moist without disturbing them.
- ● Tray or shallow container – For holding water while soaking the Jiffy pots (e.g., a baking dish or plastic tub).
- ○ Plastic wrap or humidity dome – To retain moisture during germination (optional but highly recommended for tropical or slow-germinating seeds).
- ● Grow lights or sunny windowsill – A south-facing window or LED grow light (12-16 hrs/day) for consistent light.
- ● Seedling heat mat – Speeds up germination for cold-sensitive seeds (e.g., peppers, tomatoes).
- ● Labeling tags or toothpicks – To mark seed types and planting dates.
- ● Fertilizer (diluted) – A balanced liquid fertilizer (5-5-5 or 10-10-10) after the first true leaves appear.
- ● Transplanting tools – Small trowel or butter knife for moving seedlings to larger pots.
- ● Humidity tray with pebbles – Elevates trays to prevent root rot from sitting water.
Step-by-Step guide to using Jiffy seed starter trays for faster germination
Here's my foolproof method for using Jiffy seed starter trays—no guesswork, just speedy, healthy starts.
🌱 Step 1: Soak the Jiffy Pellets for 10 Minutes
Fill a shallow tray with warm water and place the Jiffy pellets inside. They'll expand dramatically in 5-10 minutes, so check frequently. The goal is a firm, moist pellet—not soggy or crumbling. You'll know they're ready when they've doubled in size and feel springy to the touch.
I like to soak them in a tray with a little space between pellets so they expand evenly. If they absorb water too quickly, they'll develop air pockets that stunt root growth. Once fully hydrated, drain any excess water—pellets should hold moisture but not drip.
💧 Step 2: Load Pellets into the Tray and Plant Seeds
Gently press each expanded pellet into a cell of your seed starter tray. The Jiffy pellets have a built-in growing medium, so no extra soil is needed. Plant 1-2 seeds per pellet, following the depth guidelines on your seed packet (usually 2-3 times the seed's diameter).
For tiny seeds like lettuce or basil, I use a toothpick to create a small dimple in the pellet—this ensures proper depth without burying them too deep. Press lightly after planting to secure the seeds. The pellets' natural structure gives seedlings something to grip as they emerge.
☀️ Step 3: Cover and Provide Warmth for Germination
Place a clear plastic dome or plastic wrap over the tray to retain warmth and humidity. Jiffy pellets germinate best at 70-75°F, so a seedling heat mat helps if your home runs cooler. You'll see sprouts in 3-7 days, depending on the seed type—fast germinators like radishes appear first, while slower ones like tomatoes take longer.
Check daily for condensation on the dome. If it feels damp but not dripping, you're golden. If you see water droplets forming, remove the dome for 10-15 minutes to prevent fungal issues. The moment the first true leaves appear, remove the dome permanently—this prevents leggy seedlings.
✂️ Step 4: Thin Seedlings and Introduce Light Gradually
Once seedlings have 2-3 true leaves, thin to the strongest plant per pellet. Use clean scissors to snip unwanted seedlings at the base—this avoids disturbing the roots of the one you're keeping. The Jiffy pellets' biodegradable nature means you can transplant directly without root disruption.
Move the tray to a bright, indirect light source (like a south-facing window) or under grow lights. Start with 12-14 hours of light daily and increase to 16 hours as seedlings grow. Leggy seedlings mean your light is too far away—position it within 4 inches of the tops.
🪴 Step 5: Harden Off and Transplant When Ready
Two weeks before your last frost date, begin hardening off seedlings. Place the tray outside in a sheltered spot for 1 hour the first day, gradually increasing exposure by 1-2 hours daily until they're out all day. The Jiffy pellets' natural structure helps roots adapt to outdoor conditions without shock.
Transplant when seedlings show 4-6 true leaves and the Jiffy pellets have broken down slightly (they'll dissolve in soil over time). Dig a hole slightly larger than the pellet, place the seedling in, and cover with soil. Water deeply to help the pellet integrate with the garden bed.
Tips & tricks for perfect Jiffy seed starter trays
These game-changing insights will help you maximize your Jiffy seed starter trays for faster, healthier germination every time!
Soaking Strategy: For even hydration, use room temperature water instead of warm—it prevents the pellets from absorbing too quickly and developing air pockets. I place them in a colander over the sink during soaking to allow excess water to drain naturally. This ensures firm, springy pellets ready for planting in exactly the 10 minutes specified.
Seed Placement Precision: In Step 2, when planting 1-2 seeds per pellet, press them just deep enough so the pellet's surface remains slightly visible. For delicate seeds like lettuce, I make a tiny divot with a toothpick—this prevents over-burying while still protecting them. The pellets' natural grip means you don't need to worry about them shifting during germination.
Germination Environment: The 70-75°F ideal temperature is crucial—if your home runs cooler, place the tray on a seedling heat mat or near a sunny window. I've found that positioning the tray on a baking sheet catches any condensation drips, preventing soggy pellets. Remove the dome immediately when you see the first true leaves to prevent leggy growth, which happens when seedlings stretch toward light.
Light Transition: When increasing light from 12-14 hours to 16 hours, I recommend using a timer for your grow lights. This gradual adjustment prevents seedlings from getting sunburned when exposed to full light too quickly. Position lights within 4 inches of the tops—closer than that can scorch delicate seedlings.
Pro Tips for Jiffy Seed Starter Trays How To Use
- These game-changing insights will help you maximize your Jiffy seed starter trays for faster, healthier germination e...
- Soaking Strategy: For even hydration, use room temperature water instead of warm—it prevents the pellets from absorbi...
- Seed Placement Precision: In Step 2, when planting 1-2 seeds per pellet, press them just deep enough so the pellet's ...
Frequently asked questions
Got questions about using Jiffy seed starter trays?
You’re not alone! Here are answers to the most common queries to help you grow with confidence—no green thumb required.
How long do Jiffy seed starter trays take to germinate seeds?
Germination time varies by plant, but most seeds sprout within 5–14 days in Jiffy trays. Keep them in a warm (65–75°F), humid spot and check daily. Leafy greens and herbs often sprout fastest (3–7 days), while tomatoes or peppers may take 2+ weeks. Pro tip: Label your trays to track progress!
Can I reuse Jiffy seed starter trays after planting?
Yes! Once your seedlings are ready to transplant, soak the trays in water for 10–15 minutes to dissolve them, then reuse the peat pots for new seeds. Just ensure they’re clean and free of pests. For long-term reuse, store them in a dry place until your next planting season.
What if my seeds aren’t sprouting in Jiffy trays?
Don’t panic! First, check moisture—peat pots should stay consistently damp (not soggy). If seeds still won’t sprout, try these fixes:
- Light: Move trays to a sunny windowsill or under grow lights (12–16 hours/day).
- Temperature: Use a heat mat (70–85°F) for slow starters like peppers.
- Freshness: Test seed viability by soaking a few in water—if they sink, they’re likely good.
- Depth: Replant seeds slightly deeper (2x their width) if they were too shallow.
Are Jiffy trays better than regular seed trays or pots?
Jiffy trays offer three key advantages over plastic pots or flats:
- Biodegradable: Dissolves into soil, eliminating transplant shock.
- Portable: Lightweight and stackable for small spaces.
- Moisture retention: Peat holds water better than some plastic options.
For large-scale planting, flats may be cheaper, but Jiffy trays win for ease and eco-friendliness.
Can I use Jiffy trays for vegetables, flowers, or just herbs?
Jiffy trays work for almost any seed—veggies, flowers, herbs, and even small shrubs! Popular picks include:
- Leafy greens (lettuce, spinach)
- Herbs (basil, parsley, cilantro)
- Flowers (marigolds, petunias)
- Tomatoes, peppers, and broccoli
Just avoid heavy root crops (like carrots) unless you’re transplanting young seedlings.
Wrapping up and next steps
Ready to transform your gardening game with Jiffy seed starter trays? 🌱 These little powerhouses make germination a breeze, helping you grow lush plants faster and easier than ever.
Whether you're a seasoned gardener or just starting out, mastering this method will give you confidence—and a head start on your green thumb goals!
Now that you’re equipped with the know-how, take the next step and grab those trays! Start small with a few easy seeds like herbs or lettuce, then expand your garden as you gain confidence. Happy planting—your future garden will thank you! 🌿✨