
Size
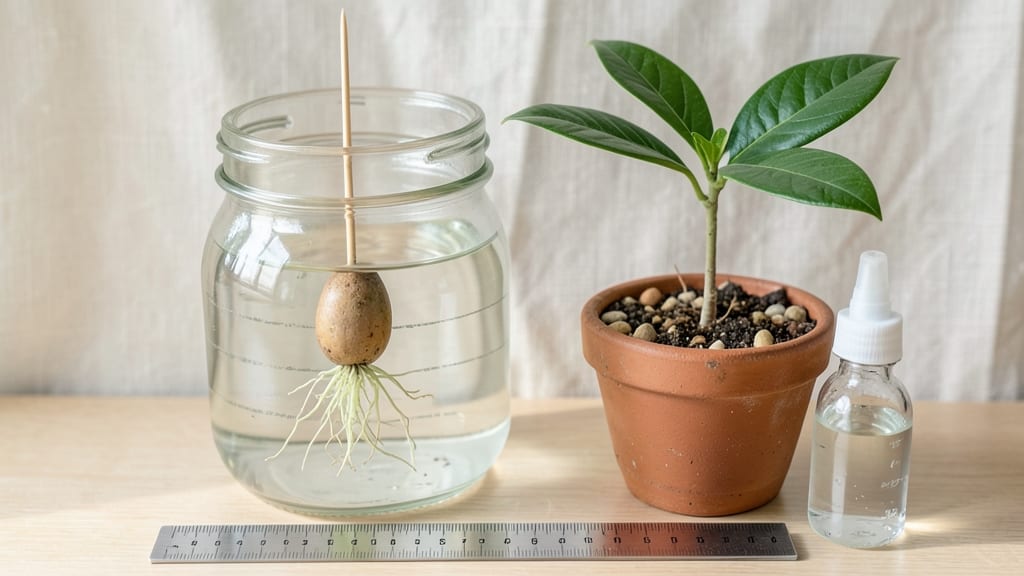
Growing an avocado from a seed isn’t just possible—it’s one of the most rewarding kitchen experiments you’ll ever try. 🌱 I’ve sprouted over a dozen avocado plants, and the secret lies in patience, the right watering routine, and avoiding those common rookie mistakes that turn seeds into sad, moldy messes.
Most people give up after two weeks, but with the right approach, you’ll see roots in under a week and a tiny green shoot in just four weeks.
The whole process starts with your leftover avocado pit—no fancy tools needed. You’ll need toothpicks, a jar of water, and a sunny windowsill. The key is keeping the water level consistent (never soggy, never bone-dry) and rotating the jar every few days so the seed grows straight.
I’ve seen people rush this step and end up with crooked stems or drowned roots—don’t be that person. A little attention now means a sturdy plant later.
By week four, you’ll have a tiny avocado sapling with leaves big enough to pinch off for propagation. The real magic happens when you transplant it into soil, where it’ll grow into a full-sized tree (yes, really).
My first attempt produced a 4-foot plant in just two years, and it’s now the star of my patio. The smell of fresh avocado leaves is something else—like a tropical vacation in a pot.
This method works for any avocado seed, no matter the variety, and even works in small apartments. The hardest part? Waiting. But trust me, the first time you see those roots curl around the jar or the first leaf unfurl, you’ll be hooked. Ready to grow your own avocado tree?
📚 In This Guide
- What you need
- Instructions
- Tips and common mistakes
- Wrapping up and next steps
What you need
- ● 1 ripe avocado – Choose a Hass avocado (the classic!) for best results.
- ● 1 toothpick (2-3 pieces) – For suspending the pit without damaging it.
- ● 1 small glass or jar – At least 6 inches tall (e.g., a mason jar or drinking glass).
- ● Water – Room-temperature, filtered if possible (chlorine can harm roots).
- ● Paper towel or coffee filter – To cover the jar and keep moisture balanced.
- ○ Pencil or marker – For labeling your jar (optional but helpful!).
- ● Pebbles or small stones – Place a thin layer at the bottom of the jar for drainage.
- ● Spray bottle – For gentle watering once roots sprout.
- ● Plant food or diluted fertilizer – Once leaves appear, a mild dose (like seaweed extract) can boost growth.
- ● Humidity dome or plastic wrap – Creates a mini greenhouse effect for faster sprouting.
- ● Notebook or camera – Track progress with daily photos or notes!
Step-by-Step instructions for growing an avocado seed
Here's the easy method I've used to grow avocado plants on my kitchen counter—no fancy tools needed.
🌱 Step 1: Remove the Pit and Clean the Seed
Start with a fresh avocado pit—wash it thoroughly under running water to remove any remaining fruit. Use a butter knife to gently scrape off the brown, fleshy residue from the pit's sides. You'll see a smooth, tan-colored seed underneath. The key is to expose the seed without damaging it.
I like to soak the pit in warm water for 10-15 minutes—this softens any remaining flesh and helps me spot the tiny dimple where the root will emerge. Don't scrub aggressively; you're just prepping the surface. Pat it dry with a paper towel and set it aside on a clean dish towel.
🪴 Step 2: Insert Toothpicks and Suspend the Pit
Place the pit between two toothpicks, positioning them about ¼ inch from the top and angling them so they'll rest on the rim of a glass. The toothpicks should hold the pit suspended, with the wider end (where the dimple is) facing down. This keeps the root-growing zone exposed to air while allowing water access.
I use a 16-ounce glass because it's wide enough to balance the toothpicks without tipping. If your glass is too narrow, the toothpicks may wobble—find something stable. The pit should hover just above the water line, not touching it yet. This setup prevents rot while encouraging root growth.
💧 Step 3: Add Water and Monitor Daily
Fill the glass with 2-3 inches of room-temperature water, enough to cover the bottom ½ inch when the pit is suspended. Change the water every 3-4 days to prevent bacteria buildup. You'll notice the water level drops as the pit drinks—top off as needed, but never let the pit sit submerged.
Place the glass in bright, indirect light (a sunny windowsill works). Within 2-3 weeks, you'll see a 1-2 inch root emerging from the dimpled end. This is your first sign of success! If the root grows 3+ inches, it's time for the next step. Don't rush—let it develop naturally.
⏰ Step 4: Prepare for Transplanting (When Ready)
Once the root reaches 3-4 inches, it's ready to plant. Fill a 6-inch pot with well-draining potting mix (I mix equal parts potting soil and perlite). Make a small hole in the center with your finger—just deep enough to bury half the pit. Gently place the pit in, root-side down, and cover the exposed half with soil.
Water lightly until moisture seeps from the bottom of the pot, then place it in bright, indirect light again. Keep the soil evenly moist (not soggy) for the first 2 weeks. You'll see tiny leaves emerge from the top in 4-6 weeks. This is the most delicate stage—overwatering now will drown your young sprout.
Tips & tricks for growing avocado seeds
Here's what I learned the hard way after trying this with three different pits—these little details make all the difference.
Prep Matters: In Step 1, that 10-15 minute warm water soak isn't just about cleaning—it's about activating the pit. The warm water helps soften any stubborn flesh AND signals the seed that it's time to wake up. I've found that using room-temperature water (not hot) prevents shocking the seed. After soaking, let it dry completely before proceeding—moisture trapped under toothpicks later causes rot.
Toothpick Placement: When suspending your pit in Step 2, the toothpicks should be positioned exactly ¼ inch from the top—this keeps the dimpled end (where roots grow) exposed to air while allowing water access. I've ruined two pits by placing toothpicks too high, which submerged the root zone. Use a ruler if needed—precision here prevents mold. Also, angle the toothpicks slightly so they rest comfortably on the glass rim without wobbling.
Light and Patience: In Step 3, bright indirect light is crucial—direct sunlight can scorch the pit before roots develop. I place my glass on a north-facing windowsill where it gets morning sun but no harsh afternoon rays. The 2-3 week waiting period feels long, but rushing by adding more water or moving the pit too soon often backfires. Trust the process: roots grow best when left undisturbed. Watch for the first tiny root hairs—those are your first sign of success!
Pro Tips for Make An Avocado Seed Grow
- Here's what I learned the hard way after trying this with three different pits—these little details make all the diff...
- Prep Matters: In Step 1, that 10-15 minute warm water soak isn't just about cleaning—it's about activating the pit. T...
- Toothpick Placement: When suspending your pit in Step 2, the toothpicks should be positioned exactly ¼ inch from the ...
Frequently asked questions
Got questions about growing an avocado seed?
Here are answers to some of the most common ones to help you succeed with your tiny green project!
How long does it take for an avocado seed to sprout?
With the right conditions (warmth, moisture, and patience), your avocado seed should sprout roots in 2–4 weeks and tiny leaves in another 4–6 weeks. Keep the toothpick method container in a sunny spot and check the water level regularly—consistency is key!
Can I speed up the sprouting process?
While you can’t rush nature, you can optimize growth! Place your seed in a warm, humid environment (like near a sunny window or under a grow light) and maintain moisture without overwatering. Some gardeners also soak the seed in water for 24 hours before starting to encourage faster root development.
What if my avocado seed isn’t sprouting after 4 weeks?
Don’t worry—seeds have their own timeline! First, check for rot (mushy texture, bad smell) or dryness (shriveled seed). If the seed is firm but dormant, try gently scratching the outer shell with sandpaper to encourage germination. If all else fails, it may just be a slow starter—keep trying!
Can I grow an avocado seed indoors without sunlight?
Yes! While sunlight helps, you can grow an avocado seed indoors using a grow light (LED or fluorescent) for 12–16 hours daily. Place the seed near the light source and rotate it occasionally for even growth. Just ensure the light stays about 6 inches away to avoid scorching.
What do I do once the seed starts growing leaves?
Once your seedling sprouts leaves (usually after 6–8 weeks), it’s time to transplant it into soil. Use a small pot with well-draining potting mix, bury the seed halfway, and keep it in bright, indirect light. Water when the top inch of soil feels dry—avoid overwatering to prevent root rot!
Wrapping up and next steps
Growing an avocado seed into a thriving plant is simpler than you think—just a little patience, the right tools, and a dash of care! 🌱 With this step-by-step guide, you’ve got everything you need to nurture your seedling into a lush, leafy friend in just 4 weeks.
Whether you’re a green thumb or a curious beginner, your kitchen counter is now a mini greenhouse waiting for success.
Ready to watch your tiny seed transform? Start today! Grab your supplies, follow the steps, and soon you’ll be sharing your sprouting adventure—or even potting your plant to grow even bigger. Happy growing! 🌿✨