
Container Gardens
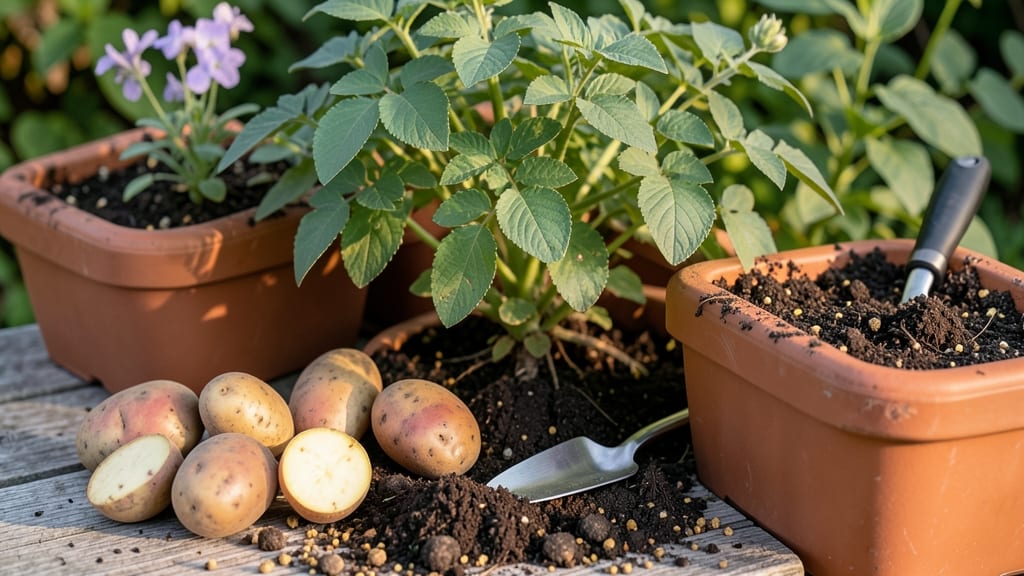
Growing seed potatoes in containers lets you harvest crisp, homegrown spuds without a backyard—just a sunny spot and a few simple supplies. 🌱 I used to think you needed a whole garden plot, but my first container harvest last spring produced 12 pounds of potatoes from just two 5-gallon buckets.
The secret? Layering them like lasagna and giving them consistent moisture.
You’ll need seed potatoes (not grocery store spuds), a container with drainage, and a mix of potting soil and compost. Start indoors 4-6 weeks before your last frost, then move containers outside once sprouts appear.
The key is keeping soil moist but not soggy—potatoes rot faster in containers than in the ground, so good drainage is everything.
By week 10, you’ll be digging up tubers that rival store-bought potatoes in flavor but with better texture. My neighbors thought I’d cheated when they saw my harvest—turns out, containers work better than rows for potatoes because the soil stays warmer and the roots don’t spread out.
Works for balconies, patios, or even a sunny windowsill with grow lights. The same method scales from a single bucket to a tower of containers—just adjust spacing for smaller pots. Here’s how to set it up without the guesswork.
📚 In This Guide
- What you need
- Instructions
- Tips and common mistakes
- Wrapping up and next steps
What you need
- ● Seed potatoes: 3–5 certified disease-free seed potatoes per container (e.g., Yukon Gold, Red Pontiac, or Fingerlings). Choose small to medium-sized potatoes with eyes or sprouts.
- ● Containers: At least 10–12 inches deep and 5–10 gallons in size (one container per 3–5 seed potatoes). Use fabric grow bags, 5-gallon buckets, or wooden boxes with drainage holes.
- ● Potting mix: A lightweight, well-draining mix like a 50/50 blend of potting soil and perlite/vermiculite (or a compost-heavy mix for organic growth). Avoid garden soil—it compacts!
- ● Drainage layer: Pebbles, gravel, or broken pottery (1–2 inches) at the bottom of containers to prevent waterlogging.
- ● Watering can or hose with a gentle spray nozzle: Containers dry out faster—keep soil consistently moist but not soggy.
- ● Fertilizer: A balanced, slow-release fertilizer (e.g., 10-10-10) or compost/well-rotted manure to mix into the soil before planting.
- ● Plant labels & marker: To track varieties (especially if growing multiple types!).
- ● Container stands or casters: Elevate containers for better airflow or move them for sunlight optimization.
- ● Mulch (straw or grass clippings): Helps retain moisture and regulate soil temperature.
- ● Plant supports (stakes or cages): Useful if potato vines get too leggy (though most container varieties stay compact).
- ● Soil moisture meter: Avoids over- or under-watering guesswork.
- ● Insect netting: Protects from pests like colorado potato beetles in early growth stages.
Step-by-step instructions for growing seed potatoes in containers
Here's the foolproof method I've used for years to grow bountiful potatoes in small spaces.
🌱 Step 1: Choose and Prep Your Containers
Use deep containers at least 10-12 inches tall with drainage holes—5-gallon buckets or fabric grow bags work perfectly. I like fabric because it lets roots breathe and prevents waterlogging. Fill each container with 6-8 inches of well-draining potting mix (never garden soil—it compacts and suffocates roots).
Leave 2-3 inches of space between the soil surface and container rim for adding more mix later. This extra room is key—it's where your potatoes will form. Tap the container gently to settle the soil without compacting it too much. You want it fluffy enough for roots to spread easily.
🌱 Step 2: Chit Your Seed Potatoes
Place your seed potatoes in a bright, cool spot (50-60°F) for 4-6 weeks before planting. You're looking for little sprouts (called "chits") to form on the top. I use an egg carton with holes cut in the lid to hold them upright and catch any excess moisture.
Turn the potatoes every few days so the chits grow evenly. This pre-sprouting gives your potatoes a head start and speeds up harvest time. If you skip this step, your plants will take longer to establish and produce fewer tubers. Watch for green shoots—those are your signal it's time to plant.
☀️ Step 3: Plant and Layer for Maximum Yield
Plant each chitted potato with the sprouts facing up, about 4 inches deep in the container. I use 2-3 potatoes per 5-gallon container depending on size—crowding them too much leads to small, misshapen tubers. Cover them with 2-3 inches of soil, leaving the chits exposed.
As the plants grow 6-8 inches tall, add more potting mix around the stems until it reaches the leaves. This layering encourages more tuber formation. Keep the soil moist but not soggy—you'll see new growth within 2-3 weeks if everything's right. The key is maintaining that 2-3 inch soil layer as the plant grows taller.
💧 Step 4: Maintain Ideal Conditions
Place your containers in full sun (6+ hours daily). Potatoes need consistent warmth to produce well—aim for soil temperatures between 60-75°F. Water when the top 1-2 inches of soil feel dry to the touch, but avoid soggy soil. I use a moisture meter to check because overwatering causes rot.
When flowers appear, don't remove them—this is a common myth. The flowers indicate the plant is healthy and producing tubers. Stop adding soil when the plants reach the container's rim. You'll know harvest time is near when the foliage starts yellowing and dying back naturally—this usually happens around 10-12 weeks after planting.
✂️ Step 5: Harvest and Store Your Potatoes
Use a fork to gently loosen the soil around the base of the plant before carefully lifting the container. Shake off excess soil to reveal your harvest. I find it's easiest to do this on a tarp to catch any potatoes that might fall. Handle the tubers gently—they bruise easily.
Cure your potatoes in a dark, dry place with good airflow for 1-2 weeks at 50-60°F. This toughens their skins and improves storage life. Store in a cool (40-50°F), dark place like a root cellar or paper bag in the pantry. With proper care, your container-grown potatoes will keep for months.
Tips & tricks for perfect container-grown seed potatoes
Here's what nobody tells you about maximizing your container potato harvest—these are the details that separate good from great.
Container Selection Matters: While 5-gallon buckets work, fabric grow bags are my secret weapon for container potatoes. The porous material prevents waterlogging while allowing roots to breathe, which is critical for tuber formation. If you don't have fabric bags, drill extra drainage holes in plastic containers—at least 6-8 holes per container. The more drainage, the better the yield.
Chitting Check: Those 4-6 weeks of chitting might feel like forever, but don't rush it! You're looking for chits that are 1-2 inches long before planting. If your sprouts are shorter than that, give them another week. I've learned the hard way that planting too soon leads to weak plants and fewer potatoes. Pro tip: Place a small mirror under your egg carton—some studies show it can encourage faster, straighter chit growth.
Layering Like a Pro: When you reach Step 3 and start layering soil, think of it like building a potato tower. Every time you add that 2-3 inch layer, you're creating a new "floor" for tubers to form. I like to mound the soil slightly around the stems rather than piling it straight up—this prevents rot at the base while encouraging more tuber development. Stop layering when plants reach the container rim, even if they're not fully mature yet.
Harvest Timing: That 10-12 week window is your sweet spot, but don't wait until the foliage is completely dead. When about 50-70% of leaves turn yellow, it's harvest time. If you wait too long, your potatoes will start sprouting and shriveling. For an early harvest, you can dig up a few potatoes after 8-10 weeks—they'll be smaller but still delicious. Just leave one plant to mature fully for seed potatoes next year.
Pro Tips for Grow Seed Potatoes In Containers
- Here's what nobody tells you about maximizing your container potato harvest—these are the details that separate good from great.
- Container Selection Matters: While 5-gallon buckets work, fabric grow bags are my secret weapon for container potatoes.
- Chitting Check: Those 4-6 weeks of chitting might feel like forever, but don't rush it!
Frequently asked questions
Got questions about growing seed potatoes in containers? You’re not alone! Here are answers to the most common queries to help you grow confidently—even if you’re a beginner.
Can I grow seed potatoes in any container?
Most containers work—just ensure they’re at least 10–12 inches deep and have drainage holes. Use fabric grow bags, 5-gallon buckets, or wooden boxes for flexibility. Avoid shallow planters; potatoes need room to expand. Line containers with cardboard or landscape fabric to prevent soil loss if needed.
How long does it take to harvest potatoes from seed?
With seed potatoes, expect a 10–12 week harvest from planting to digging. New potatoes (small, tender ones) can be harvested as early as 8–10 weeks by gently brushing soil away from stems. For full-sized potatoes, wait until the foliage yellows and dies back—this signals maturity!
What if my seed potatoes sprout but don’t grow leaves?
Slow or no leaf growth often means cool temps, poor light, or overwatering. Move containers to a sunny spot (6+ hours of light daily) and water only when the top inch of soil feels dry. If sprouts are leggy or weak, try fertilizing lightly with compost tea or a balanced 10-10-10 fertilizer to boost energy.
Can I reuse last year’s potatoes as seed?
No—only use certified seed potatoes (not grocery-store spuds) to avoid diseases. Store-bought potatoes carry pathogens that can spread in your garden. If you’re curious, try organic seed potatoes from nurseries or online retailers for the best results.
Are container-grown potatoes as tasty as garden-grown?
Container potatoes are just as flavorful—sometimes even more concentrated in flavor since they’re grown in controlled conditions. Varieties like ‘Yukon Gold’ or ‘Red Pontiac’ thrive in containers and deliver buttery, crisp textures. The key? Loose, well-draining soil and regular harvesting to encourage new growth.
Wrapping up and next steps
Growing seed potatoes in containers is a rewarding way to enjoy fresh, homegrown spuds—even in small spaces! With just a few simple supplies and a little patience, you’ll harvest homegrown potatoes in just 10 weeks.
Whether you’re a beginner or a seasoned gardener, this method proves that big yields don’t require big yards.
Now that you’re ready to plant, why not take it a step further? Try experimenting with different potato varieties, like reds, purples, or fingerlings, for unique flavors. Or, share your container gardening success with friends—you might inspire them to grow their own! 🌱