
Lawn
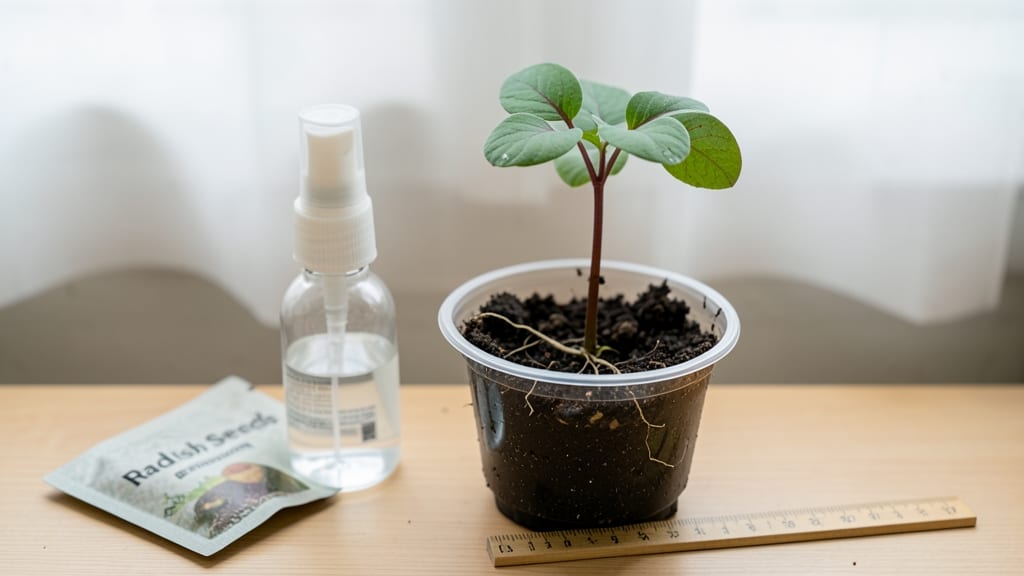
Growing a seed in a cup changed how I start plants forever. 🌱 No more losing seedlings to damping-off or overwatering—this method keeps everything contained, easy to monitor, and ready to transplant in weeks. The best part?
You use what you already have, and when you're done, the cup breaks down or gets composted. I started with basil seeds last spring, and within 10 days, sturdy seedlings were ready for their permanent home.
The key is using a cup with drainage holes (poke them yourself if needed) and a mix of potting soil and perlite for airflow. Place it near a sunny window or under a grow light, and keep the soil lightly moist—not soggy.
You’ll watch roots develop through the cup walls, giving you a real-time view of growth. When seedlings have 2-3 true leaves, they’re ready to move to larger pots or the garden. No transplant shock, no fuss—just healthy starts that thrive from day one.
Perfect for herbs, microgreens, or even small vegetables. Whether you’re a beginner or a seasoned gardener, this method saves space, reduces waste, and makes seed starting foolproof. Let’s get those seeds growing!
📚 In This Guide
- What you need
- Instructions
- Tips and common mistakes
- Wrapping up and next steps
What you need
- ● 1 clear plastic or glass cup (8–12 oz, with drainage holes or a lid with holes—or a mesh strainer)
- ● 1–2 tbsp organic seeds (choose sprouting-friendly varieties like broccoli, radish, sunflower, or alfalfa)
- ● Water (room temperature, filtered if possible)
- ● 1 small bowl or tray (for rinsing)
- ○ Paper towels or a sprouting lid (optional but helpful for drainage)
- ● Scissors or a nail (to poke drainage holes in the cup lid, if needed)
- ○ Spray bottle (for gentle rinsing, optional but convenient)
- ● Sunlight or grow light (4–6 hours of indirect light daily)
- ● Label or marker (to track seed types and planting dates)
Step-by-step instructions for growing seeds in a cup
This simple method turns any disposable cup into a zero-waste sprouting station for herbs and microgreens.
🌱 Step 1: Soak Your Seeds for Faster Germination
Place 1 tablespoon of seeds (herbs like basil or microgreens like radish) in a bowl and cover with warm water for 6-8 hours. I like to use a mesh bag or cheesecloth to contain them—it makes rinsing easier later. The seeds will plump up and double in size, signaling they're ready to sprout.
Here's the thing—don't skip this step. Soaking softens the seed coat, which speeds up germination from 3-5 days to just 1-2 days. Drain the water completely before moving to the cup, squeezing gently to remove excess moisture. You want the seeds damp but not dripping.
🪴 Step 2: Set Up Your Cup Sprouting Station
Poke 4-6 drainage holes in the bottom of a 16-ounce plastic cup using a nail or screwdriver. Line the cup with a paper towel cut to fit snugly, leaving an inch of towel hanging over the sides. This creates a natural wicking system that keeps roots moist without overwatering.
Place the soaked seeds evenly across the paper towel, spreading them ¼ inch apart so they don't crowd as they grow. Cover the cup with another paper towel or a breathable cloth to maintain humidity. The goal is to create a mini greenhouse effect—just enough moisture to encourage sprouting without drowning the seeds.
💧 Step 3: Rinse and Maintain Moisture Daily
Every 12 hours, remove the cup's top layer and rinse the seeds gently under lukewarm water for 30 seconds. I use a fine-mesh strainer to hold the cup while rinsing—it keeps everything contained. After rinsing, shake off excess water and let the cup drain for 5 minutes before replacing the cover.
Watch for first tiny sprouts within 24-48 hours. This is the moment that matters: once you see those first green shoots, switch to rinsing twice daily. The roots will start growing toward the drainage holes, while the sprouts reach upward. Keep the paper towel damp but never soggy—you'll know it's right when the towel feels slightly damp to touch but doesn't pool water.
☀️ Step 4: Provide Light and Airflow for Strong Growth
After 3-4 days, when sprouts reach ½ inch tall, move the cup to bright indirect light. A sunny windowsill works, but avoid direct midday sun—it can overheat the cup and scorch tender sprouts. I angle my cup slightly to ensure even light exposure on all sides.
Here's where it gets fun—watch the cotyledons (those first true leaves) pop through the soil after a few days. Once they appear, increase airflow by removing the cover completely. Good ventilation prevents mold and encourages sturdy stems. If you notice any yellowing or sliminess, rinse immediately and let the cup dry for 10 minutes before covering again.
✂️ Step 5: Harvest at Peak Freshness
Herb sprouts are ready to harvest when they reach 1-2 inches tall, usually 7-10 days after planting. Microgreens like radish or broccoli take 10-14 days to develop their first true leaves. Snip just above the soil line with clean scissors, leaving the roots intact if you want to grow another batch.
Real talk: your first harvest might feel small, but that's normal. Use the leftover roots to grow a second crop—just rinse them, replace the paper towel, and continue the process. For maximum yield, I plant 2 cups at a time, harvesting one while the other grows. Store harvested sprouts in a sealed container in the fridge for up to 5 days—they'll stay fresher than store-bought greens.
Tips & tricks for perfect zero-waste sprouting
Took me a while to figure these out, so here goes—simple tricks that'll make your cup sprouting foolproof.
Seed Selection: Not all seeds are created equal for this method. Herbs like basil and cilantro sprout quickly (ready in 7-10 days), while microgreens like radish or broccoli take longer (10-14 days). For fastest results, choose small seeds—they spread evenly and sprout faster than larger ones. I always opt for organic seeds when possible, as they're less likely to be treated with chemicals that could inhibit growth.
Drainage System: The 4-6 drainage holes in Step 2 are non-negotiable—they prevent root rot and ensure proper airflow. If you're worried about leaks, place the cup in a shallow tray or saucer to catch any drips. For extra insurance, use a cup with a wider base—it gives roots more space to grow downward without crowding. This simple setup keeps your sprouts healthy and prevents that dreaded slimy mold.
Lighting Hack: Bright indirect light is key after Day 3, but natural light isn't always available. If you're limited to artificial lighting, use a grow light or even a bright LED bulb placed 6-12 inches above the cup. I keep mine on for 12-14 hours daily to mimic daylight. Just avoid heat lamps—they can scorch tender sprouts faster than you'd think.
Second-Growth Strategy: That leftover root system after your first harvest is gold! After harvesting, rinse the roots thoroughly, replace the paper towel, and add fresh seeds. This second crop often grows even faster because the roots are already established. I've gotten three full harvests from a single cup this way—just remember to rinse and refresh the paper towel between batches.
Pro Tips for Growing A Seed In A Cup
- Took me a while to figure these out, so here goes—simple tricks that'll make your cup sprouting foolproof.
- Seed Selection: Not all seeds are created equal for this method. Herbs like basil and cilantro sprout quickly (ready ...
- Drainage System: The 4-6 drainage holes in Step 2 are non-negotiable—they prevent root rot and ensure proper airflow....
Frequently asked questions
Got questions about sprouting seeds in a cup? You’re not alone—this simple method is game-changing, but it’s natural to have doubts! Below, we’ve rounded up the most common queries to set you up for success.
What kind of seeds can I grow in a cup?
Almost any small seed works! Try fast-sprouting herbs like basil, cilantro, or parsley, or microgreens such as radish, broccoli, or sunflower. Avoid large seeds (like beans) or those requiring stratification (e.g., almonds). Stick to organic, non-GMO seeds for the best results.
How long does it take to grow a seed in a cup?
Timing varies by seed type, but most herbs and microgreens sprout within 3–7 days. For example:
- Radish microgreens: 5–7 days
- Basil: 7–10 days (longer for full leaves)
- Cilantro: 5–10 days
Why is my seed not sprouting? Troubleshooting tips!
If your seeds aren’t germinating, try these fixes:
- Not enough moisture: Soak seeds overnight or mist 2x/day.
- Too dark: Place near a sunny window or under a grow light.
- Old seeds: Test viability by soaking a few—if they sink, they’re good!
- Overcrowding: Thin seedlings if they’re too dense for airflow.
Can I reuse the cup for another batch?
After harvesting, rinse the cup thoroughly with hot, soapy water, then sanitize with a 1:10 vinegar-water solution. Let it dry completely before reuse. This keeps your setup zero-waste and ready for your next crop!
How do I harvest and use my homegrown sprouts?
Harvest herbs when leaves are 2–3 inches tall (snip stems with scissors). For microgreens, cut just above soil when first true leaves appear. Use them fresh in salads, sandwiches, or as garnishes! Store in a damp paper towel in the fridge for up to 5–7 days.
Wrapping up and next steps
Growing a seed in a cup isn’t just a clever way to sprout herbs or microgreens—it’s a simple, sustainable, and rewarding habit that brings freshness to your table with zero waste!
Whether you’re a beginner or a seasoned gardener, this method proves that small spaces and big results go hand in hand. 🌱
Now that you’re armed with tips and tricks, why not take the next step? Start with a few easy seeds like radish or broccoli sprouts, then expand your collection as you gain confidence.
Share your progress with friends or even gift them a cup of their own—because growing together makes it even more fun! 🌟