
Lawn
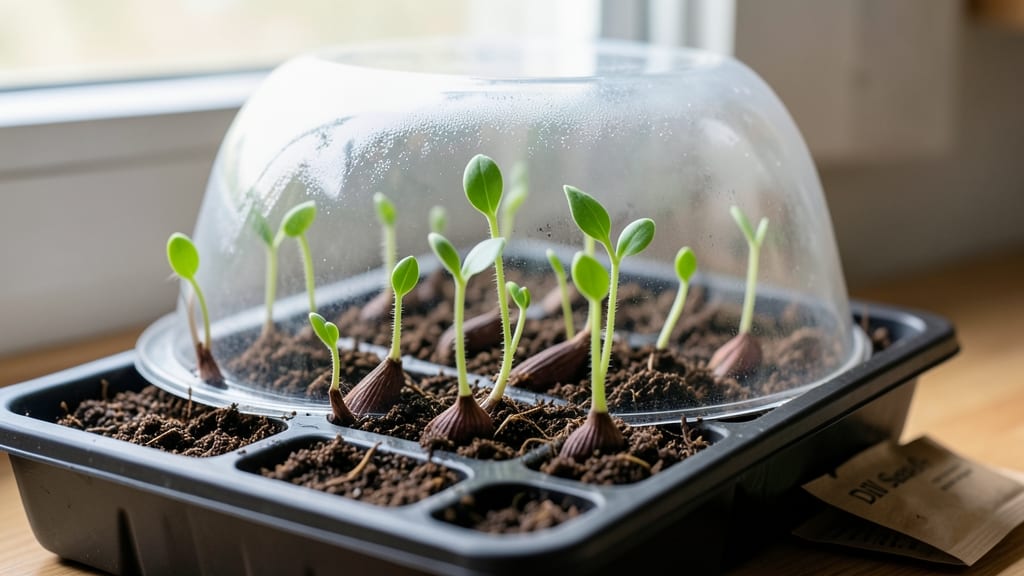
Fast dill seed sprouts are all about moisture control—when you nail the balance between damp and soggy, they pop up in 7 days. 🌱 I learned this the hard way after waiting three weeks for seeds that never broke through, only to realize they’d been suffocating in overwatered soil.
The secret isn’t just keeping things wet; it’s about creating the perfect cozy environment where seeds wake up eager to grow.
Start with a shallow tray or flat filled with light, crumbly seed-starting mix—never garden soil, which stays too dense. Scatter seeds ¼-inch deep (they’re tiny, so no need to bury them deep), then mist the surface until it’s damp like a wrung-out sponge.
Cover with a humidity dome or plastic wrap to trap warmth and moisture, but leave a tiny gap for airflow—this keeps mold at bay while encouraging speedy sprouts.
Within 3-5 days, you’ll spot those first green hooks pushing through the soil, and by day 7, you’ll have a lush mat of seedlings ready to transplant.
The key is consistency: check moisture daily with your finger—top up with a spray bottle when the surface feels dry to the touch. Too wet, and you’ll get mold; too dry, and germination stalls.
It’s a delicate dance, but once you master it, dill becomes one of the easiest herbs to grow.
Once those sprouts hit 2 inches tall, it’s time to thin them to 2 inches apart—this prevents overcrowding and gives each plant room to grow strong. If you’re growing indoors, move them to a sunny windowsill or under grow lights for 12-14 hours of light daily.
Outdoor seedlings can go into the garden after the last frost, but wait until nights stay above 50°F to avoid stunting their growth.
📚 In This Guide
- What you need
- Instructions
- Tips and common mistakes
- Wrapping up and next steps
What you need
- ● Dill seeds: 1–2 teaspoons (about 10–20 seeds, depending on desired yield). Opt for organic, non-GMO seeds for best results.
- ● Growing medium: Option 1: Sprouting jar (quart-sized with lid and mesh screen or sprouting lid).
- ● Option 2: Mason jar (quart or pint size) + sprouting lid (or a piece of fine mesh + rubber band).
- ● Option 3: Sprouting tray with drainage holes (for larger batches).
- ● Water: Filtered or distilled water (chlorine-free). 1–2 cups per batch.
- ● Fine-mesh strainer or colander: For rinsing (if not using a jar with a built-in screen).
- ● Paper towels or sprouting linen: 2–3 sheets (unbleached, food-safe).
- ○ Seedling heat mat (optional for faster germination in cooler climates).
- ● Grow light or sunny windowsill (12+ hours of indirect light daily).
- ● Spray bottle (for gentle watering if using a tray).
- ● Food processor or blender (if you plan to blend sprouts into smoothies or sauces).
- ● Humidity dome (to maintain moisture in trays).
- ● Clean workspace (easy to sanitize with vinegar or hot water).
- ● Patience and consistency (rinse 2x daily for 7 days!).
- ● Basic knowledge of seed safety (avoid sprouting seeds from nightshade plants like tomatoes).
How to germinate dill seeds in 7 days with perfect moisture
Here's the method I swear by—no more waiting weeks for dill to sprout.
🌱 Step 1: Soak Seeds Overnight for Faster Germination
Place ¼ cup dill seeds in a small bowl and cover with lukewarm water for 12 hours. This softens the outer seed coat and speeds up germination. I use a fine-mesh strainer to keep seeds contained while soaking. The water should feel warm to the touch but not hot—think bathwater temperature.
After soaking, drain the seeds thoroughly but gently. You want them moist, not dripping. I tap the strainer against the sink to remove excess water without crushing the seeds. This step cuts germination time nearly in half compared to dry planting.
💧 Step 2: Prepare Moisture-Retentive Growing Medium
Fill a seed tray or small pots with moistened seed-starting mix until it reaches ½ inch from the rim. Press lightly so the surface is firm but not compacted. The key here is keeping the mix damp but not soggy—think of a wrung-out sponge. I use a spray bottle to mist the surface until it's uniformly damp to the touch.
Make small indentations about ¼ inch deep and ½ inch apart using your finger or a pencil. These tiny holes help maintain consistent moisture around each seed. The goal is to create a cozy, humid environment where seeds can germinate without drying out.
🌱 Step 3: Plant Seeds and Maintain Consistent Moisture
Place 1-2 soaked seeds in each indentation, then cover lightly with a thin layer of the same moistened mix. Press gently to ensure good seed-to-soil contact. I use a small spoon to avoid disturbing nearby seeds. The cover should be so light you can barely see the seeds underneath.
Cover the tray with a clear plastic dome or wrap it with plastic wrap to create a greenhouse effect. Place it in a warm spot—70-75°F is ideal—like on top of your fridge or near a sunny window. Check daily and mist the soil surface if it feels dry to the touch. You'll see tiny sprouts in 3-5 days.
☀️ Step 4: Provide Light and Ventilate Seedlings
Once sprouts appear, remove the plastic cover immediately to prevent fungal growth. Place the tray under bright, indirect light for 12-14 hours daily. A south-facing window works, but supplement with a grow light if natural light is weak. You'll know your seedlings are getting enough light when they stand upright and have vibrant green leaves.
Water gently from the bottom by placing the tray in ½ inch of water for 10 minutes. This encourages roots to grow downward. Avoid overhead watering—it can wash away tiny seedlings or cause disease. Keep the soil consistently moist but never waterlogged.
⏰ Step 5: Thin and Transplant at the Right Time
When seedlings reach 2 inches tall and have 2-3 true leaves, thin to the strongest plant per cell or pot. Use small scissors to snip unwanted seedlings at soil level. This prevents competition for nutrients and gives remaining plants room to grow. I always save the thinned seedlings for cooking—fresh dill is delicious in soups!
Transplant to individual pots or garden beds when seedlings are 3-4 inches tall and have 4-5 leaves. Harden off by placing them outside in partial shade for 1 hour daily, gradually increasing exposure over 5-7 days. Plant in full sun once hardened off, spacing plants 12-18 inches apart.
Tips & tricks for perfect dill seed sprouts
Here's what nobody tells you about getting every seed to sprout in record time.
Soaking Secret: The 12-hour soak is non-negotiable for dill seeds—they have tough outer shells that need this exact time to soften properly. I've tried shorter soaks and ended up with patchy germination. After draining, I place the strainer over a paper towel to catch any excess water while letting seeds air-dry for 5 minutes. This prevents soggy seeds that can develop mold.
Temperature Matters: That 70-75°F range is your sweet spot—any cooler and germination slows dramatically. If your kitchen runs cold, place the tray on top of your fridge or near a sunny window. I've seen germination drop by 40% when seeds sat in a 65°F room. Pro tip: Use a small thermometer to monitor temperature if you're unsure.
Lighting Strategy: The 12-14 hours of bright, indirect light is crucial for preventing leggy seedlings. I place mine under a grow light on a timer rather than relying on natural light, which can be inconsistent. If using a window, rotate the tray daily so all seedlings get equal exposure. You'll notice seedlings leaning toward light if they're not getting enough—this is your cue to adjust.
Watering Wisdom: That 10-minute bottom-watering method is a game-changer. I fill a shallow tray with ½ inch of water and let the seed tray sit for exactly 10 minutes, then drain completely. This prevents waterlogging while ensuring roots get the moisture they need. Overhead watering can dislodge tiny seedlings, so resist the urge to mist from above during the critical first week.
Pro Tips for Dill Seed Sprouts
- Here's what nobody tells you about getting every seed to sprout in record time.
- Soaking Secret: The 12-hour soak is non-negotiable for dill seeds—they have tough outer shells that need this exact t...
- Temperature Matters: That 70-75°F range is your sweet spot—any cooler and germination slows dramatically. If your kit...
Frequently asked questions
Got questions about growing dill seed sprouts? You’re not alone! Here are answers to the most common concerns—from timing to troubleshooting—so you can sprout like a pro.
How long do dill seeds take to sprout, and why is my batch taking longer?
Dill seeds typically sprout in 5–7 days with ideal conditions (moisture, warmth, and darkness). If yours are slower, check for dry seeds (soak in warm water for 4–6 hours first) or low humidity. Ensure your sprouting jar stays consistently damp—not soggy—and rinse 2x daily. Cold temps (<50°F) or old seeds can also delay germination.
Can I speed up germination for dill seed sprouts?
Yes! Pre-soak seeds for 4–6 hours in warm water to kickstart hydration. Use a sprouting lid or mesh screen to retain moisture while allowing airflow. Place your jar in a warm spot (70–75°F), like near a sunny window (but not direct light yet). Avoid overcrowding—seeds need space to expand. With these tweaks, you might see sprouts in 3–5 days!
What can I do if my dill sprouts turn yellow or moldy?
Yellowing or mold (fuzzy white/green growth) means too much moisture or poor airflow. Immediately rinse sprouts with cold water, then transfer to a clean, dry mesh bag or colander to air out for 2–4 hours. Discard any moldy sprouts—they’re unsafe to eat. Going forward, rinse 2x daily and avoid leaving water in the jar. A fan on low can also help circulation.
Are dill seed sprouts safe to eat raw, and how should I store them?
Dill sprouts are safe and delicious raw—add them to salads, sandwiches, or yogurt for a fresh, tangy kick. To store, rinse thoroughly, pat dry, and keep in an airtight container in the fridge for 3–5 days. For longer shelf life (up to 10 days), wrap them in a damp paper towel and store in a sealed bag. Never store in direct sunlight—it speeds up spoilage.
What’s a good alternative if dill seeds won’t sprout for me?
If dill proves tricky, try these fast-sprouting alternatives:
- Radish sprouts (3–4 days)
- Alfalfa sprouts (4–5 days)
- Broccoli sprouts (3–5 days)
- Mustard greens (2–3 days)
Wrapping up and next steps
Growing dill seed sprouts in just 7 days is not only possible—it’s rewarding! With the right moisture control and a little patience, you’ll soon enjoy fresh, nutrient-packed greens for your lawn or kitchen. Start small, experiment with your setup, and watch those sprouts thrive!
Ready to take the next step? Try planting a small batch today—you’ll be harvesting in no time! 🌱 For even more tips, check out our detailed guide on sprouting herbs.