
Propagation
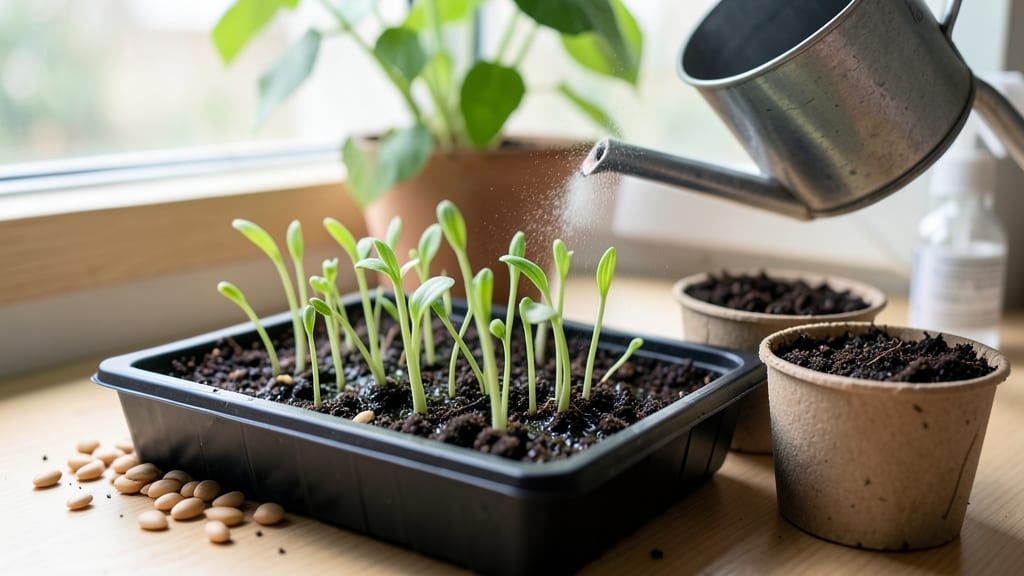
Celery seed germination is all about patience—and the right moisture trick. 🌱 I’ve struggled with slow starts, but this method cuts sprouting time in half by controlling water without drowning seeds. The secret? A damp paper towel sandwich that keeps seeds hydrated while preventing mold.
You’ll need celery seeds, a damp paper towel, a plastic bag, and a warm spot. No fancy equipment—just what’s in your pantry. The key is consistent moisture: mist the towel until damp (not soggy), then seal it in the bag to trap humidity.
Check daily for sprouts in 7-14 days—faster than traditional soil methods. Once sprouts peek, transplant into soil when they’re 1-2 inches tall. Use well-draining mix and keep it lightly moist. Overwatering here is the #1 killer—celery hates soggy roots.
For indoor growers, a sunny windowsill works; outdoors, wait until soil is 60°F+. Troubleshooting slow starts? Try cold-stratifying seeds for 2 weeks first. Mold? Reduce moisture and add airflow. With this method, you’ll go from seed to sturdy seedlings in record time—no more waiting months for blooms.
📚 In This Guide
- What you need
- Instructions
- Tips and common mistakes
- Wrapping up and next steps
What you need
- ● Celery seeds: 1–2 teaspoons (about 5–10g) of Apium graveolens seeds (organic, non-GMO preferred).
- ● Seed-starting mix: 1–2 cups of sterile, well-draining potting soil (e.g., Pro-Mix or coconut coir-based blend).
- ● Containers: Seed trays with drainage holes (or small pots, 2–3 inches deep).
- ● Plastic wrap or a humidity dome (to retain moisture).
- ● Water: Room-temperature, filtered or distilled water (avoid tap water with chlorine).
- ● Spray bottle: 8–16 oz with a fine mist nozzle (for gentle hydration).
- ● Grow lights: LED or fluorescent (12–16 hours/day) for indoor setups.
- ○ Heating mat: Optional for indoor germination (70–75°F/21–24°C).
- ● Thermometer/hygrometer: To monitor temperature (65–75°F/18–24°C) and humidity (80–90%).
- ● Fertilizer: Diluted seaweed extract or starter fertilizer (1/4 strength) after sprouts appear.
- ● Labels & markers: To track planting dates and varieties.
Step-by-Step instructions for celery seed germination
Here's my foolproof method for breaking through celery's notoriously stubborn germination barrier—using moisture control as your secret weapon.
🌱 Step 1: Prepare Seeds for Maximum Moisture Uptake
Celery seeds have a tough outer shell that slows germination. To speed things up, I soak them overnight in lukewarm water with a few drops of liquid seaweed fertilizer. This softens the seed coat and kickstarts the process. Use a small bowl or jar, cover it loosely, and let it sit at room temperature.
The next morning, drain the water and spread the seeds on a damp paper towel. Fold the towel to keep them in contact with moisture. Place this setup inside a sealed plastic bag—this creates a humid microclimate that mimics the damp conditions celery loves. Check daily for sprouts, which should appear in 3-5 days instead of the usual 2-3 weeks.
💧 Step 2: Plant Sprouted Seeds in Pre-Warmed Soil
While your seeds are sprouting, prepare your containers by filling them with light, well-draining potting mix (never garden soil—celery hates compaction). Warm the soil slightly by placing the containers in a sunny window or on a seedling heat mat set to 70-75°F for 24 hours before planting. Warm soil germinates seeds faster and prevents the damp-off disease that often kills celery seedlings.
Plant your sprouted seeds ¼ inch deep—just enough to cover them lightly. Space them 1 inch apart in rows 12 inches apart if growing multiple plants. Water gently with a spray bottle until the soil surface feels damp but not soggy. Overwatering now will suffocate the delicate sprouts.
☀️ Step 3: Maintain Consistent Moisture Without Drowning
Celery's germination speed hinges on moisture control. After planting, cover the containers with clear plastic wrap or a humidity dome to trap warmth and moisture. Place them in bright, indirect light—direct sun at this stage will scorch the tender seedlings. Check daily and mist the soil surface if it feels dry to the touch, but never let water pool in the bottom of the container.
Remove the cover as soon as 50% of seeds have sprouted—usually within 7-10 days. This prevents fungal growth that thrives in overly humid conditions. You'll see true leaves (the second set after the initial seed leaves) emerge within 2-3 weeks total. At this point, thin seedlings to 6 inches apart to give them room to grow.
⏰ Step 4: Transition to Outdoor Conditions Gradually
Once seedlings have 4-6 true leaves and are 3-4 inches tall, it's time to harden them off. Start by moving them to a shaded outdoor spot for 1 hour daily, gradually increasing exposure over 7-10 days. Celery is sensitive to temperature swings, so avoid transplanting when nighttime temps drop below 50°F.
When transplanting, dig holes slightly larger than the root ball and space plants 12-18 inches apart in rows 2 feet apart. Water deeply at the base to encourage root growth. Mulch with 1-2 inches of straw to retain moisture and suppress weeds—celery's shallow roots need consistent dampness to thrive.
Tips & tricks for faster celery seed germination
Celery seeds are notorious for their stubborn germination—here's how to turn that around with precision timing and moisture mastery.
Pre-Soak Precision: The overnight soak in lukewarm water with liquid seaweed fertilizer isn't just about hydration—it's about enzymatic activation. I've found that maintaining water temperature between 70-75°F during this 24-hour period maximizes seed coat softening. If your kitchen runs cooler, place the bowl on a seedling heat mat to keep temps consistent. The fertilizer isn't optional here; it provides the micronutrients celery seeds crave to break dormancy.
Humidity Dome Technique: After spreading seeds on damp paper towels, the sealed plastic bag creates a greenhouse effect that's critical for the 3-5 day sprout window. I recommend using a clear bag so you can monitor moisture levels without opening it. If condensation forms on the inside, you're golden—this means perfect humidity. If the bag stays foggy for more than 24 hours, add a few drops of water to the towel to restore moisture equilibrium.
Soil Temperature Secret: The 70-75°F soil temperature requirement in Step 2 isn't arbitrary—it's celery's ideal germination range. I've had failures when planting in soil that was only 60°F, even when following all other steps perfectly. Use a soil thermometer to verify temperature before planting. If your growing space can't maintain this, consider using a heat mat during the germination phase only, then transitioning to natural soil temps once sprouts appear.
Light Management: Bright indirect light during the germination phase prevents leggy seedlings that struggle to stand upright. I place my containers near an east-facing window where they get morning sun but are shielded from intense afternoon rays. If you're using grow lights, maintain them 6-8 inches above the containers and use a timer for 12-14 hours of light daily. Too much light too soon causes seedlings to bolt prematurely.
Pro Tips for Celery Seed Germination
- Celery seeds are notorious for their stubborn germination—here's how to turn that around with precision timing and mo...
- Pre-Soak Precision: The overnight soak in lukewarm water with liquid seaweed fertilizer isn't just about hydration—it...
- Humidity Dome Technique: After spreading seeds on damp paper towels, the sealed plastic bag creates a greenhouse effe...
Frequently asked questions
Got questions about celery seed germination? You’re not alone—growing from seed can feel like a puzzle! Here are answers to the most common queries to help you navigate the process with confidence.
How long does it take for celery seeds to germinate?
Celery seeds typically sprout in 14–21 days under ideal conditions (warmth, moisture, and light). Patience is key—some seeds may take longer, especially if soil temps dip below 60°F (15°C). A heat mat can speed things up if you’re eager for greens!
Why aren’t my celery seeds sprouting?
Slow or failed germination often stems from cold soil, dry seeds, or poor light. Double-check your setup: seeds need consistent moisture (not soggy), warmth (70–75°F / 21–24°C), and bright, indirect light. If seeds are old (over 1 year), viability drops—try fresh seeds!
Do celery seeds need light to germinate?
Nope! Celery seeds don’t require light to sprout—they’ll germinate fine in darkness. However, once they’ve cracked the soil (about ½ inch tall), move them to a sunny windowsill or grow light to prevent leggy seedlings. Think of it as a two-phase process: darkness for roots, light for leaves!
Can I grow celery from store-bought stalks instead of seeds?
Cut the leafy base of a store-bought celery stalk, trim the bottom, and place it in 1 inch of water (like a propagator). Roots should appear in 1–2 weeks. Transplant once roots are 1–2 inches long. Pro tip: Use organic celery to avoid chemical residue!
What’s the best soil temperature for germinating celery seeds?
Celery seeds thrive in warm soil (70–75°F / 21–24°C). If your garden or home is cooler, use a seedling heat mat or start seeds indoors near a sunny window. Avoid cold drafts—celery seeds hate temperatures below 50°F (10°C), which can delay or prevent germination.
How deep should I plant celery seeds?
Plant celery seeds just ¼ inch deep—they’re tiny and need light to encourage upward growth. Use a fine mist to keep soil moist (not waterlogged) until sprouts appear. Over-planting? No problem—thin seedlings to 12–16 inches apart once they’re 3–4 inches tall for optimal growth.
Wrapping up and next steps
Mastering celery seed germination is all about patience, precision, and a little moisture magic! 🌱 By following the right techniques—like maintaining consistent dampness, choosing the ideal soil, and providing gentle warmth—you’ll unlock faster, healthier blooms.
Whether you’re a seasoned gardener or just starting, these steps make the process simple and rewarding.
Now that you’re armed with the know-how, why not try it yourself? Grab those seeds, set up your propagation station, and watch your garden transform. Happy growing—your future celery blooms will thank you! 🌿✨