
Lawn
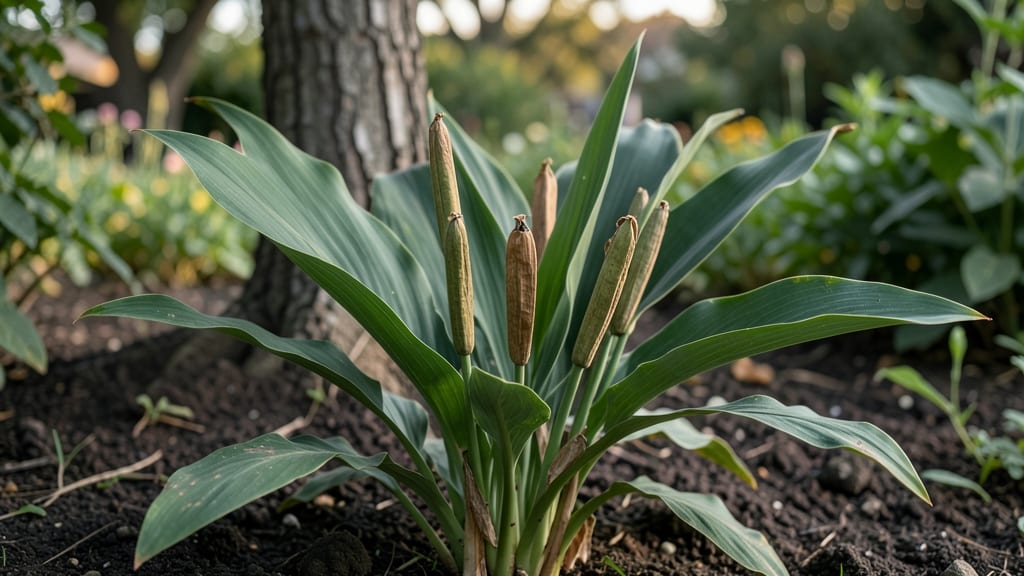
Those plump, papery canna lily seed pods hold the secret to multiplying your bold tropical blooms for free. 🌿 I’ve collected and germinated hundreds of them, and the results—vibrant foliage and fiery flowers—are worth the patience.
The key is knowing when to harvest, how to crack them open, and exactly when to plant those tiny seeds for the best success.
You’ll need just a few simple tools: sharp scissors, a bowl of water, and a warm spot indoors or a protected outdoor bed. The seeds themselves are delicate, so timing matters—harvest pods when they turn brown and papery, then soak them overnight to loosen the seeds.
Most gardeners rush this step, but taking 10 extra minutes makes all the difference in germination rates.
By mid-spring, you’ll watch those first green shoots push through the soil, signaling your patience paid off. The seedlings grow fast—expect 6-inch plants in just 8-10 weeks—with thick, glossy leaves that scream “tropical.”
They’ll bloom their first year if you give them warmth, consistent moisture, and a spot with at least 6 hours of sunlight daily.
Even in cooler climates, canna lilies thrive as annuals or overwintered tubers, so don’t let the “tropical” label fool you. With the right timing and care, you’ll have a border full of these showstoppers in no time—without spending a dime on new plants.
📚 In This Guide
- What you need
- Instructions
- Tips and common mistakes
- Wrapping up and next steps
What you need
- ● Canna lily seed pods: Fresh, mature pods (harvested when they turn brown and dry). Aim for 3–5 pods per batch.
- ● Potting mix: Well-draining, organic mix (e.g., 50% peat moss or coco coir + 50% perlite or vermiculite). 1–2 gallons per pot.
- ● Containers: Pots with drainage holes (6–8 inches in diameter). 1–2 pots per batch.
- ● Watering can or spray bottle: For gentle hydration.
- ● Scissors or pruning shears: To open seed pods carefully.
- ○ Plastic wrap or humidity dome: To retain moisture (optional but helpful for germination).
- ● Grow lights or sunny windowsill: Bright, indirect light (6+ hours daily).
- ● Seed-starting trays: For organized germination (if sowing multiple pods).
- ● Heat mat: Keeps soil 75–85°F for faster germination (especially in cooler climates).
- ● Fertilizer (low-nitrogen): Like fish emulsion or worm castings (diluted to half-strength).
- ● Label markers: To track planting dates and varieties.
- ● Garden gloves: Protects hands when handling pods or soil.
How to germinate canna lily seed pods for stunning tropical blooms
Here's the straightforward method I use to coax those vibrant canna lily blooms from tiny seed pods.
🌱 Step 1: Harvest and Prepare the Seed Pods
Collect mature seed pods when they turn brown and begin splitting open naturally. The pods should feel dry and papery to the touch. I like to harvest them in late summer when they're fully ripe but before they've released seeds on their own.
Open the pods carefully with your fingers or a small knife to release the seeds. You'll find 1-3 large, dark seeds inside each pod. These seeds are surprisingly heavy for their size—don't be surprised if they sink when you try to float-test them. Remove any seeds that look shriveled or damaged.
💧 Step 2: Soak Seeds for Faster Germination
Place the seeds in a bowl of lukewarm water and let them soak for 24-48 hours. This softens the tough outer coating and speeds up germination. I like to add a drop of liquid seaweed fertilizer to the water for extra nutrients during this process.
After soaking, the seeds should feel slightly softer when pressed between your fingers. Don't worry if they float—they're still viable. Once soaked, remove them from the water and let them dry slightly on a paper towel for about 30 minutes before planting.
☀️ Step 3: Plant Seeds in Warm, Moist Soil
Fill small pots with a mix of 50% peat moss and 50% perlite to create a light, airy medium. Canna lily seeds need warmth to germinate, so place the pots in a location where the soil temperature stays between 75-85°F. A seedling heat mat works wonders for this.
Plant the seeds about 1 inch deep—they're large enough that you won't need to plant multiple seeds per pot. Water gently until the soil feels evenly moist but not soggy. You'll know it's right when water runs through the bottom of the pot without pooling.
🌿 Step 4: Provide Consistent Warmth and Humidity
Cover the pots with clear plastic wrap or a humidity dome to maintain moisture and warmth. Canna lily seeds can take 2-4 weeks to germinate, so patience is key. Keep the soil consistently moist during this time—you'll know it's right when the top inch feels damp to the touch.
Place the pots in bright, indirect light. Avoid direct sunlight during germination as it can overheat the seeds. You'll see the first signs of germination when the seed coat splits open and a small sprout emerges. This is your signal to remove the plastic cover immediately.
⏰ Step 5: Transition to Bright Light and Care for Seedlings
Once the seedlings emerge, move them to a location with bright, indirect light for the first week. After that, gradually introduce them to morning sun to avoid leaf scorch. You'll notice the leaves developing a deep green color as they grow stronger.
Keep the soil consistently moist but not waterlogged. Canna lily seedlings are sensitive to root rot, so always ensure the pots have drainage holes. Fertilize lightly with a balanced liquid fertilizer once the seedlings develop their second set of true leaves.
Tips & tricks for perfect canna lily germination
Here's what nobody tells you about getting those tropical blooms started right.
The Harvest Timing: Those seed pods are ready when they turn a deep, papery brown and begin splitting open naturally. If you harvest too early, the seeds won't be fully mature. I've learned the hard way that waiting until late summer—when the pods feel dry but haven't released seeds yet—gives you the best germination rates. The seeds should feel surprisingly heavy for their size, almost like little rocks—this is a good sign they're ready.
Soaking Strategy: The 24-48 hour soak isn't just about hydration—it's about breaking down that tough outer coating. I add a drop of liquid seaweed fertilizer to the lukewarm water because it gives those seeds a little nutrient boost right from the start. After soaking, let them dry on a paper towel for about 30 minutes before planting. This helps prevent rot later on, and you'll notice the seeds feel slightly softer when pressed between your fingers.
Soil Temperature Matters: Canna lily seeds need warmth to germinate, and 75-85°F is the sweet spot. If your home stays cooler than this, invest in a seedling heat mat—it's a game-changer for tropical plants. I place my pots on a heat mat under my grow lights, and it cuts germination time by nearly half. The soil should feel warm to the touch, not just room temperature. You can also try placing pots on top of your refrigerator if you don't have a heat mat.
Germination Patience: Those 2-4 weeks can feel like forever, but trust me—it's worth the wait. The key is consistency. Keep the soil moist (not soggy) and maintain that humidity dome. I check moisture by sticking my finger about an inch into the soil—it should feel damp but not wet. Once you see that first split in the seed coat, remove the plastic immediately to prevent mold. This is your signal that nature's working its magic.
Pro Tips for Canna Lily Seed Pods
- Here's what nobody tells you about getting those tropical blooms started right.
- The Harvest Timing: Those seed pods are ready when they turn a deep, papery brown and begin splitting open naturally....
- Soaking Strategy: The 24-48 hour soak isn't just about hydration—it's about breaking down that tough outer coating. I...
Frequently asked questions
Got questions about growing canna lily seed pods? You’re not alone! Here are some of the most common queries—and their answers—to help you cultivate those stunning tropical blooms with confidence.
How long do canna lily seed pods take to germinate?
Germination typically takes 2–4 weeks in warm, moist conditions (70–80°F). Patience is key—some seeds may sprout faster, while others need extra time. Keep the soil consistently damp (not soggy) and avoid moving the pot until you see tiny shoots. If nothing emerges after 6 weeks, the seeds may be dormant or non-viable.
When is the best time to plant canna lily seed pods?
Start seeds indoors 8–12 weeks before your last frost (or in spring if you live in a warm climate). Canna lilies thrive in heat, so avoid planting outdoors until soil temps reach at least 60°F. Hardening off seedlings for 1–2 weeks before transplanting helps them adjust to outdoor conditions.
Can I grow canna lilies from seed pods instead of buying tubers?
Seed pods are a budget-friendly and rewarding alternative to tubers. However, seeds may not always produce plants identical to the parent (unlike tubers, which guarantee consistent blooms). For guaranteed results, start with seeds and save tubers from mature plants for future growth.
Why aren’t my canna lily seeds sprouting? Troubleshooting tips
If your seeds aren’t germinating, check these common issues:
- Cold soil: Canna seeds need warmth—try a heat mat or move pots to a sunny windowsill.
- Dry soil: Keep the growing medium moist but not waterlogged (a spray bottle works well).
- Old seeds: Fresh seeds germinate better; store-bought pods may be 1–2 years old.
- Low viability: Some seed pods produce weak or no seeds—try soaking them in warm water overnight before planting.
How do I know if my canna lily seed pods are viable?
Healthy seed pods should feel firm and plump, not shriveled or hollow. Gently squeeze—if you hear a rattling sound, seeds are likely inside. For extra assurance, cut open a pod: viable seeds are dark, dense, and slightly sticky. If pods are mushy or moldy, discard them to avoid rot.
Wrapping up and next steps
Canna lily seed pods are your gateway to vibrant, tropical blooms that bring life to any garden! 🌿 With the right patience, preparation, and care, you can transform those tiny seeds into stunning, sun-loving plants.
Whether you’re a seasoned gardener or just starting out, the key is consistency—keep those pods moist, warm, and protected as they sprout.
Ready to dive in? Start small—try a few seed pods in pots first before planting them in your garden. Watch them grow, and soon, you’ll be rewarded with bold, show-stopping flowers that’ll make your outdoor space the talk of the neighborhood! 🌸