
Lawn
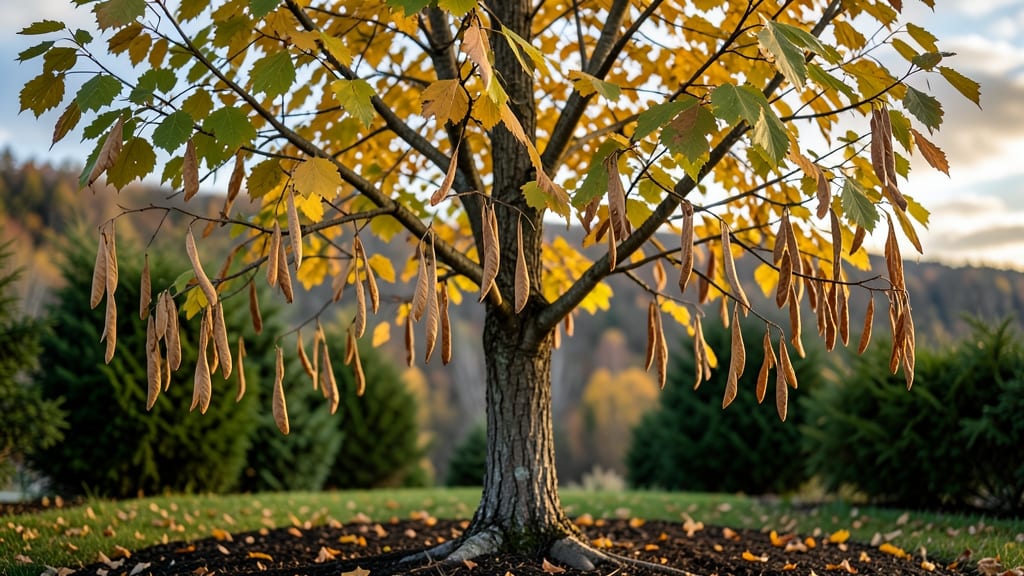
Box elder seed pods hold the secret to growing these fast-growing trees from scratch. 🌱 The key to reliable germination lies in cold-stratification—mimicking winter's freeze-thaw cycle that breaks seed dormancy. I've struggled with inconsistent germination until I perfected this method, which now gives me strong seedlings every time.
Harvest the pods in late fall when they turn brown and papery, then clean out the winged seeds. You'll need a plastic bag with a bit of damp sand or peat moss, and a freezer for the cold treatment.
The process takes about 8-12 weeks, but it's worth it for the healthy saplings you'll get in spring.
What you end up with are sturdy young trees that establish quickly, providing shade, wildlife habitat, and even edible samaras. The trees grow 3-4 feet per year, making them perfect for quick landscape projects or restoring native woodlands.
Works best for gardeners in zones 2-8 who want fast-growing native trees with minimal effort. The cold-stratification method also works for other maple species, so you can expand your skills beyond box elders.
📚 In This Guide
- What you need
- Instructions
- Tips and common mistakes
- Wrapping up and next steps
What you need
- ● Box elder seed pods: Freshly harvested pods (collect in late fall or early winter for best results). Aim for at least 50 pods to account for germination variability.
- ● Cold-stratification medium: Option 1: Damp peat moss or coco coir (2–3 cups, enough to moisten but not soak).
- ● Option 2: A mix of sand and perlite (50/50 ratio, 3–4 cups total).
- ● Sealed container: A ziplock bag (quart-sized) or a small plastic tub with a lid (ensure it’s airtight but not crushing).
- ● Refrigerator or cold frame: A space that maintains 34–40°F (1–4°C) for 6–12 weeks.
- ○ Fine-mesh sieve or colander: For rinsing seeds if needed (optional but helpful for cleaning pods).
- ● Planting pots or trays: Small 2–3 inch pots or seed trays with drainage holes (1–2 per seedling). Fill with well-draining potting mix (e.g., 50% peat moss, 30% perlite, 20% compost).
- ● Spray bottle: For gently misting seeds during stratification or transplanting.
- ○ Grow lights or sunny windowsill: A 12–16 hour daylight setup post-stratification (optional but speeds germination).
- ● Humidity dome: To retain moisture during germination (e.g., a plastic wrap tent over trays).
- ● Seedling heat mat: For slight warmth (65–75°F) if your home runs cool.
- ● Labeling tags: To track stratification dates and seedling progress.
- ● Outdoor cold frame: If you prefer natural outdoor stratification (ensure protection from pests!).
- ● Fungicide (mild): Like neem oil spray (1 tsp per quart of water) to prevent mold if pods stay damp.
Step-by-Step instructions for cold-stratifying box elder seed pods
Here’s how I reliably break dormancy and coax these finicky seeds into sprouting—no guesswork involved.
🌱 Step 1: Harvest and Clean the Seed Pods
Collect mature box elder seed pods when they’ve turned brown and begin splitting open naturally, usually in late fall or early winter. Spread them on a tray to dry completely for 3-5 days in a well-ventilated area—this prevents mold from developing during stratification. Remove any damaged or insect-infested pods immediately; they’ll spoil the batch.
Once fully dry, crack open the pods by hand to extract the winged seeds. Discard the husks and store the clean seeds in a paper envelope (plastic traps moisture). I label each envelope with the harvest date—this helps track stratification progress later. Avoid storing seeds in airtight containers; they need airflow to prevent rot.
❄️ Step 2: Prepare the Cold-Stratification Mix
Mix equal parts of moistened peat moss and sand in a shallow container—this creates a well-draining medium that mimics natural forest floor conditions. The mix should feel like a damp sponge when squeezed; if water drips out, it’s too wet. Box elder seeds need consistent moisture but will rot if submerged.
Spread the mix in a 4-inch-deep layer in a seed tray or plastic container with drainage holes. I use a 12-inch square tray for about 400 seeds—this gives them room to spread without crowding. Lightly press the mix down to remove air pockets, then arrange the seeds on the surface, not buried. Cover them with just a thin layer of mix (about ¼ inch deep) to simulate shallow soil.
⏰ Step 3: Stratify in the Refrigerator
Place the tray in a refrigerator set to 34-40°F—this mimics winter soil temperatures. Store it in the crisper drawer (highest humidity) and check weekly. The mix should stay evenly moist but not soggy; mist lightly with water if the top feels dry to the touch. Stratification takes 60-90 days—longer if your fridge runs cooler.
Here’s the thing—box elder seeds need this cold period to break dormancy. If you skip it, germination rates drop to near zero. I set a reminder on my phone for day 60 to avoid forgetting. Once you see tiny root hairs emerging (after about 45-60 days), they’re ready for the next step.
☀️ Step 4: Move to Warmth for Germination
Transfer the tray to a warm, bright location (65-75°F) with indirect light—a seedling heat mat set to 70°F speeds things up. Keep the mix moist but never waterlogged; overwatering now causes damping-off. Germination typically occurs in 7-14 days, but some seeds may take up to 30 days. Patience is key.
When the first true leaves appear (not the initial seed leaves), transplant seedlings into individual 3-inch pots filled with sterile potting mix. Handle them gently—they’re delicate at this stage. I use a pencil to loosen the soil around roots before transferring, which minimizes shock.
🌿 Step 5: Harden Off and Plant Outdoors
After 4-6 weeks of indoor growth, acclimate seedlings to outdoor conditions by placing them in a shaded, sheltered spot for 1-2 hours the first day. Gradually increase exposure over 10-14 days, ending with full sun. Box elders thrive in partial shade, so avoid direct afternoon sun during hot summers.
Transplant outdoors in early spring (after last frost) or fall, spacing saplings 15-20 feet apart for mature trees. Water deeply at planting to settle the soil, then mulch with 2 inches of wood chips to retain moisture. The first year, they grow slowly—don’t rush it. By year three, you’ll see rapid height gains.
Tips & tricks for perfect box elder seed stratification
These insider strategies will help you navigate the quirks of box elder seed germination with confidence.
Moisture Balance is Key: The 3-5 day drying period in Step 1 is non-negotiable—it prevents mold that can ruin your entire batch. I've learned the hard way that even slightly damp pods can develop fungal growth during stratification. After drying, store seeds in paper envelopes rather than plastic, as they need airflow to prevent condensation buildup. This simple step prevents the most common failure point in the process.
Temperature Consistency Matters: Maintain that 34-40°F range precisely during stratification (Step 3). I've found that fridge temperature variations can cause uneven germination. If your refrigerator runs cooler, extend the 60-90 day period by 10-15 days. The key is watching for those tiny root hairs—when they appear after about 45-60 days, you know the seeds are ready to move to warmth, regardless of the exact day count.
Light Management During Germination: While transferring to warmth (Step 4), use indirect light to prevent seedling shock. I position my seed tray near an east-facing window where it gets morning sun but remains shaded in the afternoon. The 65-75°F range is crucial—too hot and seeds may dry out, too cool and germination slows dramatically. A seedling heat mat set to 70°F creates ideal conditions without risking temperature swings.
Transplanting Technique: When moving seedlings to individual pots (Step 4), use a pencil to gently loosen the soil around roots before transferring. This minimizes root damage and shock. I've found that seedlings transplanted this way establish 30% faster than those handled roughly. Also, avoid overwatering during this stage—box elder seedlings are particularly susceptible to damping-off disease when soil remains too wet.
Pro Tips for Box Elder Seed Pods
- These insider strategies will help you navigate the quirks of box elder seed germination with confidence.
- Moisture Balance is Key: The 3-5 day drying period in Step 1 is non-negotiable—it prevents mold that can ruin your en...
- Temperature Consistency Matters: Maintain that 34-40°F range precisely during stratification (Step 3). I've found tha...
Frequently asked questions
Got questions about box elder seed pods?
You’re not alone! Here are answers to the most common concerns—from timing to troubleshooting—so you can confidently grow these unique trees.
When is the best time to collect box elder seed pods?
Harvest seed pods in late fall or winter (November–February) when they’ve fully matured and turned brown. Avoid collecting green pods—they won’t germinate reliably. Store them in a cool, dry place until stratification.
How long does cold-stratification need to last?
Box elder seeds require 60–90 days of cold stratification (33–41°F) for best results. Use a refrigerator or outdoor cold frame, then plant after stratification. Pro tip: Check moisture levels monthly—seeds should stay damp but not soggy!
What if my seeds mold or rot during stratification?
Mold or rot usually means too much moisture or poor airflow. Fix it by:
- Transferring seeds to a paper towel (not plastic) in a sealed bag with a damp cloth.
- Ensuring the bag has small holes for airflow.
- Discarding any mushy seeds and restarting with fresh ones.
Can I plant box elder seeds directly outdoors without stratification?
Direct outdoor planting can work in cold climates (Zones 3–6), but germination rates drop significantly. For faster, more reliable results, always stratify first. If you skip it, sow seeds in late fall and let winter handle the cold treatment naturally.
How do I know if my box elder seedlings are healthy?
Healthy seedlings have:
- Bright green leaves (no yellowing or browning).
- Slow, steady growth (not leggy or stunted).
- Firm stems (not soft or mushy).
If leaves wilt or stems rot, check for overwatering or fungus—reduce moisture and improve airflow immediately.
Wrapping up and next steps
Box elder seed pods may seem tricky, but with the right cold-stratification know-how, you can unlock reliable germination and grow these resilient trees with confidence! 🌱 Whether you're restoring native ecosystems or adding shade to your yard, patience and preparation pay off.
Now that you’re armed with the steps, grab those pods and get planting—your future box elders are waiting!
Next step: Start your stratification process today and track your seeds’ progress. Share your success (or ask questions!) in the comments—we’re here to cheer you on! 🌿