
Propagation
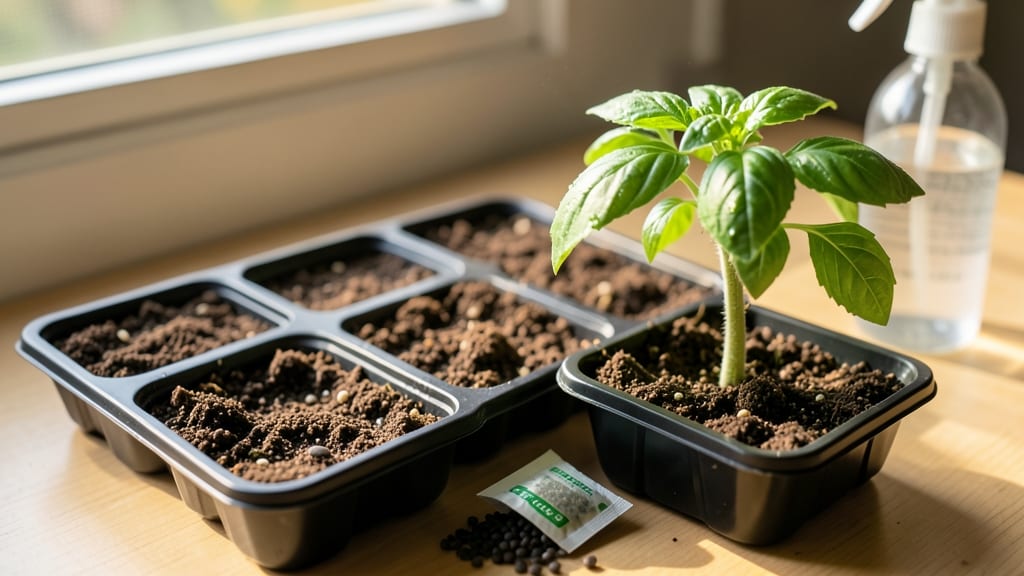
Growing basil from seed indoors gives you fresh, fragrant leaves in just 10-14 days—no store-bought plants required. 🌱 I’ve started dozens of batches, and the secret lies in keeping the soil warm, the light bright, and the patience minimal.
Most people overcomplicate it, but this method is simple enough for a first-timer to succeed.
The only supplies you truly need are a shallow tray or small pots, seed-starting mix, and a heat source (like a seed mat or sunny windowsill). Basil seeds germinate quickly when soil stays between 70-80°F, so a warm spot is non-negotiable.
Mist the soil lightly after planting, then keep it damp—not soggy—and you’ll see sprouts in less than two weeks.
Once those first green leaves appear, you’ll want to move seedlings to a south-facing window or under grow lights for 6-8 hours of light daily. Leggy stems? That’s just basil stretching for sunlight—pinch them back to encourage bushier growth.
With proper care, you’ll harvest your first leaves in 4-6 weeks, and the plants will keep producing all season.
This method works year-round, whether you’re growing on a kitchen counter or a dedicated grow shelf. The key is consistency: water when the top inch feels dry, rotate plants weekly for even growth, and avoid overcrowding.
Before you know it, you’ll have a basil plant that rivals the grocery store—except this one’s pesticide-free and always within arm’s reach.
📚 In This Guide
- What you need
- Instructions
- Tips and common mistakes
- Wrapping up and next steps
What you need
- ● Basil seeds: 1 packet (50–100 seeds) of Ocimum basilicum (Sweet Basil, Genovese, or Thai varieties work well).
- ● Seed-starting mix: 1–2 cups of sterile, seedling-specific soil (avoid garden soil—it’s too dense!).
- ● Containers: 1–2 small pots (2–4 inches wide) with drainage holes, or
- ● 1 long seed tray or shallow container (6+ inches) with drainage.
- ● Drainage tray or saucer: 1 (to catch excess water).
- ● Spray bottle: 1 (for gentle watering).
- ● Grow lights or sunny windowsill: Option 1: A full-spectrum LED grow light (12–16 inches above plants) for 12–16 hours/day.
- ● Option 2: A south-facing window (6+ hours of direct sunlight daily).
- ○ Humidity dome or plastic wrap: 1 (optional, to retain moisture while germinating).
- ● Fertilizer: Balanced liquid fertilizer (5-5-5 or 10-10-10) for when seedlings sprout.
- ● Heat mat: 1 (keeps soil warm for faster germination, ~70–75°F).
- ● Pruning shears: 1 (for harvesting and shaping plants later).
- ● Labels: 1–2 (to track planting dates if experimenting with varieties).
Step-by-step instructions for growing basil from seed indoors
Here’s how to get basil sprouting fast—no fancy equipment needed, just your windowsill and patience.
🌱 Step 1: Soak and Plant the Seeds
Start by soaking the basil seeds in warm water for 12 hours—this softens the outer shell and speeds up germination. I use a small bowl and cover it loosely with plastic wrap to keep the water warm. Basil seeds are tiny, so I like to plant them in small, shallow containers (like egg cartons or seed trays) to avoid losing them.
Fill the container with moistened potting mix (not garden soil) and press it down gently so it’s firm but not packed. Make a tiny hole about ¼ inch deep with your finger, drop in 1-2 seeds, and cover lightly with more soil. Pat the surface so it’s even—this prevents seeds from washing away when you water.
💧 Step 2: Cover and Keep Warm for Germination
Cover the container with a clear plastic lid or plastic wrap to trap warmth and humidity. Basil seeds germinate best at 70-75°F, so if your home runs cooler, place the tray on top of a seedling heat mat or near a warm spot like the fridge’s top (but not inside it!). Mist the soil lightly with water to keep it damp—not soggy—and check daily for condensation.
You’ll see sprouts in 5-7 days (that’s why this is fast!). Once the first green tips appear, remove the cover immediately—too much humidity after germination invites mold. Place the tray under grow lights or in the brightest windowsill (south-facing is ideal) for 12-14 hours of light daily. Without enough light, seedlings stretch leggy and weak.
☀️ Step 3: Thin and Transplant for Stronger Growth
When seedlings have 2-3 true leaves (the larger ones after the initial cotyledons), thin them so only the strongest plant remains per cell. Use scissors to snip the weaker stems at soil level—this prevents disturbing the roots of the plant you’re keeping. If you’re using egg cartons, transplant the seedlings into individual 3-4 inch pots with fresh potting mix to give them room to grow.
Water gently at the base, avoiding the leaves to prevent disease. Basil loves warmth and moisture, so keep the soil evenly damp (but never waterlogged). Rotate the pots daily so all sides get equal light—you’ll notice plants leaning toward the window if they’re not getting enough light from all directions. After 2-3 weeks, you’ll see bushy growth with those signature basil leaves.
✂️ Step 4: Prune for Bushier Plants and Harvest
Once your basil reaches 4-6 inches tall, pinch off the top set of leaves with your fingers. This might seem counterintuitive, but it encourages the plant to branch out and grow fuller. I do this every 2-3 weeks to keep my basil compact and productive. Avoid cutting more than ⅓ of the plant at once—this can stress it out.
Harvest leaves from the bottom up to promote new growth. Use clean scissors or your fingers to pluck leaves just above a leaf node (where new leaves grow). You’ll see fresh leaves sprouting within 5-7 days—that’s your reward for patience! Keep harvesting regularly, and your basil will stay lush and flavorful all season long.
Tips & tricks for growing basil from seed indoors
Here's what nobody tells you about growing basil from seed—these tricks will help you avoid common pitfalls and get those aromatic leaves faster.
Soaking Secret: For even faster germination in your 12-hour soak, use filtered or distilled water instead of tap water. Chlorine in tap water can inhibit seed growth, and warm water (around 80°F) helps speed up the process. I like to place my bowl in a warm spot like on top of the fridge to maintain consistent temperature. After soaking, drain the seeds immediately—leaving them in water longer than 12 hours can cause them to rot.
Container Choice Matters: While egg cartons work, they don't provide enough drainage for long-term growth. For the transplanting step, use containers with drainage holes and at least 3-4 inches of depth. I've found that small plastic nursery pots work perfectly—they're affordable, reusable, and give roots plenty of room to develop. Just be sure to use fresh potting mix (not garden soil) to prevent disease.
Lighting Hack: If you don't have grow lights, place your seedlings in the brightest window you have, even if it's not south-facing. South-facing windows get the most light, but east or west-facing windows can work too—just rotate your plants every few days so all sides get equal exposure. In winter months, supplement with a simple LED desk lamp placed 6 inches above the plants for 12-14 hours daily to prevent leggy growth.
Pruning Timing: The 2-3 week pruning schedule is ideal, but don't wait until your basil reaches 4-6 inches if you're eager for harvests. Once you see 4-6 true leaves, you can start pinching back the top growth to encourage bushiness. This early pruning won't harm your plant and will actually give you more leaves to harvest sooner. Just remember to always leave at least 2-3 sets of leaves when you pinch—this ensures your plant keeps growing upward.
Pro Tips for Basil From Seed Indoors
- Here's what nobody tells you about growing basil from seed—these tricks will help you avoid common pitfalls and get t...
- Soaking Secret: For even faster germination in your 12-hour soak, use filtered or distilled water instead of tap wate...
- Container Choice Matters: While egg cartons work, they don't provide enough drainage for long-term growth. For the tr...
Frequently asked questions
Got questions about growing basil from seed indoors? You’re not alone! Here are some of the most common queries—and their answers—to help you succeed with your windowsill herb garden.
How long does it take for basil seeds to germinate indoors?
Most basil seeds sprout within 7–14 days when kept warm (around 70–75°F) and moist. Use a seedling heat mat if your windowsill is chilly—patience is key! If nothing emerges after 3 weeks, try fresh seeds or adjust moisture levels.
Why are my basil seeds not sprouting?
Common culprits include cold soil, dry conditions, or old seeds. Check your setup:
- Keep soil consistently damp (not soggy).
- Ensure warmth—seeds need heat to activate.
- Test seed viability by soaking a few in water (floaters are likely dead).
How soon can I harvest basil grown from seed?
You can snip small leaves once your plant has 4–6 true leaves (usually 6–8 weeks from seeding). For full harvests, wait until the plant is 6–8 inches tall. Always leave at least 2–3 sets of leaves to encourage regrowth!
Can I grow basil indoors without a sunny window?
Basil thrives under grow lights (12–16 hours/day). Use a full-spectrum LED 2–3 inches above the plants. If natural light is limited, supplement with a cheap clip-on bulb—just rotate plants daily for even growth.
What’s the best temperature for indoor basil growth?
Basil loves warmth! Keep your growing area between 65–80°F during the day and above 55°F at night. Avoid drafts (like AC vents) or cold windowsills. A seedling heat mat can boost germination if your space is cool.
How do I prevent pests on my indoor basil?
Indoor basil rarely faces pests, but aphids or fungus gnats can appear. Combat them with:
- Neem oil spray (diluted) for soft-bodied bugs.
- Let the topsoil dry slightly between waterings to deter gnats.
- Isolate new plants for 1–2 weeks to catch hitchhikers early.
Wrapping up and next steps
Growing basil from seed indoors is a rewarding journey that brings fresh, fragrant herbs right to your kitchen!
With just a sunny windowsill, a little patience, and the right care, you’ll enjoy a thriving basil plant in weeks. Now that you’ve mastered the basics, why not expand your indoor herb garden?
- Try your hand at harvesting and drying your basil for winter use.
- Experiment with other fast-growing herbs like parsley or cilantro using the same method.
- Share your success with friends or family—homegrown basil makes a fantastic gift!
Your green thumb is already proving itself—keep growing, keep enjoying! 🌱✨