
Propagation
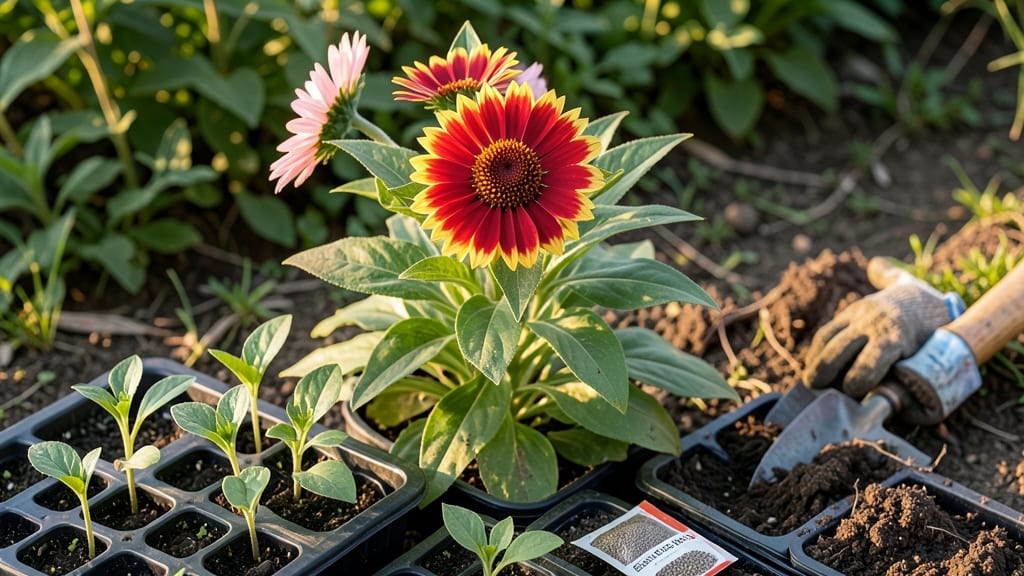
Growing zinnias from seed to bloom means 60 days of vibrant color—and cold stratification is the secret weapon that makes it foolproof. 🌱 I've struggled with slow germination before, but this method guarantees strong, healthy seedlings that burst into bloom like clockwork.
The trick isn't complicated: just a little chill time before planting, and your zinnias will outperform anything you buy at the nursery.
You'll need just three simple supplies: zinnia seeds, a shallow container for stratification, and some well-draining potting mix. The process takes about 2 weeks of cold treatment before you even plant, but it pays off with seedlings that stand tall and sturdy from day one.
No more leggy, weak stems—just bold, bushy plants ready to thrive in your garden.
By the time you see those first true leaves, you're already counting down to full blooms in just 6 weeks. The flowers come in every color imaginable, and they keep producing all summer long with proper care.
You'll be snipping fresh bouquets or watching bees buzz around your garden like it's a five-star resort.
Works perfectly for beginner gardeners or anyone tired of waiting for store-bought plants to catch up. The stratification step is the only real secret—once you master it, zinnias become the easiest, most rewarding annual in your garden. Let's get those seeds started!
📚 In This Guide
- What you need
- Instructions
- Tips and common mistakes
- Wrapping up and next steps
What you need
- ● Zinnia seeds: Choose heirloom or hybrid varieties (e.g., 'Benary’s Giant,' 'Profusion'). Buy 1-2 packets (50-100 seeds) for a full bloom display.
- ● Seed-starting mix: A lightweight, sterile blend (e.g., Pro-Mix or FoxFarm Seedling Mix), 1-2 cubic feet depending on tray size.
- ● Seed trays or pots: Cell packs (72-128 cells) or 4-6" biodegradable pots (10-20 units).
- ● Grow lights or sunny windowsill: A LED grow light (12-16 hours/day) or a south-facing window with 6+ hours of sunlight.
- ● Plastic wrap or humidity dome: To retain moisture during germination.
- ● Watering can or spray bottle: With a fine mist nozzle for gentle watering.
- ● Fertilizer: A balanced, water-soluble option (e.g., 10-10-10) or fish emulsion (diluted to half-strength).
- ● Cold stratification setup: A refrigerator (34-40°F) or cool basement for 7-14 days (see step for details).
- ○ Gloves (optional): Protect your hands from soil and seeds.
- ● Plant labels: Popsicle sticks or biodegradable tags to track varieties.
- ● Transplanting tools: A small trowel or spoon for delicate seedlings.
- ○ Mulch (optional): Straw or shredded leaves to retain moisture in outdoor beds.
- ○ Pruning shears (optional): For deadheading spent blooms and encouraging more flowers.
Step-by-step instructions for growing zinnias from seed to bloom
Turn those tiny seeds into vibrant blooms in just two months with this straightforward approach.
🌱 Step 1: Cold Stratify Seeds for Faster Germination
Zinnia seeds thrive after a cold treatment that mimics winter conditions. Place your seeds between two damp paper towels in a sealed plastic bag. Store them in your refrigerator for 7-10 days, checking occasionally to ensure the towels stay moist but not soggy. This cold stratification tricks the seeds into thinking winter has passed, triggering faster and more uniform germination once planted.
After the cold period, you'll notice the seeds begin to plump slightly—this is your signal they're ready for planting. I like to label the bag with the date so I don't forget when the stratification period ends. This step is crucial for avoiding the patchy germination that frustrates many gardeners.
☀️ Step 2: Prepare Containers and Plant in Well-Draining Soil
Fill 4-inch diameter containers with a lightweight seed-starting mix that drains well—zinnias despise soggy roots. I use a blend of 50% peat moss, 30% perlite, and 20% vermiculite to ensure proper aeration. Press the mix down gently to create a firm planting surface, but avoid compacting it too tightly.
Plant 2-3 seeds per container at a depth of ¼ inch, spacing them evenly. Cover lightly with additional mix, then mist the surface with water until the soil feels damp but not wet. Place the containers in a warm spot (70-75°F) where they'll receive bright, indirect light—a sunny windowsill works well. You'll see sprouts in 7-14 days, depending on your home's warmth and humidity.
🌿 Step 3: Transplant Seedlings After True Leaves Appear
Once seedlings develop their first true leaves (the second set after the initial cotyledons), they're ready to move outdoors. Harden them off by placing them outside in a sheltered spot for 1-2 hours the first day, gradually increasing exposure over 5-7 days. This slow adjustment prevents shock and ensures they thrive in garden conditions.
Transplant into the garden after the last frost date, spacing seedlings 12-18 inches apart in full sun—zinnias need at least 6-8 hours of direct sunlight daily to produce their boldest blooms. I like to plant them in groups of three or more for a dramatic display. Water deeply at the base to encourage strong root growth, but avoid wetting the foliage to prevent disease.
💧 Step 4: Maintain Consistent Watering and Fertilization
Zinnias are drought-tolerant once established, but consistent moisture is key during their first 4-6 weeks of growth. Water deeply 2-3 times per week, ensuring the top 2 inches of soil stay moist but not waterlogged. Overhead watering can spread fungal diseases, so I use a soaker hose or water at the base of the plants in the early morning.
Feed seedlings with a balanced, water-soluble fertilizer (10-10-10) diluted to half-strength every 2 weeks once they reach 3-4 inches tall. This encourages lush foliage and abundant blooms. Stop fertilizing once buds form to prevent leggy growth—zinnias produce their best flowers when they focus energy on blooming rather than leaf production.
✂️ Step 5: Deadhead and Support for Continuous Blooms
To keep zinnias flowering nonstop, deadhead spent blooms by pinching off the faded flowers with your fingers or clean pruners. This encourages the plant to produce new buds from the base, extending the blooming season. I like to do this in the early morning when the flowers are still dry, making the task easier and less messy.
Tall varieties (over 2 feet) may need staking or support to prevent them from flopping in wind or rain. Use bamboo stakes or tomato cages inserted gently into the soil beside each plant. Avoid tying the stems too tightly—zinnias grow quickly and need room to move. With proper care, you'll enjoy vibrant blooms from late summer until the first frost, making them one of the most rewarding annuals to grow.
Tips & tricks for perfect zinnia growth from seed
Here's what nobody tells you about growing zinnias that'll make all the difference between patchy sprouts and a vibrant summer garden.
Cold Stratification Secret: The 7-10 day cold treatment isn't just about speed—it breaks the seed's natural dormancy cycle. I've found that placing the sealed bag on the top shelf of your fridge (where temps hover around 38-42°F) gives the most consistent results. If your fridge runs warmer, extend the stratification to 12 days to compensate. Watch for the seeds to plump slightly—they'll look almost swollen when ready to plant. This visual cue tells you the stratification worked.
Soil Mix Strategy: Your 50-30-20 blend of peat moss, perlite, and vermiculite is perfect, but here's the pro move: sterilize it first by baking in a 200°F oven for 30 minutes. This kills any fungal spores that could compete with your seedlings. After cooling, mix in a handful of compost per container—zinnias respond beautifully to this organic boost without the risk of over-fertilization. The key is balance: too much compost can cause damping off, while too little means poor root development.
Lighting Hack: Those 70-75°F warm spots with bright indirect light? I've had the best luck using a simple LED grow light on a timer for 12 hours daily. Position it just 6 inches above seedlings to prevent legginess. If you don't have grow lights, rotate containers daily to ensure even exposure—zinnias will lean toward whatever light source they can find. The goal is to mimic spring sunlight without scorching tender leaves. You'll notice seedlings develop thicker stems and darker leaves when they get proper light.
Transplanting Timing: The 5-7 day hardening off period is non-negotiable, but here's how to make it foolproof. Start with just 1 hour on day one, then add 30 minutes each subsequent day. I've seen gardeners rush this and end up with wilted seedlings. The real test comes when you pinch a leaf—if it springs back immediately, they're ready. Also, transplant on an overcast day or in late afternoon to reduce stress from direct sunlight. This gradual approach builds resilience that pays off with stronger plants.
Pro Tips for Zinnias From Seed To Bloom
- Here's what nobody tells you about growing zinnias that'll make all the difference between patchy sprouts and a vibra...
- Cold Stratification Secret: The 7-10 day cold treatment isn't just about speed—it breaks the seed's natural dormancy ...
- Soil Mix Strategy: Your 50-30-20 blend of peat moss, perlite, and vermiculite is perfect, but here's the pro move: st...
Frequently asked questions
Got questions about growing zinnias from seed? We’ve got answers!
Whether you’re a first-time gardener or a seasoned pro, these common queries will help you avoid pitfalls and maximize your zinnia success.
How long does it take for zinnia seeds to germinate?
Zinnia seeds typically germinate in 7–14 days after planting, depending on soil temperature and moisture. Keep the soil warm (around 70°F) and consistently damp—not soggy—to speed up the process. If you’re impatient, try a heat mat for faster sprouting!
Do zinnias need cold stratification to grow?
Nope! Unlike some wildflowers, zinnias do not require cold stratification. In fact, they germinate best in warm soil. Direct-sow seeds after the last frost when soil temps hit 55–60°F, or start indoors 4–6 weeks before your last frost date for a head start.
Why aren’t my zinnia seeds sprouting?
If your seeds aren’t germinating, check these common culprits:
- Old seeds: Zinnia seeds lose viability after 1–2 years.
- Too cold: Seeds need warmth (60°F+) to sprout.
- Poor soil contact: Press seeds lightly into soil (¼” deep).
- Dampness issues: Overwatering can cause rot; keep soil moist but not waterlogged.
Can I grow zinnias in containers?
Zinnias thrive in containers as long as the pot is at least 6–8 inches deep and has drainage holes. Use a well-draining potting mix and place the container in a sunny spot (6+ hours of light daily). Dwarf varieties like ‘Thumbelina’ are perfect for small pots!
How do I keep zinnias blooming all season?
To prolong blooms, deadhead spent flowers regularly (snip just above the next set of leaves). Feed plants every 2–3 weeks with a balanced fertilizer (10-10-10) and ensure they get full sun. Water at the base to avoid fungal issues, and mulch to retain moisture. With these tips, your zinnias will keep shining until frost!
Wrapping up and next steps
Growing zinnias from seed to bloom is a rewarding journey that brings vibrant color to your garden in just 60 days—especially with a little cold stratification magic! 🌱 Whether you're a beginner or a seasoned gardener, these bold blooms prove that patience and care pay off in stunning petals.
Now that you’ve mastered the steps, why not share your success?
🌟 Your Next Step:
- Experiment! Try different zinnia varieties (like 'Benary’s Giant' or 'Crystal') to see which thrive best in your climate.
- Extend the season: Deadhead spent blooms to encourage more flowers, or save seeds for next year!
- Share the joy: Snap a photo of your zinnias in full glory and tag us—we’d love to see your garden come alive!
Happy gardening—your future blooms are waiting! 🌸