
Flowers
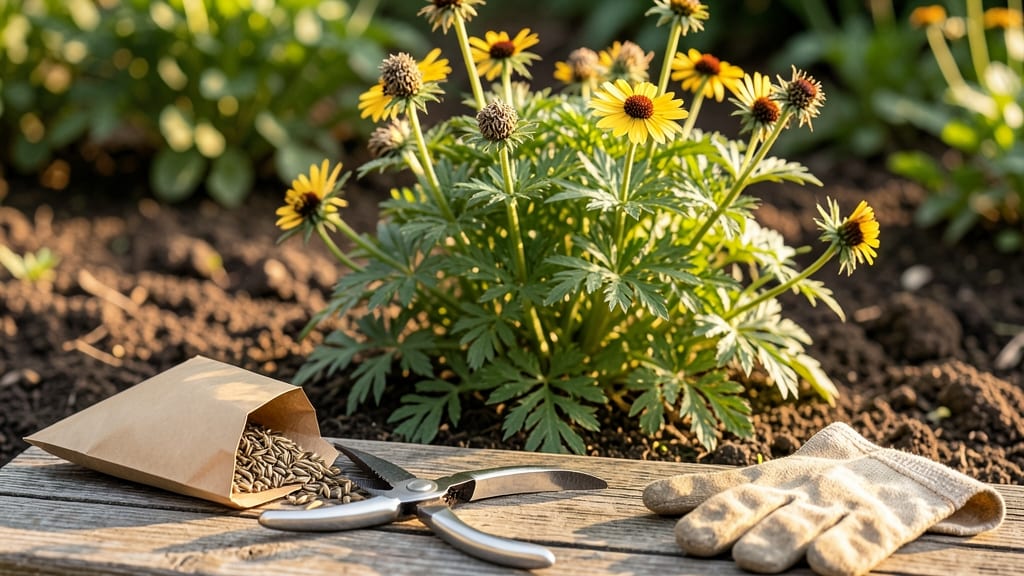
Cold-stratifying whorled tickseed seeds unlocks vibrant golden blooms by next summer—no fancy greenhouse needed. 🌱 I’ve grown this drought-loving beauty from seed three times, and the trick is mimicking winter’s chill to break dormancy.
These tiny seeds pack a punch: once established, they’ll spread like wildfire, filling gaps with cheerful daisy-like flowers that hummingbirds adore. The secret lies in patience and timing. Start indoors in late winter, let them chill for 6-8 weeks, then transplant after the last frost.
They thrive in poor, dry soil—perfect for rocky slopes or low-maintenance borders—where other plants would struggle. Just give them full sun and forget to water them, and you’ll get months of blooms with almost no effort.
What you’ll end up with is a self-seeding superstar that multiplies yearly, outcompeting weeds while adding golden pops of color. The first-year plants might be small, but by summer, they’ll form dense mounds of foliage topped with cheerful blooms. Even my black thumb can’t kill these.
Works in zones 3-9, from desert gardens to humid climates. Let’s get those seeds sprouting!
📚 In This Guide
- What you need
- Instructions
- Tips and common mistakes
- Wrapping up and next steps
What you need
- ● Whorled tickseed seeds: 1 packet (50–100 seeds) – Look for organic, non-GMO seeds for best results.
- ● Seed-starting trays: 1–2 shallow trays (2–3 inches deep) with drainage holes or biodegradable pots.
- ● Seed-starting mix: 1 bag (1–2 cubic feet) – A lightweight, well-draining mix (e.g., 50% peat moss, 30% perlite, 20% vermiculite).
- ○ Grow lights or sunny windowsill: A full-spectrum LED grow light (optional but recommended for indoor starts) or a south-facing window.
- ● Spray bottle: 1 – For gentle watering to avoid disturbing seeds.
- ● Plastic wrap or humidity dome: 1 sheet – Helps retain moisture during germination.
- ● Plant labels: 50–100 – To track seedling progress (or use toothpicks + masking tape!).
- ○ Fertilizer (optional): 1 bottle of balanced liquid fertilizer (5-5-5 or 10-10-10) for post-germination growth.
- ● Cold stratification (critical!): A refrigerator with a crisper drawer (or a seed stratification kit) to mimic winter conditions.
- ○ Warmth for germination: A heat mat (optional but helpful) to maintain 65–75°F (18–24°C) after stratification.
- ● Outdoor space: A garden bed, container, or raised bed with full sun (6+ hours daily) for transplanting.
- ● Patience (but not too much!): Germination takes 10–21 days after stratification.
- ● Label early! 🎯 Whorled tickseed seedlings look similar to other Coreopsis varieties—avoid mix-ups.
- ● Skip the stratification step? ❄️ If you’re impatient, try sowing directly outdoors in fall (seeds need cold to break dormancy naturally).
- ● Thin seedlings: 🌱 Once they have 2–3 true leaves, snip or transplant weaker ones to give strong plants room.
How to grow whorled tickseed from seeds in containers
This drought-tolerant perennial thrives with minimal fuss—here’s how to coax vibrant blooms from seed in just two months.
🌱 Step 1: Cold-Stratifiy Seeds for Reliable Germination
Whorled tickseed (Coreopsis verticillata) seeds need cold stratification to break dormancy. Place seeds in a sealed container with a damp paper towel, then refrigerate for 4-6 weeks at 34-40°F. Check weekly—they’re ready when they soften slightly and lose their hard outer shell.
Real talk: Skipping this step means waiting months for germination, if it happens at all. I’ve tried planting untreated seeds in spring, and they either rot or sprout erratically. The cold mimics winter’s natural cycle, fooling the seed into thinking conditions are perfect for growth.
💧 Step 2: Sow in Well-Draining Mix and Keep Moist
Fill 4-inch pots with a sterile seed-starting mix (never garden soil—it compacts and suffocates roots). Plant seeds ¼ inch deep, spacing them 1 inch apart. Water gently with a spray bottle until the soil feels damp 1 inch below the surface.
Use a clear plastic dome or plastic wrap to retain humidity, but remove it immediately after germination to prevent mold. You’ll see first true leaves in 7-14 days—this is your cue to move them to brighter light. Overwatering now is the fastest way to lose seedlings, so let the top inch dry slightly between waterings.
☀️ Step 3: Transition to Full Sun and Harden Off
Once seedlings have 2-3 sets of leaves, introduce them to bright, indirect light for a week. Gradually increase sunlight to 6+ hours daily of morning sun (afternoon sun can scorch tender leaves). Whorled tickseed loves heat but hates soggy roots—water only when the soil feels dry 2 inches down.
Two weeks before transplanting, start hardening off by placing pots outside in partial shade for 1-2 hours daily, increasing time gradually. You’ll know they’re ready when they handle full sun without wilting. This step is critical—plants shocked by sudden sun exposure often bolt or develop leaf scorch.
🪴 Step 4: Transplant to Final Containers or Garden
Choose well-draining containers (at least 6 inches deep) or a sunny garden bed with sandy loam. Space plants 12-18 inches apart—they’ll spread but stay compact. Dig holes twice as wide as the root ball to encourage root expansion. Transplant in late spring after the last frost when soil warms to 55°F.
Water deeply after planting to settle the soil, then reduce frequency—whorled tickseed is drought-tolerant once established. Mulch with 1 inch of shredded bark to retain moisture and suppress weeds. The first blooms will appear in 60-70 days, but the real show starts in late summer when flowers cover the plant in cheerful yellow.
Tips & tricks for perfect whorled tickseed growth
Between us, these little tricks will turn your seed-starting frustration into a thriving garden of cheerful yellow blooms.
The Stratification Secret: Don't just refrigerate those seeds—create a mini ecosystem. Place a damp paper towel in a sealed plastic bag with the seeds, then add a few ice cubes to the fridge. This maintains consistent 34-40°F temps without needing a fancy temperature monitor. Check weekly by gently pressing a seed—it's ready when it gives slightly under thumb pressure, like a ripe avocado pit.
Lighting Strategy: In Step 3, when transitioning to sunlight, I use a south-facing window with a sheer curtain to diffuse harsh afternoon rays. For indoor growers, a simple LED grow light on a timer (14 hours on/10 hours off) mimics summer days perfectly. Watch for pale seedlings—they're begging for more light! The 6+ hours of morning sun is non-negotiable for that vibrant yellow color we all love.
Transplanting Hack: Before moving your seedlings to their final home, give the pots a good soak. Then, when transplanting, the root ball stays intact and settles into the wider holes you've prepared. This reduces transplant shock dramatically. I dig holes twice as wide as the pot diameter—it's worth the extra effort for those first 60 days of growth.
Watering Wisdom: The 1-inch deep planting and 2-inch dry check might seem counterintuitive for a drought-tolerant plant, but here's the thing: seedlings need consistent moisture to establish roots. Once they're in their final containers, you can back off to watering only when soil feels dry 3 inches down. That's when their drought tolerance really kicks in.
Pro Tips for Whorled Tickseed Seeds
- Between us, these little tricks will turn your seed-starting frustration into a thriving garden of cheerful yellow bl...
- The Stratification Secret: Don't just refrigerate those seeds—create a mini ecosystem. Place a damp paper towel in a ...
- Lighting Strategy: In Step 3, when transitioning to sunlight, I use a south-facing window with a sheer curtain to dif...
Frequently asked questions
about growing whorled tickseed (Coreopsis verticillata) from seeds—because even the easiest blooms have a few surprises!How long do whorled tickseed seeds need to be cold-stratified?
Cold-stratify your seeds for 4–6 weeks in the fridge (moistened paper towel + sealed bag). This mimics winter and breaks dormancy—no fancy equipment needed! Plant them right after, and you’ll see sprouts in 7–14 days if conditions are ideal.
Can I plant whorled tickseed seeds directly outside without stratification?
Technically yes, but germination rates drop dramatically (often <50%). For best results, stratify first. If you skip it, plant in early spring when soil temps hit 50°F+—just know you might wait 3–4 weeks longer for blooms.
Why aren’t my tickseed seedlings sprouting after stratification?
Check these 3 culprits:
- Moisture: Keep soil consistently damp (not soggy) during germination.
- Light: Seeds need bright indirect light—no dark closets!
- Temperature: Ideal range is 60–75°F; cooler temps slow growth.
How do I encourage bigger, fuller blooms from tickseed?
Deadhead spent flowers regularly to prompt more blooms. For larger flowers, pinch back leggy stems when seedlings are 4–6 inches tall. Feed with a low-nitrogen fertilizer (like 5-10-5) at planting and mid-season—too much nitrogen = leafy monsters, not blooms!
Are whorled tickseed seeds deer- or rabbit-resistant?
Not exactly! While less palatable than hostas or lettuce, deer and rabbits will nibble if hungry. Protect seedlings with row covers or companion plants like marigolds or lavender. Once established (6+ inches tall), they’re usually safe—but don’t bank on them being "deer-proof."
Wrapping up and next steps
Whorled tickseed seeds are a game-changer for gardeners eager to see vibrant blooms without the wait! 🌸 With cold stratification, you can coax these cheerful flowers to life in just 60 days, making them perfect for impatient green thumbs.
Whether you're reviving a neglected garden or experimenting with new varieties, their resilience and beauty make them a must-try.
Ready to grow your own? Grab those seeds, follow the steps, and watch your garden transform—one whorled bloom at a time! 🌱 For extra inspiration, explore companion plants or creative container designs to elevate your floral display.