
Propagation
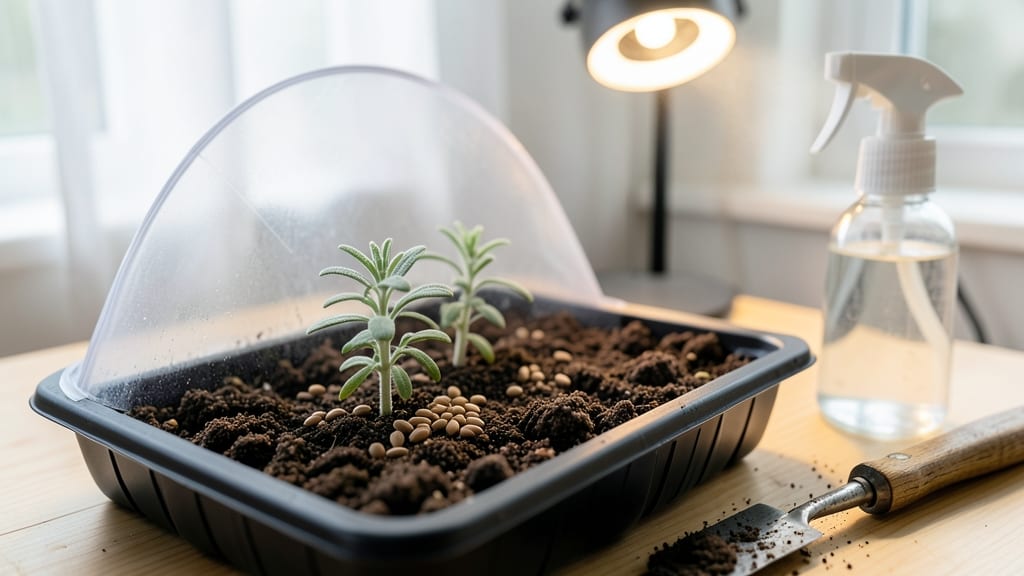
Thyme seed germination needs moisture, chill, and light to break dormancy fast—otherwise, they’ll sit there for months. 🌱 I’ve learned the hard way that skipping these steps means waiting forever for those first tiny green needles to appear. The secret isn’t complicated: a little patience, the right conditions, and a few simple tricks to speed things up. Start with a shallow tray filled with moist seed-starting mix—just damp, not soggy. Sprinkle seeds on top (no need to bury them) and press lightly so they make contact with the soil. Cover with a humidity dome or plastic wrap to keep things cozy, then pop the tray in the fridge for 2-4 weeks. This cold treatment mimics winter’s natural signal for germination. Once you see sprouts (usually within 1-3 weeks after removing from cold), move them to bright, indirect light. Keep the soil consistently moist but never waterlogged—thyme hates soggy roots. Within 6-8 weeks, you’ll have sturdy seedlings ready for transplanting, provided they’ve developed at least 2-3 sets of true leaves. The key to success? Consistency. Too much heat or dryness slows germination, while mold or rot can kill seedlings. If you notice fuzzy growth, reduce moisture and improve airflow immediately. With these steps, you’ll go from bare soil to thriving thyme plants in no time!
📚 In This Guide
- What you need
- Instructions
- Tips and common mistakes
- Wrapping up and next steps
What you need
- ● Thyme seeds: 1–2 teaspoons (or ~5–10g) of high-quality, organic thyme seeds (e.g., Thymus vulgaris for culinary thyme).
- ● Seed-starting mix: 2–3 cups of sterile, well-draining potting soil (avoid garden soil—it may harbor pathogens!).
- ● Containers: Small seed trays (4–6" deep) or
- ● 4–6 biodegradable peat pots (2–3" diameter) or
- ● Repurposed containers (yogurt cups, egg cartons) with drainage holes.
- ● Water: Room-temperature, filtered water (chlorine-free if possible).
- ● Spray bottle: 8–12 oz with a fine mist nozzle (for gentle hydration).
- ● Plastic wrap or humidity dome: Clear plastic sheet or a DIY cover (e.g., a cut-open plastic bottle).
- ● Grow lights or sunny windowsill: A full-spectrum LED grow light (12–16 hours/day) or a south-facing window (6+ hours of sunlight).
- ● Heat mat: Germination mat set to 70–75°F (21–24°C) for faster sprouting.
- ● pH meter or test kit: To ensure soil pH is 6.0–7.0 (thyme prefers slightly acidic to neutral).
- ● Fertilizer: Diluted liquid seaweed extract or balanced starter fertilizer (5-5-5 ratio).
- ● Tweezers: For delicate seed placement (if not broadcasting).
- ● Notebook: To track moisture, light, and germination progress!
Step-by-step instructions for germinating thyme seeds
Here's how to coax those tiny thyme seeds into sprouts with speed and confidence.
🌱 Step 1: Prepare Seeds for Maximum Germination Potential
Thyme seeds have tough outer shells that need help breaking down. Start by soaking them in lukewarm water for 12-24 hours—this softens the seed coat and kickstarts hydration. I use a small bowl and cover the seeds with water so they’re fully submerged. You’ll see them swell slightly, which means they’re ready for planting.
After soaking, drain the seeds and spread them on a damp paper towel. Fold the towel to keep them moist but not soggy, then place it in a sealed plastic bag. Store this setup in your refrigerator for 2-4 weeks. This cold stratification mimics winter conditions and tricks the seeds into thinking spring has arrived. Check weekly to ensure the towel stays damp—if it dries out, germination will stall.
💧 Step 2: Plant in Moist, Well-Draining Soil
Fill small pots or seed trays with a light, sterile potting mix—thyme hates heavy garden soil. Moisten the mix until it’s damp but not dripping, then scatter the seeds on the surface. Press them lightly into the soil so they make contact but don’t bury them deeper than 1/8 inch. Overplanting is fine; you can thin later.
Cover the tray with a clear plastic dome or wrap it in plastic wrap to trap moisture and warmth. Place the setup in a spot with indirect light—a bright windowsill away from direct sun works best. Keep the soil consistently moist by misting lightly every 2-3 days. You’ll know it’s right when the surface looks damp but not glistening. Too much water here causes rot, while too little stalls germination.
☀️ Step 3: Provide Warmth and Light for Sprouting
Thyme seeds need warmth to germinate, so place the tray on a seedling heat mat set to 70-75°F. Without this, germination can take 4-6 weeks—with warmth, you’ll see sprouts in 2-3 weeks. Once the first green shoots appear, remove the plastic cover immediately to prevent damping-off, a fungal disease that collapses seedlings overnight.
Move the tray to a sunny windowsill or under grow lights providing 12-14 hours of light daily. You’ll notice the seedlings stretch toward the light—if they grow leggy (long and weak), they need more intensity. Keep the soil moist but not soggy, watering at the base to avoid disturbing the tiny roots. True leaves (the second set after the initial seed leaves) will appear in 3-4 weeks, signaling it’s time to thin or transplant.
✂️ Step 4: Thin and Harden Off Seedlings
When seedlings reach 1-2 inches tall and have 2-3 true leaves, thin them to 2-3 inches apart to reduce competition. Use scissors to snip unwanted seedlings at soil level—pulling risks damaging roots. This step might feel harsh, but crowded thyme grows weak and spindly. Keep the remaining plants in bright light and maintain moderate moisture.
Two weeks before your last frost date, start hardening off the seedlings by placing them outside in a sheltered spot for 1-2 hours daily. Gradually increase their outdoor time over 10-14 days, ending with a full day in the garden. Watch for signs of stress like wilting or yellowing leaves—these mean they’re not ready yet. Once hardened off, transplant thyme into its permanent home, spacing plants 12-18 inches apart in well-draining soil.
Tips & tricks for perfect thyme seed germination
These little tricks will help you beat the odds and get your thyme seeds sprouting faster than ever.
Soaking Secret: When soaking thyme seeds for 12-24 hours, use lukewarm water that feels like a warm bath—not scalding. I add a pinch of sea salt to the water to prevent bacterial growth during that critical hydration phase. After soaking, give the seeds a quick rinse before spreading them on the damp paper towel—this removes any residual salt that could irritate the seedlings later.
Cold Stratification Hack: The 2-4 week refrigerator phase is where patience pays off. I place a small dish of water near the sealed bag to maintain humidity without overwatering. If your fridge is particularly dry, check the towel every 5 days instead of weekly—thyme seeds won't forgive consistent dryness during this period. Pro tip: Write the date on the bag so you don't forget when you started!
Light Management: Once those first green shoots appear, move your tray to a south-facing window immediately. If you're using grow lights, position them just 2-3 inches above the seedlings—they'll grow toward the light like little sun-worshippers. I've found that rotating the tray 180 degrees daily prevents lopsided growth toward one side of the window.
Thinning Technique: When thinning seedlings to 2-3 inches apart, use clean scissors sterilized with rubbing alcohol. Snip at soil level rather than pulling—this prevents disturbing the roots of your keepers. I like to plant a few extra seeds intentionally so I always have spares if damping-off claims a few seedlings overnight.
Pro Tips for Thyme Seed Germination
- These little tricks will help you beat the odds and get your thyme seeds sprouting faster than ever.
- Soaking Secret: When soaking thyme seeds for 12-24 hours, use lukewarm water that feels like a warm bath—not scalding...
- Cold Stratification Hack: The 2-4 week refrigerator phase is where patience pays off. I place a small dish of water n...
Frequently asked questions
Got questions about germinating thyme seeds?
You’re not alone! Here are some of the most common queries—and their answers—to help you grow lush thyme from scratch.
How long does it take for thyme seeds to germinate?
Thyme seeds are slow starters! Under ideal conditions (cool temps, moisture, and light), germination can take 2–4 weeks. Some varieties may take even longer—patience is key. Pre-soaking seeds for 24 hours can speed up the process slightly.
Do thyme seeds need cold stratification to germinate?
Yes! Thyme seeds benefit from cold stratification (chilling) to break dormancy. Place them in a sealed bag with damp peat moss or paper towels, then refrigerate for 2–4 weeks before sowing. This mimics winter conditions and triggers faster sprouts.
What’s the best way to keep thyme seeds moist during germination?
Consistency is critical. Use a spray bottle to mist the soil lightly, keeping it damp but not soggy. Cover the tray with plastic wrap or a humidity dome to retain moisture. Check daily—overwatering can cause rot, while dryness stalls germination.
Can I germinate thyme seeds indoors without a grow light?
Technically yes, but results may be spotty. Thyme seeds need bright, indirect light (or a grow light) to sprout evenly. A sunny windowsill works temporarily, but a 12–14 hour daily light source ensures stronger, healthier seedlings.
Why aren’t my thyme seeds sprouting? Troubleshooting tips.
If seeds aren’t germinating, check these common issues:
- Old seeds: Thyme seeds lose viability after 1–2 years. Test freshness with a viability test (soak in water—sinkers are good!).
- Improper moisture: Soil should feel like a wrung-out sponge. Too dry or waterlogged = failure.
- Temperature extremes: Ideal range is 60–70°F (15–21°C). Avoid heat sources like radiators.
- Poor seed-to-soil contact: Press seeds lightly into soil (¼ inch deep) to ensure contact.
Still stuck? Try scarification (lightly sanding seeds) to break their hard outer shell.
Wrapping up and next steps
Growing thyme from seed is a rewarding journey that unlocks the magic of homegrown herbs—and you’ve got all the tools to succeed! 🌱 By mastering the trifecta of moisture, chill, and light, you’ll watch those tiny seeds transform into fragrant, vibrant plants in no time.
Whether you’re a seasoned gardener or just starting, this process is your ticket to a thriving herb garden.
Ready to take the next step? Plant those seeds today and enjoy the satisfaction of nurturing life from scratch! For extra confidence, experiment with different containers or germination setups—your green thumb will thank you.