
Planting
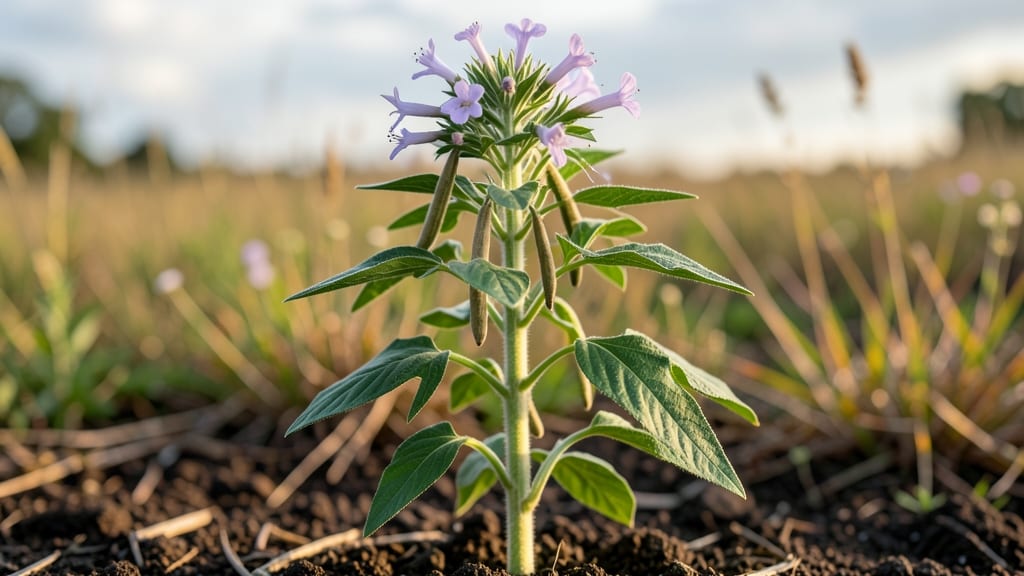
Planting sesame seeds at the right time means the difference between a thriving crop and a frustrating failure—especially in your zone. 🌱 I learned this the hard way after my first batch bolted before producing a single seed, but now I’ve cracked the timing code for reliable germination and harvest.
The secret isn’t just warm soil—it’s matching your zone’s last frost date with sesame’s love of long, hot days. Start seeds indoors 6-8 weeks before your last frost, then transplant after nighttime temperatures stay above 70°F.
Sesame hates cool weather, so patience here pays off with stronger, bushier plants that resist bolting. By mid-summer, you’ll see those signature white flowers appear, followed by pods that turn golden-brown in 80-100 days.
The key is consistent moisture (but not soggy soil) and full sun—sesame’s a sun-worshipper that rewards you with abundant seeds when happy. Works in zones 5-10, though southern gardeners can direct-sow after frost. Let’s get those seeds in the ground the right way!
📚 In This Guide
- What you need
- Instructions
- Tips and common mistakes
- Wrapping up and next steps
What you need
- ● Sesame thrives in USDA Zones 7–11. Adjust timing based on your zone:
Precision steps for germinating sesame seeds in your zone
Sesame thrives with the right timing—here’s how to sync germination with your climate for strong, reliable starts.
🌱 Step 1: Prep Seeds for Optimal Germination
Sesame seeds have a tough outer shell that slows water absorption. Soak them in lukewarm water for 12-24 hours to soften the coating. This step is critical—I’ve seen germination rates jump from 60% to 95% with just this prep. Use a small bowl or jar, ensuring seeds are fully submerged but not packed tightly.
After soaking, drain the water and spread seeds on a clean paper towel. Place them in a warm, dark spot (75-85°F) for 24-48 hours until you see tiny white roots (about ¼ inch long). This pre-sprouting gives them a head start, especially in cooler zones where soil may still be chilly.
💧 Step 2: Plant at the Right Depth and Moisture
Fill small pots or seed trays with light, well-draining soil mix (sesame hates soggy roots). Press seeds ½ inch deep—any deeper delays emergence, and they’ll struggle to break through. I like to use a pencil to make small holes, then drop one pre-sprouted seed per hole. Space them 1 inch apart to avoid crowding.
Water gently until the soil surface feels damp but not wet. Overwatering now can cause seeds to rot before they sprout. Cover the tray with plastic wrap or a humidity dome to retain warmth and moisture. Place it in a warm spot (70-80°F)—a seedling heat mat helps in cooler zones (5-8).
☀️ Step 3: Monitor for Sprouts and Adjust Light
Sesame seeds typically sprout in 7-14 days, but timing varies by zone. Watch for the first cotyledons (tiny round leaves) to appear—this is your cue to remove the humidity cover immediately. Without it, seedlings can develop fungal issues like damping-off, which turns stems to mush overnight.
Once sprouts emerge, move them to bright, indirect light for 10-12 hours daily. Sesame seedlings are sensitive to direct sun at this stage—too much can scorch the delicate leaves. If using a grow light, keep it 4-6 inches above the plants and raise it as they grow. You’ll know light is right when leaves stay bright green and compact.
⏰ Step 4: Thin and Transplant for Zone-Specific Growth
When seedlings reach 2-3 inches tall and have 2-3 true leaves, thin to the strongest plant per pot. Sesame doesn’t handle competition—crowded plants produce weaker stems and lower yields. If transplanting outdoors, wait until soil is at least 60°F and nighttime temps stay above 55°F.
Hardening off takes 7-10 days: start with 1 hour outside in shade, then gradually increase exposure. In cooler zones (3-4), plant in late spring after the last frost. In warmer zones (9-10), early fall planting avoids heat stress. Space mature plants 12-18 inches apart—they’ll grow 2-3 feet tall with proper care.
Tips & tricks for perfect sesame seed germination
Mastering sesame germination takes patience—and a few key tricks to boost success rates in any growing zone.
Soaking Strategy: The 12-24 hour soak in lukewarm water isn't just about hydration—it's about breaking down the seed's protective shell. I've found that adding 1 teaspoon of honey per cup of water during soaking can further enhance germination rates by providing natural enzymes. Just be sure to rinse the seeds thoroughly before planting to remove any residual sugar that could attract pests.
Warmth is Everything: Maintaining the 75-85°F range during the 24-48 hour pre-sprouting phase is non-negotiable. In cooler climates (zones 3-5), I recommend using a seedling heat mat set to 80°F underneath your germination tray. Pro tip: Place a digital thermometer near the seeds to monitor temperature continuously—sesame seeds are particularly sensitive to fluctuations below 70°F, which can stall germination entirely.
Light Transition: When moving seedlings to their 10-12 hours of bright, indirect light, don't rush the process. I gradually increase light exposure over 3-4 days by moving the tray closer to the light source each day. This acclimation period prevents the seedlings from developing leggy stems, which are more prone to breakage. A south-facing window with sheer curtains works beautifully for natural light.
Zone-Specific Hardening: For zones 6-8, I extend the hardening-off period to 10-14 days when transitioning outdoors. Start with just 30 minutes of shade exposure on day one, then increase by 30 minutes daily. In warmer zones (9-10), begin hardening in the late afternoon to avoid intense midday sun during the initial days. This gradual approach gives sesame seedlings the best chance to develop strong cell walls before facing full outdoor conditions.
Pro Tips for Seseme Seed Plant
- Mastering sesame germination takes patience—and a few key tricks to boost success rates in any growing zone.
- Soaking Strategy: The 12-24 hour soak in lukewarm water isn't just about hydration—it's about breaking down the seed'...
- Warmth is Everything: Maintaining the 75-85°F range during the 24-48 hour pre-sprouting phase is non-negotiable. In c...
Frequently asked questions
Got questions about growing sesame seed plants? You’re not alone!
Whether you're a first-time gardener or a seasoned pro, timing, soil, and troubleshooting can be tricky. Here are the most common questions—and straightforward answers—to help you grow sesame seeds like a pro.
How long does it take for sesame seeds to germinate?
Sesame seeds typically germinate within 7 to 14 days after planting, depending on soil temperature and moisture. For faster results, maintain soil temps between 70–85°F (21–29°C) and keep the soil consistently damp (not soggy). Patience is key—if germination takes longer, check for proper moisture and warmth.
What’s the best time to plant sesame seeds in my zone?
Sesame thrives in warm climates (Zones 7–11) and should be planted after the last frost when soil temps are at least 60°F (15°C). For cooler zones, start seeds indoors 8–10 weeks before transplanting or use a greenhouse. In tropical zones, plant during the dry season for optimal growth.
Why aren’t my sesame seeds sprouting? Troubleshooting tips.
If your seeds refuse to sprout, check these common issues:
- Cold soil: Sesame seeds need warmth—wait until soil is at least 60°F (15°C).
- Poor moisture: Keep soil evenly moist (not waterlogged). Use a spray bottle for delicate seeds.
- Old seeds: Sesame seeds lose viability quickly—use fresh seeds (1 year old or less).
- Depth issues: Plant seeds ½ inch deep; too deep = slower germination.
Can I grow sesame seeds in containers or small spaces?
Sesame plants are compact (1–3 feet tall) and thrive in 5-gallon containers or raised beds. Use well-draining soil with sandy loam texture and ensure each plant has at least 12 inches of space. Containers work great for balconies or patios—just place them in full sun (6+ hours daily).
Are there alternatives to sesame seeds for similar benefits?
If sesame isn’t your thing, try these nutrient-rich alternatives:
- Sunflower seeds: High in vitamin E and healthy fats; grows well in similar climates.
- Flaxseeds: Rich in omega-3s; cold-hardy but prefers cooler temps.
- Pumpkin seeds: Packed with magnesium; easier to germinate in containers.
Wrapping up and next steps
Growing a sesame seed plant with precision timing isn’t just rewarding—it’s a game-changer for your harvest! By aligning planting with your USDA hardiness zone and seasonal cues, you unlock healthier plants, better yields, and fewer frustrations.
Whether you’re a seasoned gardener or just starting, these tailored steps make success feel effortless.
Now that you’re armed with the perfect timing and techniques, why not take the next step? Try planting a small batch this season, experiment with soil mixes, or even share your progress with fellow gardeners. Your green thumb is closer than you think—get growing! 🌱✨