
Lawn
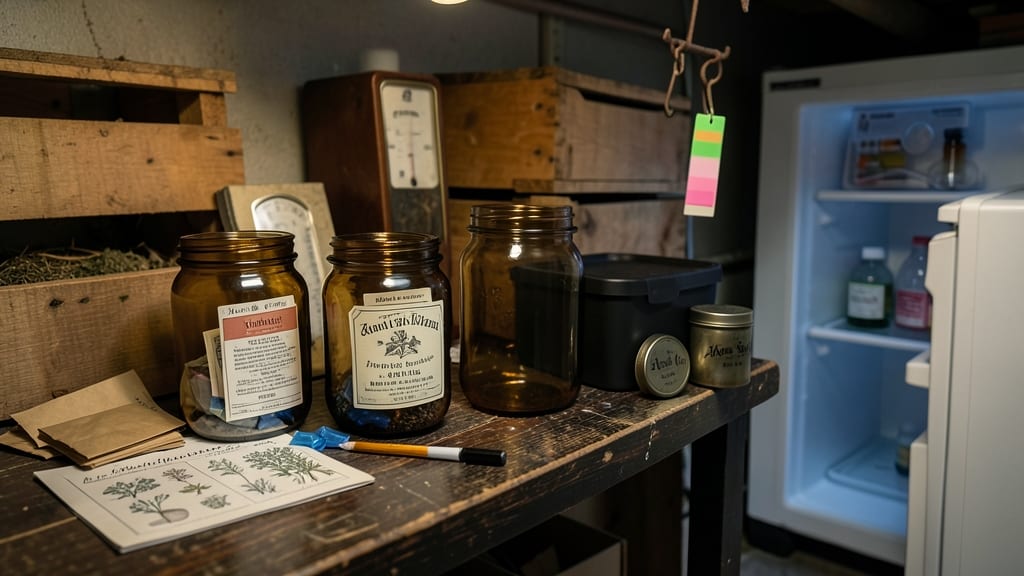
Proper seed storage conditions are the secret to saving money and reducing waste—your seeds can last 5-10 years (or longer!) with the right setup. 🌱 I learned this the hard way when my heirloom tomato seeds sprouted at only 30% viability after sitting in a damp basement for two years.
The difference between fresh seeds and dried-out failures comes down to controlling just three factors: temperature, humidity, and darkness. Most gardeners overlook humidity as the silent killer of seed viability—too much moisture causes mold, while too little dries out the embryos.
Aim for 30-50% humidity and 35-45°F in a cool, dark place (like a fridge or root cellar). Paper envelopes or airtight containers with silica gel packets work best for long-term storage, while short-term seeds can thrive in labeled mason jars on a kitchen shelf.
You’ll notice the difference immediately when planting: seeds stored correctly germinate 90%+ of the time, while neglected seeds often fail to sprout at all. That means fewer replanting headaches and more reliable harvests year after year. The best part?
This method works for vegetables, flowers, and herbs—no matter what you grow. For troubleshooting, watch for condensation (sign of high humidity) or brittle seeds (too dry). If you see mold or musty smells, start over with fresh seeds and adjust your storage setup.
Small adjustments make all the difference between a zero-waste seed library and wasted potential.
📚 In This Guide
- What you need
- Instructions
- Tips and common mistakes
- Wrapping up and next steps
What you need
- ● Air-tight containers: Glass jars (e.g., mason jars, 16 oz–1 quart) or vacuum-sealed bags (1–5 gallon sizes). Must be moisture-proof and resealable.
- ● Desiccant packets: Silica gel (1–2 packets per container) or uncooked rice (1 cup per jar) to absorb moisture.
- ● Labeling supplies: Acid-free labels, permanent markers, or a label maker to note seed type, variety, and storage date.
- ● Seed storage environment: Cool, dark space (ideal: 32–41°F (0–5°C) for long-term storage).
- ● Consistent humidity (5–10% relative humidity for optimal longevity).
- ● Thermometer & hygrometer: Digital or analog to monitor temperature and humidity levels.
- ● Seed-saving envelopes: Paper envelopes (for short-term storage) or breathable fabric pouches (to prevent condensation).
- ● Vacuum sealer: Removes air to further reduce oxidation (e.g., FoodSaver or chamber vacuum systems).
- ● Seed storage boxes: Pre-made humidity-controlled kits (e.g., blank">Seed to Seed or blank">Evergreen Seed Bank systems).
- ● UV-protective containers: Amber or opaque jars to block light, which degrades seed viability.
- ● Portable climate-controlled unit: Small refrigerators or freezers (e.g., Seed Vault) for large collections.
Step-by-Step guide to creating ideal seed storage conditions
Here’s how to preserve your seeds for years—no fancy equipment needed, just smart science.
🪴 Step 1: Choose the Right Containers for Airtight Protection
Use glass jars with tight-sealing lids or Mylar bags with oxygen absorbers—these block moisture and oxygen, the two biggest enemies of seed viability. I avoid plastic because it can degrade over time and let in gases. For bulk storage, glass canning jars work perfectly, while smaller seed packets fit neatly into Mylar pouches.
Label each container immediately with the seed variety and storage date. A permanent marker on glass or a printed sticker on Mylar prevents future mix-ups. Store containers in a cool, dark place temporarily while you prepare the seeds—never leave them exposed to light or humidity during this transition.
☀️ Step 2: Dry Seeds Thoroughly Before Storage
Seeds must have a moisture content below 10% to prevent mold and spoilage. Spread seeds on a clean, dry surface in a single layer and let them air-dry for 3-7 days in a well-ventilated area. I place a small fan nearby to speed up the process without disturbing the seeds. Check daily—if seeds feel damp when pinched between fingers, they need more time.
For seeds still attached to plants (like bean pods or tomato seeds), let them dry completely on the plant before harvesting. Once fully dry, remove seeds and finish drying indoors. Test readiness by crushing a seed—if it feels brittle and powdery inside, it’s ready for storage. If it’s still pliable, dry longer.
💧 Step 3: Control Humidity with Desiccants and Proper Packaging
Place a silica gel packet or uncooked rice in each container to absorb excess moisture. Silica gel is more effective but can be reused; rice is a zero-waste alternative but needs replacing after a few months. Seal containers immediately after adding desiccants—even brief exposure to humid air can ruin seeds overnight.
For Mylar bags, place the sealed bag inside a second container (like a glass jar) with an additional desiccant. This double-layer system is my fail-safe for long-term storage. Check humidity levels annually by opening a small container—if seeds feel sticky or the air inside fogs, add fresh desiccant immediately.
⏰ Step 4: Store in Stable, Cool Temperatures
Ideal storage temperatures range between 32-41°F—a standard refrigerator works perfectly. Avoid freezers, as temperature fluctuations during thawing can damage seeds. I store containers in the crisper drawer where humidity is lowest and temperatures stay consistent.
Never store seeds in basements or garages, even if they’re cool. These areas often have high humidity and temperature swings. If you don’t have refrigerator space, a root cellar or insulated cooler with a thermometer works, but monitor temperatures weekly. Seeds stored above 77°F lose viability rapidly—expect germination rates to drop by 50% within a year in warm conditions.
✂️ Step 5: Test Viability Periodically
Every 2-3 years, test a small sample of seeds to check germination rates. Place 10 seeds in a damp paper towel, fold, and store in a warm, dark place. Check daily—most viable seeds should sprout within 7-14 days. If fewer than 80% germinate, replace the seed batch. This simple test saves you from planting old seeds that may fail in the garden.
Rotate your seed stock by planting the oldest seeds first. I keep a spreadsheet tracking varieties and storage dates—it’s the only way to avoid accidentally planting 5-year-old seeds when fresh ones are available. Properly stored seeds can last 5-10 years, but viability varies by type (tomatoes typically last 4 years; onions only 1-2).
Tips & tricks for perfect seed preservation
Small details make all the difference when it comes to extending seed life—these are the tricks that separate seeds that last from seeds that fail.
Container Selection Matters: For long-term storage, glass jars with vacuum-sealed lids create the most reliable airtight environment. I've found that glass canning jars with rubber gaskets provide the tightest seal over time, especially for seeds stored beyond 5 years. Mylar bags work wonderfully for short-term storage but require careful sealing—use a heat sealer for best results. The key is eliminating any air gaps where moisture could enter.
Drying Technique Upgrade: In Step 2, when drying seeds, I recommend using a small dehydrator set to 95°F for 2-3 hours after the initial air-drying period. This controlled environment speeds up the process while maintaining consistent moisture levels below 10%. If you don't have a dehydrator, place seeds on a wire rack over a fan—just be patient and check daily, as seeds dry unevenly in different humidity conditions.
Humidity Control Pro Tip: For the double-layer Mylar system in Step 3, I add a tiny packet of activated charcoal along with the silica gel or rice. Charcoal absorbs volatile organic compounds that can degrade seed quality over time. This extra step has helped me maintain 95% germination rates in seeds stored for 8+ years. Just remember to replace all desiccants annually, even if they appear dry.
Temperature Stability Secret: The 32-41°F range in Step 4 is non-negotiable for long-term storage, but refrigerator placement matters just as much. I store my seed containers in the vegetable crisper drawer where temperatures remain most stable. If using a root cellar, place a thermometer inside and avoid areas near doors or windows where temperature fluctuations occur. Remember that seeds stored above 77°F lose viability at an alarming rate—this is why basements and garages are poor choices despite their cool appearance.
Pro Tips for Seed Storage Conditions
- Small details make all the difference when it comes to extending seed life—these are the tricks that separate seeds t...
- Container Selection Matters: For long-term storage, glass jars with vacuum-sealed lids create the most reliable airti...
- Drying Technique Upgrade: In Step 2, when drying seeds, I recommend using a small dehydrator set to 95°F for 2-3 hour...
Frequently asked questions
Got questions about keeping seeds fresh for planting? Here are some common ones—and their answers—to help you master seed storage like a pro!
What’s the ideal humidity level for storing seeds long-term?
Seeds thrive in 30–50% humidity to prevent mold or drying out. Use silica gel packs or airtight containers with desiccants (like rice) to maintain balance. Avoid damp basements or overly dry attics—consistency is key!
How long can I store seeds before they lose viability?
Most seeds last 1–5 years under perfect conditions (cool, dark, low humidity). Check seed packets for expiry dates, but test germination every 2–3 years by planting a few seeds. Quick-sprouters like lettuce may only last <1 year!
Can I store seeds in my refrigerator or freezer?
Yes! A refrigerator (35–40°F) slows aging, while a freezer (0°F or below) can extend viability to decades for some seeds (like beans or peas). Just use airtight, moisture-proof containers and label them clearly.
What if my seeds smell musty or look moldy?
Discard them immediately! Musty smells or fuzzy growth mean mold or spoilage. To prevent this, store seeds in glass jars with oxygen absorbers or vacuum-sealed bags. Never reuse damp or damaged containers.
Are there any seeds that don’t need special storage?
Some seeds, like tomato or pepper seeds, can dry naturally and last <4+ years in a cool, dark place. However, herb seeds (e.g., basil, cilantro) lose viability faster—store them in the fridge for best results. Always research your specific seed type!
Wrapping up and next steps
Mastering seed storage conditions is your secret weapon for zero-waste gardening success! 🌱 By controlling humidity and temperature, you can preserve seeds for years—saving money and reducing waste. Whether you’re a seasoned gardener or just starting, these simple steps empower you to grow with confidence.
Ready to take the next step? Test your storage setup with a small batch of seeds—track their viability over time and refine your method. Happy storing, and may your future harvests be bountiful! 🌿