
Lawn
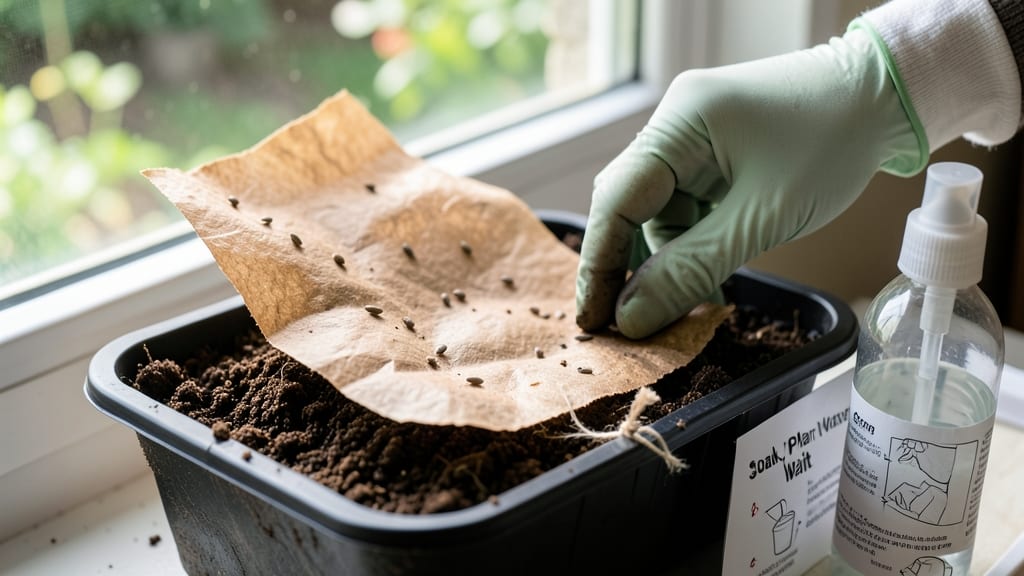
Seed paper instructions turn your craft projects into living gifts that grow into wildflowers. 🌱 The magic happens when you mix seeds, paper pulp, and a little water to form biodegradable paper that sprouts when planted—no soil prep needed at first. You’ll need wildflower seeds, recycled paper, water, and a blender to break down the paper into pulp. Spread the seed-paper mix on a screen to dry flat, then cut into shapes for planting. The best part? It dissolves in soil, leaving no trace behind. Plant your seed paper in well-drained soil, keeping it moist but not soggy. Within 10-14 days, you’ll see tiny sprouts pushing through, and in 4-6 weeks, you’ll have lush wildflowers ready to attract pollinators. Perfect for weddings, birthdays, or just adding a touch of nature to your garden. Here’s how to make it work every time!
📚 In This Guide
- What you need
- Instructions
- Tips and common mistakes
- Wrapping up and next steps
What you need
- ● Seed Mix: Choose wildflower seeds, herbs, or vegetables (e.g., basil, marigold, or sunflower). Aim for 1–2 tablespoons per sheet of paper.
- ● Unbleached Paper: Use recycled paper, coffee filters, or plain printer paper. 1–2 sheets per batch (adjust based on size).
- ● Water: Just enough to create a slurry—about ½ cup per batch.
- ● Blender or Food Processor: For blending paper into pulp. A small blender works best for DIY projects.
- ● Mixing Bowl: A shallow, wide bowl for blending pulp.
- ● Sieve or Mesh Screen: A fine-mesh strainer (hole size ~1mm) to drain excess water.
- ● Rolling Pin or Smooth Object: To press out moisture (e.g., a wooden spoon or clean bottle).
- ● Baking Sheet or Tray: Line with parchment paper for drying.
- ○ Optional Add-Ins: Natural dyes (e.g., beet juice, turmeric) for colored paper.
- ● Essential oils (e.g., lavender) for scent.
- ● A patient mindset—seed paper needs 24–48 hours to dry completely.
- ● A sunny, dry spot for drying (or a warm, low-heat oven on low if in a hurry).
- ○ Gloves (optional) if handling wet pulp or dyes.
Step-by-Step instructions for making seed paper at home
This project turns ordinary paper into a living, plantable craft—here's how to make it bloom.
🌱 Step 1: Gather Your Materials and Prepare the Base
You'll need 1 cup wildflower seeds, 2 cups water, 1 cup unsized paper pulp (or shredded paper), and 1 tablespoon psyllium husk powder—this last ingredient is key for binding. Soak your paper pulp in warm water for 10 minutes until it breaks down completely. The mixture should resemble thick, creamy oatmeal.
I like to use an old blender for this step—it saves time and ensures even consistency. If you're using pre-made paper pulp, skip the soaking and blend it directly with water. The goal is a smooth, lump-free slurry that will spread evenly when you're ready to form your paper.
💧 Step 2: Mix Seeds and Binding Agents
Once your pulp is ready, stir in the wildflower seeds and psyllium husk powder until fully combined. The psyllium acts like a natural glue, holding everything together while the seeds stay evenly distributed. For 4 sheets of seed paper, this amount is perfect—too much psyllium makes the paper brittle, and too little won't bind properly.
Here's the thing—don't overmix after adding the psyllium. Stir just until the powder dissolves and the seeds are dispersed. You'll see the mixture thicken slightly as the psyllium activates. If it looks too runny, add a splash more pulp; if it's too thick, thin it with a little more water.
☀️ Step 3: Form the Paper and Dry Evenly
Lay a smooth, non-stick surface (like a baking sheet or plastic wrap) and pour your seed mixture onto it, spreading it into a thin, even layer with a spatula or your hands. The thinner you spread it, the more delicate (and plantable) the final paper will be. Cover it with a second sheet of plastic wrap and press gently to remove air bubbles.
Let it dry completely in a warm, dry place away from direct sun for 24-48 hours. You'll know it's ready when the edges lift easily and the paper feels stiff to the touch. If you see mold or spots, your mixture was too wet—next time, use less water.
✂️ Step 4: Cut and Store for Planting
Once fully dry, carefully lift the seed paper from the surface and use a sharp knife or scissors to cut it into your desired shapes—think greeting cards, bookmarks, or decorative coasters. Handle it gently; seed paper is delicate but sturdy enough for light crafts. Store your finished sheets in a cool, dry place until you're ready to plant.
This is the moment that matters: when you're ready to plant, simply press the seed paper into moist soil and water lightly. Within 7-14 days, you'll see the first green sprouts pushing through—proof your craft is now a living thing.
Tips & tricks for perfect plantable paper crafting
Between us, the secret to seed paper that actually grows lies in the little details—especially when you're working with natural materials. Here's what nobody tells you about making this eco-friendly craft bloom.
Psyllium Husk Precision: That 1 tablespoon of psyllium husk powder is non-negotiable for 4 sheets—it's the glue that holds your wildflower seeds in place. I learned this the hard way after ruining three batches with too much (brittle paper) and too little (falling apart). Weigh it accurately or use a measuring spoon, then stir just until dissolved—overmixing activates the psyllium too quickly and makes your mixture gummy.
Seed Distribution Technique: In Step 2, when you're mixing the seeds, don't just dump them in. Sprinkle them gradually while stirring to ensure even distribution throughout the pulp. I like to divide the seeds into quarters and add them one at a time, folding the mixture gently between each addition. This prevents seed clusters that could create bare spots in your final paper.
Drying Strategy: The 24-48 hour drying window is critical, but don't assume any warm spot will work. I've had the best results with a dehumidifier running nearby—it creates consistent airflow without direct heat. If you're in a humid climate, extend the drying time or use a fan on low. The paper should peel away cleanly when dry; if it tears, your mixture was too wet or didn't dry evenly.
Planting Preparation: Before you plant, give your seed paper a gentle mist with water—this reactivates the seeds and ensures better soil contact. I like to press it into moist soil with a small trowel, then water lightly from above. The key is keeping the paper in place while the seeds germinate; a light rock or decorative pebble can help weigh it down during the first few days.
Pro Tips for Seed Paper Instructions
- Between us, the secret to seed paper that actually grows lies in the little details—especially when you're working wi...
- Psyllium Husk Precision: That 1 tablespoon of psyllium husk powder is non-negotiable for 4 sheets—it's the glue that ...
- Seed Distribution Technique: In Step 2, when you're mixing the seeds, don't just dump them in. Sprinkle them graduall...
Frequently asked questions
Got questions about seed paper? You’re not alone!
Here are answers to the most common queries to help you craft your plantable masterpiece with ease.
How long does it take for seeds in the paper to sprout?
Sprouting time varies by seed type, but most seed papers yield tiny seedlings in 7–21 days under ideal conditions (warmth, moisture, and sunlight). Wildflower blends often sprout faster (1–2 weeks), while herbs or grass may take longer. Keep the paper moist until you see green!
Can I make seed paper without a blender?
If you lack a blender, try these alternatives:
- Food processor – Works great for small batches.
- Mortar & pestle – Best for tiny amounts (like herbs).
- Rolling pin – Crush dried flowers/seeds into a fine powder first.
What if my seed paper curls or tears when drying?
Cracking or curling usually means uneven drying. Fix it by:
- Laying a damp cloth over the paper for 10–15 minutes to soften.
- Pressing gently with a heavy book (no direct heat!).
- Avoid stacking wet sheets—dry them flat and spaced apart.
Can I use seed paper indoors for decoration?
Yes! Seed paper makes stunning indoor decor, but germination depends on light. Place it near a sunny window or under a grow light. For non-plantable art, skip the watering—just enjoy the aesthetic! Pro tip: Frame it in a shallow shadow box to protect it from moisture.
What can I do with leftover seed paper scraps?
Don’t toss those small pieces! Repurpose them:
- Plant them directly in soil or a hanging planter.
- Glue scraps onto cards, bookmarks, or gift tags for eco-friendly crafts.
- Compost them—seeds will break down naturally.
Wrapping up and next steps
Creating your own seed paper is a rewarding way to blend creativity with sustainability! 🌱 Whether you're crafting plantable cards, gift tags, or eco-friendly stationery, you’ve now got the know-how to turn waste into wildflowers.
Start small—experiment with different seeds or designs—and soon, you’ll be sharing this green craft with friends or even selling your creations.
Ready to grow your skills? Next, try planting your seed paper in a sunny spot and watch your garden bloom from scratch. Happy crafting—and happy growing! 🌿