
Lawn
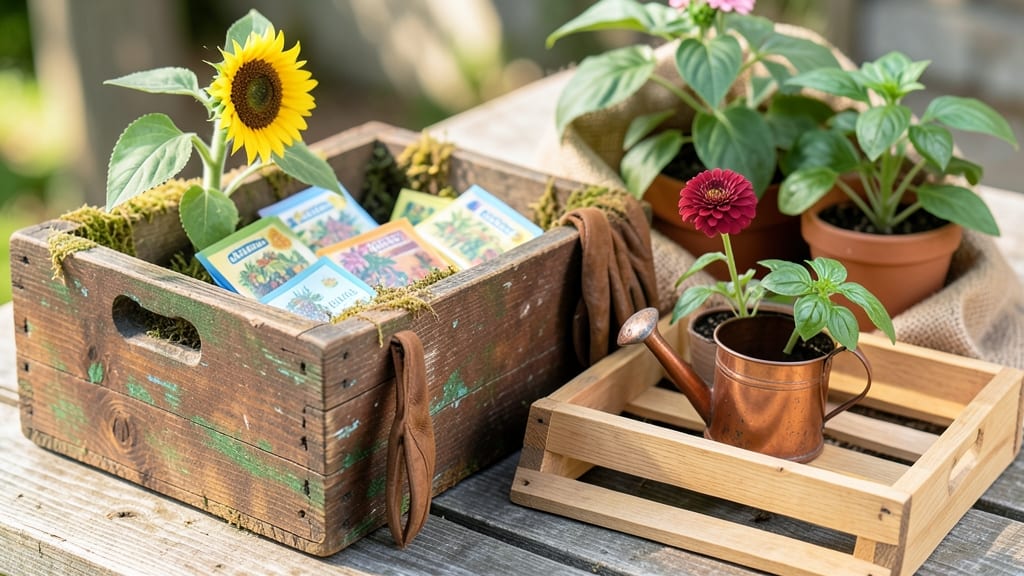
Those pretty seed packets on your shelf aren’t just labels—they’re the first spark of your garden’s future. 🌸 I’ve collected them for years, not just for planting but for the way they transform a simple seed into a vision of vibrant blooms and lush foliage.
Each packet carries a story, a color palette, and a promise of what your garden could become.
Start by organizing them by color, height, or bloom time to create a visual roadmap for your garden. My sunny border is packed with cheerful zinnias and cosmos, while the shade garden gets delicate impatiens and ferns.
The packets themselves become part of the design—display them in a shadow box or use them to wrap gifts for fellow gardeners.
You’ll find yourself designing with intention, mixing textures and heights for a garden that feels like a living painting. The best part? Every packet is a tiny, portable piece of your garden’s soul, ready to inspire your next planting decision or decorate your journal pages with botanical dreams.
From seed to shelf, these packets make garden planning feel like an art project. Whether you’re sketching layouts or gifting them to friends, they’re the easiest way to turn seeds into something beautiful before they even sprout.
📚 In This Guide
- What you need
- Instructions
- Tips and common mistakes
- Wrapping up and next steps
What you need
- ● Seed packets: 10–20 empty, clean seed envelopes (or kraft paper bags, if preferred). Choose ones with a sturdy design or repurpose old ones from your garden.
- ● Decorative paper: Colored cardstock, scrapbook paper, or patterned paper (8.5" x 11" sheet). Opt for acid-free materials to preserve seed viability.
- ● Adhesive: A glue stick, double-sided tape, or a small bottle of craft glue for secure sealing.
- ● Seeds: Your saved or purchased seeds (ensure they’re properly dried and labeled). Aim for small quantities (e.g., 1–2 tbsp per packet).
- ● Labels & markers: Acid-free labels, sticker paper, or a fine-tip permanent marker for writing seed details.
- ○ Optional embellishments: Washi tape, dried flowers, lace trim, or stencils for added flair.
- ● Scissors or a paper cutter for clean cuts.
- ● A ruler to measure and align designs evenly.
- ○ Bone folder or credit card for crisp folds (optional but helpful!).
- ● Hole punch (if using ribbon or twine to close packets).
- ○ Sealing wax or clear nail polish (optional) to seal edges and add a polished look.
Step-by-Step instructions for growing beautiful flowers from seed packets
Here's how to turn those charming seed packets into a burst of vibrant color—no green thumb required.
🌱 Step 1: Choose the Right Time and Location
Check the back of your seed packet for the last frost date in your area. Most annual flowers thrive when planted 2-3 weeks after frost—this gives the soil time to warm up. I like to start seeds indoors 6-8 weeks before that date if my growing season is short, but many pretty flowers like zinnias and marigolds can be sown directly outside once the soil reaches 60°F.
Pick a sunny spot that gets at least 6-8 hours of sunlight daily. If you're planting in containers, make sure they have drainage holes—waterlogged roots kill seedlings faster than anything. I always test my spot by placing a seed packet in the ground for a week to see how much sun it really gets.
🌱 Step 2: Prepare the Soil and Sow Seeds
Loosen the top 6 inches of soil with a garden fork or trowel to help roots spread easily. Mix in a handful of compost or the balanced fertilizer from your packet if the soil looks tired. For containers, fill them halfway with potting mix and add a sprinkle of slow-release fertilizer.
Read the planting depth on your seed packet—it’s usually twice the seed’s diameter. Scatter seeds thinly, spacing them 1-2 inches apart (crowding leads to weak, leggy plants). Cover lightly with soil, then gently water until the surface looks damp but not soggy. I use a spray bottle for delicate seeds like snapdragons to avoid washing them away.
☀️ Step 3: Keep Seeds Happy Until Germination
Most flower seeds need warmth to sprout, so keep the soil at 65-75°F using a clear plastic dome or even a sheet of plastic wrap. Place the tray in a warm spot like on top of the fridge or near a sunny window. You’ll see tiny sprouts in 7-14 days—watch for the first true leaves (the second set after the initial seed leaves).
Once sprouts appear, remove the cover immediately to prevent mold. Water gently from the bottom (place the tray in a shallow dish of water for 10 minutes) to avoid disturbing the seedlings. If you notice any yellowing or wilting, you’re either overwatering or underwatering—let the top inch of soil dry out between waterings.
🌿 Step 4: Thin and Care for Healthy Seedlings
When seedlings have 2-3 sets of true leaves, thin them to 6-12 inches apart (check your packet for spacing). Use scissors to snip unwanted plants at soil level—this avoids disturbing the roots of the ones you’re keeping. I always save the thinned seedlings for cooking or crafts (basil leaves make great garnishes!).
Fertilize lightly with a balanced, water-soluble fertilizer (like 10-10-10) every 2-3 weeks once seedlings are established. Watch for pests like aphids—spray with soapy water if you spot them early. Deadhead spent blooms regularly to encourage more flowers and prevent self-seeding if you don’t want surprises next year.
⏰ Step 5: Enjoy Your Blooms and Plan Ahead
Your flowers will start blooming in 6-12 weeks, depending on the variety. Cut back spent blooms to the nearest set of leaves to keep the plant producing. If your flowers are annuals, they’ll fade at the first frost—save seeds from your favorites for next year by letting a few pods dry on the plant before harvesting.
For perennials like coneflowers or black-eyed Susans, cut back stems in late fall to 2 inches tall and mulch lightly. This protects roots over winter and gives them a strong start in spring. I always label my plants with the seed packet info so I know what to expect next season!
Tips & tricks for perfect seed packet blooms
Transforming tiny seed packets into vibrant flowers doesn't have to be intimidating—these simple tricks will help you avoid common pitfalls and grow gorgeous blooms with confidence.
Timing is Everything: The 6-8 hours of sunlight mentioned in Step 1 is non-negotiable for most annual flowers. If your garden spot gets less light, choose shade-tolerant varieties like impatiens or begonias instead of sun-lovers like zinnias. I always test sunlight exposure by placing a seed packet in the spot for a week—if it gets less than 6 hours, reconsider your location.
Soil Secrets: In Step 2, don't skip the compost! If your soil looks tired or compacted, mix in a 2-inch layer of compost before planting. For containers, use a high-quality potting mix with added perlite for drainage—this prevents the waterlogged roots that kill seedlings. I've ruined batches by skipping this step, especially in heavy clay soil.
Germination Troubleshooting: When waiting for those 7-14 days of germination in Step 3, keep soil consistently moist but not soggy. A simple trick: place your seed tray on a bed of pebbles in a shallow dish of water. The tray lifts slightly, allowing water to wick up as needed without overwatering. This method creates perfect humidity without the mold risk of plastic domes.
Thinning Made Easy: The 2-3 sets of true leaves stage in Step 4 is your cue to thin. Instead of pulling seedlings (which disturbs roots), use clean scissors to snip at soil level. I always save the thinned seedlings—you can transplant them to other spots or even use them in cooking (basil, chives, and nasturtiums are edible!).
Pro Tips for Pretty Seed Packets
- Transforming tiny seed packets into vibrant flowers doesn't have to be intimidating—these simple tricks will help you...
- Timing is Everything: The 6-8 hours of sunlight mentioned in Step 1 is non-negotiable for most annual flowers. If you...
- Soil Secrets: In Step 2, don't skip the compost! If your soil looks tired or compacted, mix in a 2-inch layer of comp...
Frequently asked questions
How long do pretty seed packets last once opened?
Most seed packets stay viable for 1–2 years unopened, but once opened, store them in a cool, dry place (like a sealed container with a silica packet) to extend their life. Rule of thumb: Use them within 6 months for best germination rates. Check the packet’s expiration date—it’s your best guide!
Can I plant pretty seed packets directly in the ground?
Many pretty seed packets (like wildflowers or annuals) thrive when direct-sown outdoors. Just follow the depth guidelines on the packet—usually 2–3 times the seed’s width. For delicate seeds (e.g., snapdragons), start indoors 4–6 weeks before the last frost for a head start.
What’s the best way to store leftover seeds from pretty packets?
Preserve seeds by storing them in airtight containers (like mason jars or envelopes) with a desiccant packet (or a spoonful of rice). Keep them in a dark, cool spot (50–60°F is ideal). Label with the variety and date—no more mystery seeds!
Are pretty seed packets more expensive than regular seeds?
Sometimes! Pretty packets often come in smaller quantities (e.g., 10–50 seeds) for specialty varieties, while bulk seeds (like sunflower or marigold) are cheaper per seed. Pro tip: Buy multi-packs or share with friends to split costs. Check local nurseries—they sometimes offer discounts on “ugly” bulk packets!
What if my pretty seeds won’t germinate?
Don’t panic! First, check if they’re fresh (old seeds may need scarification or stratification). Ensure they’re planted at the right depth and moisture level—some need light to sprout (like petunias). If all else fails, try soaking seeds overnight in lukewarm water before replanting.
Still stumped? Snap a photo of your packet and ask a local garden club—they’re full of seed-saving secrets!
Wrapping up and next steps
Pretty seed packets aren’t just charming—they’re your gateway to effortless, beautiful blooms that bring life to any garden or patio. Whether you’re a seasoned gardener or just starting out, these tiny treasures make growing flowers a breeze, blending ease with aesthetic joy. 🌸
Ready to transform your space? Start by picking your favorite seed packets, grab your supplies, and let nature do the rest. Plant a seed today—your future garden will thank you! 🌱