
Lawn
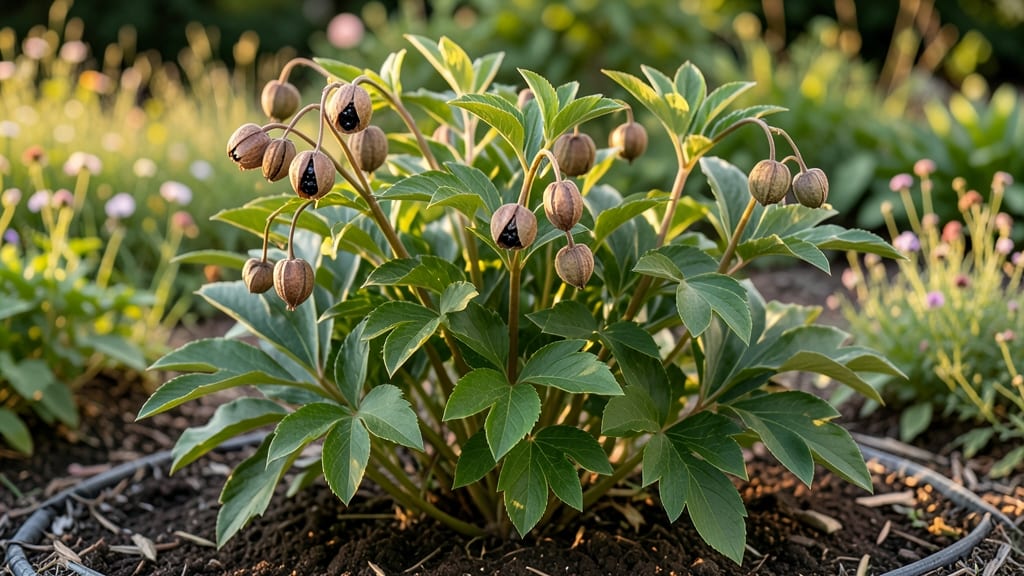
Peony seed pods are nature’s slow-motion treasure chest—🌸 but only if you know how to unlock them. Most gardeners skip this route entirely, since peonies are famously stubborn from seed. I’ve grown dozens from pods, though, and the ones that finally bloom?
They’re the most vibrant in my garden, with colors that defy the catalogs. The secret lies in patience: collecting them at the right moment, drying them properly, and mimicking winter’s chill before planting.
Here’s the truth: 90% of peony seeds won’t germinate—even with perfect care. But the 10% that do? They reward you with plants that outperform nursery divisions in just a few years.
You’ll need a sharp pair of scissors, a paper bag for drying, and a fridge or cold frame for stratification. No fancy tools, just time and attention. The payoff comes in year three or four, when those first blooms appear.
What you’ll end up with are seedlings that crave full sun and well-draining soil, but won’t tolerate soggy roots. They grow slowly at first—think of them as toddlers in the plant world—so don’t rush them.
By year five, you’ll have peonies that bloom earlier and longer than their divided cousins, thanks to the genetic diversity of seed-grown stock. The fragrance alone makes the wait worthwhile.
This method works best in zones 3-8, where winters are cold enough for natural stratification. For warmer climates, extend the cold treatment to 12-16 weeks.
And if you’re impatient (like I was), remember: the first few years are about nurturing roots, not flowers. That’s when the magic happens underground.
📚 In This Guide
- What you need
- Instructions
- Tips and common mistakes
- Wrapping up and next steps
What you need
- ● Fresh peony seed pods: Harvest only fully mature, brown, and slightly papery pods (avoid green or soft ones!). Aim for 10–20 pods depending on your desired yield.
- ● Pruning shears or sharp scissors: Sterilized to prevent disease transfer (rubbing alcohol wipe works!).
- ● Paper towels or newspaper: 2–3 sheets for drying seed pods indoors.
- ● Brown paper bags or breathable mesh bags: 1–2 bags (with holes for airflow) to store pods during drying.
- ● Small cardboard box or seed tray: For cold stratification (ensure it’s at least 6 inches deep and has drainage holes).
- ● Potting soil or perlite: 2–3 cups (sterile, seed-starting mix preferred).
- ● Plastic wrap or clear lid: To create a mini greenhouse effect during stratification.
- ● Labeling tags & permanent marker: To track pod varieties and harvest dates!
- ● Desiccant packs (e.g., silica gel): Speed up drying time if pods are damp.
- ● Fine-mesh strainer or sieve: For gently separating seeds from chaff after drying.
- ● Humidity tray (with pebbles & water): If your home is dry, to maintain 40–50% humidity during drying.
- ● Grow lights or sunny windowsill: For post-stratification seedling care (if germinating indoors).
- ● Notebook or app (e.g., Gardenate): To log stratification start/end dates and seedling progress.
Step-by-Step instructions for harvesting, drying, and cold stratifying peony seed pods
Here's how to transform last season's peony seed pods into next year's vibrant blooms.
🌱 Step 1: Harvest Mature Seed Pods at the Right Time
Wait until the seed pods turn a deep brown color and begin to split open naturally—this usually happens in late fall after the first frost. Harvest them when they're dry but haven't yet released seeds onto the ground. Use clean, sharp pruning shears to snip the pods from the stems, leaving a small portion of the stem attached for easier handling.
I always work on a dry day when the pods are completely free of morning dew. This prevents moisture from encouraging mold growth during the drying process. Collect pods in a paper bag or open mesh container to allow airflow—plastic bags trap humidity and ruin your seeds.
💧 Step 2: Dry the Seed Pods Thoroughly Before Extraction
Spread the harvested pods in a single layer on a screen or clean piece of window screen in a dry, well-ventilated area. Choose a spot with indirect sunlight—direct sun can overheat and crack the pods. Let them dry for 2-4 weeks, turning them occasionally to ensure even drying. You'll know they're ready when the pods feel light and brittle when squeezed gently.
Don't rush this step. If pods aren't completely dry, moisture trapped inside will cause the seeds to rot during storage. I test dryness by gently pressing a pod—if it crumbles easily, it's ready. Store the dried pods in a paper envelope labeled with the variety and harvest date until you're ready to extract the seeds.
✂️ Step 3: Extract and Clean the Seeds
Once fully dry, open each pod carefully with your fingers or a small knife to release the seeds. You'll find 1-3 large, dark seeds per pod, each about the size of a small pea. Remove any empty seed cases or debris by hand—don't use water to clean them, as peony seeds are sensitive to moisture at this stage.
Inspect each seed for signs of damage or disease. Healthy seeds are firm and plump, with a smooth, unblemished surface. Discard any seeds that feel soft, shriveled, or show signs of mold. Store the viable seeds in a small paper envelope or mesh bag in a cool, dark place until you're ready to stratify them.
⏰ Step 4: Cold Stratify Seeds for Successful Germination
Peony seeds require cold stratification to break dormancy. Place the seeds in a sealed plastic bag with a small amount of damp (not wet) sand or perlite. The moisture level should feel like a damp sponge—squeeze it gently, and just a few drops should come out. Seal the bag and place it in your refrigerator for 3-4 months at a temperature of 35-40°F.
Check the seeds monthly to ensure they haven't dried out or developed mold. If the sand feels dry, mist it lightly with water and reseal the bag. After the stratification period, plant the seeds immediately in well-draining soil at a depth of 1 inch. Peony seeds germinate slowly—don't expect sprouts for 6-12 months.
☀️ Step 5: Plant Stratified Seeds in Prepared Soil
Choose a sunny location with 6+ hours of direct sunlight daily—peonies thrive in full sun. Prepare the planting area by amending the soil with compost to improve drainage and fertility. Plant the stratified seeds 1 inch deep and 12 inches apart, spacing them to allow for future growth. Water gently after planting to settle the soil around the seeds.
Keep the soil evenly moist but not soggy during the germination period. Mulch the area with 2-3 inches of organic mulch to retain moisture and regulate soil temperature. Be patient—young peony seedlings grow slowly, and it can take 2-3 years before you see the first blooms. The wait is worth it for the stunning, long-lasting flowers that follow.
Tips & tricks for perfect peony seed pod processing
Transforming last season's peony seed pods into next year's blooms requires patience and precision—here's how to avoid common pitfalls and maximize success.
Timing is Everything: Harvest pods only after the first frost when they've turned deep brown but haven't released seeds. I've learned this the hard way—waiting too long means seeds scatter, while harvesting too early results in underdeveloped seeds that won't germinate. The 2-4 week drying period in Step 2 is equally critical; rushing this step risks moisture damage that can ruin your seeds entirely.
Environmental Control: For Step 2's drying process, I recommend setting up a drying station near an open window with indirect sunlight. Avoid attics or garages where temperature fluctuations can occur—consistent conditions are key. If your climate is particularly humid, consider placing a small fan nearby to improve airflow without disturbing the pods. The goal is to mimic natural drying conditions while preventing mold growth.
Seed Viability Check: When inspecting seeds in Step 3, pay special attention to their weight and appearance. Healthy peony seeds should feel dense and firm—like small marbles—rather than hollow or shriveled. I've found that using a magnifying glass helps identify tiny cracks or mold spots that might not be visible to the naked eye. Discarding compromised seeds now saves months of frustration later.
Stratification Strategy: During the 3-4 month cold stratification in Step 4, I place a small piece of paper with the variety name and harvest date inside the bag before sealing it. This prevents mix-ups if you're working with multiple peony varieties. Also, use a refrigerator with consistent temperatures—avoid those with door temperature fluctuations that can occur in some models. The 35-40°F range is non-negotiable for breaking dormancy properly.
Pro Tips for Peony Seed Pods
- Transforming last season's peony seed pods into next year's blooms requires patience and precision—here's how to avoi...
- Timing is Everything: Harvest pods only after the first frost when they've turned deep brown but haven't released see...
- Environmental Control: For Step 2's drying process, I recommend setting up a drying station near an open window with ...
Frequently asked questions
Got questions about peony seed pods?
You’re not alone! Here are some of the most common queries—plus straightforward answers to help you navigate harvesting, drying, and cold stratification like a pro.
When is the best time to harvest peony seed pods?
Harvest peony seed pods when they turn tan or brown and begin to split open naturally—usually in late summer to early fall (August to October, depending on your climate). Avoid harvesting if pods are still green or wet, as they won’t dry properly. Pro tip: Check daily, as pods dry quickly once mature!
How long does cold stratification need to take for peony seeds?
Cold stratification mimics winter conditions and typically requires 60–90 days in the fridge (or outdoors in a protected area). Place moistened seeds in a sealed bag with damp peat moss or paper towels, then store them at 35–40°F (2–4°C). Don’t rush it! Inconsistent stratification can delay or prevent germination.
What if my peony seed pods won’t dry or stay moldy?
If pods stay damp or develop mold, they’re likely too humid. Spread them in a single layer in a well-ventilated area (like a mesh bag or screen tray) and avoid direct sunlight. Use a fan on low to circulate air. If mold appears, discard affected pods immediately—never risk using them, as mold can harm germination.
Can I grow peonies from seed pods if I don’t have a fridge?
Yes! If you lack fridge space, try outdoor cold stratification by planting pods directly in the ground in fall (before frost). Cover them lightly with soil and mulch. Nature handles the cold work for you—just be patient, as germination may take 1–2 years.
How do I know if my peony seeds are viable after drying?
Viable seeds are plump, firm, and dark-colored (not shriveled or hollow). For extra peace of mind, conduct a float test: Drop seeds in water—viable ones sink, while empty or dead ones float. Store good seeds in a cool, dry place (like a sealed container with silica gel) for up to 2 years.
What’s the fastest way to germinate peony seeds?
After stratification, plant seeds shallowly (¼ inch deep) in well-draining soil and keep them consistently moist (not soggy). Germination can take 3–6 months, so patience is key! Use a humidity dome or plastic wrap to retain moisture until sprouts appear. Speed up the process by soaking seeds in warm water for 24 hours before planting.
Wrapping up and next steps
Peony seed pods are a gardener’s secret to nurturing next year’s stunning blooms—but patience and care are key! By harvesting, drying, and cold-stratifying these pods, you’re setting the stage for vibrant, healthy peonies that’ll reward you with showstopping flowers.
Don’t let this natural process intimidate you; with the right steps, anyone can master it.
Ready to grow your own peony patch? Start by gathering your pods this fall and follow the simple techniques outlined above. Soon, you’ll be watching your garden transform into a lush, fragrant paradise—one seed at a time! 🌸