
Lawn
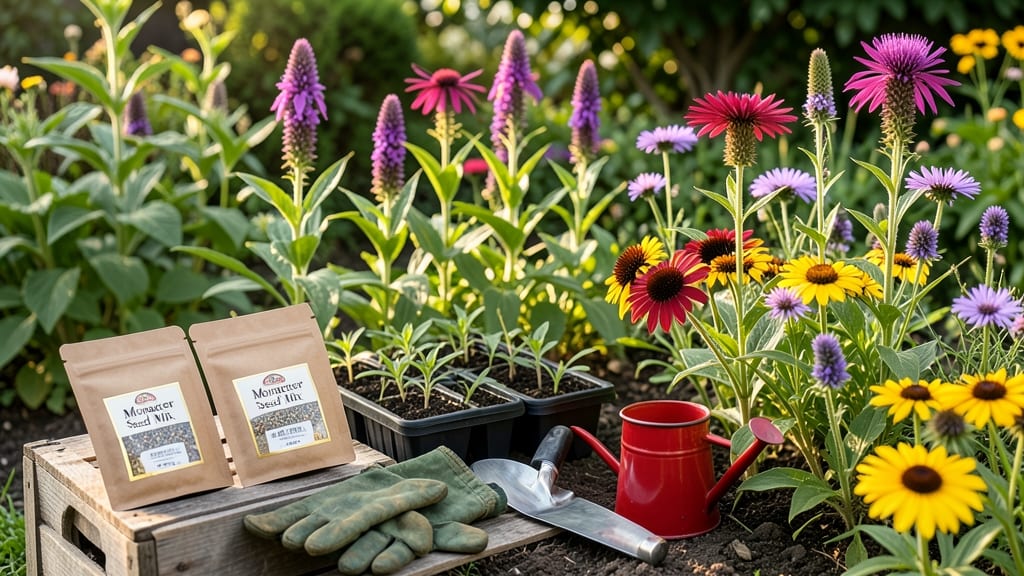
Cold-stratifying your monarch seed mix unlocks the secret to 90% germination—no fancy equipment, just a little winter magic. 🌱 I learned the hard way that skipping this step means waiting months for milkweed to sprout, if it even bothies.
The right mix of seeds (native milkweed varieties) and a few weeks in the fridge transforms flimsy paper-thin seeds into sturdy little powerhouses ready to fuel monarch caterpillars.
You’ll need a sunny patch with 6+ hours of light, well-draining soil, and patience—because monarchs don’t rush. The best time to plant is mid-April to early May after the last frost, but the real prep happens in October or November when you cold-stratify.
This mimics nature’s way of breaking seed dormancy, so you skip the guesswork and get bold, healthy starts instead of patchy, weak seedlings.
By summer, you’ll have foot-tall milkweed buzzing with butterflies, their orange wings contrasting against the deep green leaves. The flowers attract pollinators too, turning your garden into a living ecosystem instead of just another green space. Plus, the caterpillars? They’ll strip the leaves clean—proof your plants are doing their job.
Works in full sun or partial shade, though monarchs prefer open areas for easy spotting. If deer or rabbits are a problem, plant near your house or add a simple wire cage until the plants establish.
The payoff? A garden that’s not just pretty, but purposeful—where every bloom supports the next generation of monarchs.
📚 In This Guide
- What you need
- Instructions
- Tips and common mistakes
- Wrapping up and next steps
What you need
- ● Monarch seed mix (pre-mixed or custom blend): 1–2 lbs of Asclepias seeds (e.g., Asclepias tuberosa for butterfly weed, Asclepias syriaca for common milkweed)
- ○ Optional: Add native wildflowers (e.g., Liatris, Echinacea) for pollinator diversity.
- ● Cold-stratification supplies: Plastic storage bag or breathable mesh bag (quart-sized)
- ● Moistened paper towels or peat moss (enough to lightly cover seeds)
- ● Planting containers: Seed trays or small pots (4–6 inches deep) with drainage holes
- ● OR direct-sow into a prepared garden bed (if skipping indoor stratification).
- ● Potting soil: 1–2 bags of well-draining, sterile potting mix (e.g., Miracle-Gro® or FoxFarm®)
- ● Basic gardening tools: Small hand trowel or spoon (for sowing seeds)
- ● Spray bottle (for gentle watering)
- ○ Gloves (optional, but seeds can be sticky!)
- ● Outdoor setup (if direct-sowing): Garden bed or large container (minimum 12" depth for mature milkweed)
- ● Compost or aged manure (to enrich soil)
- ● Mulch (straw or shredded leaves, 1–2 inches thick)
- ○ Optional (but helpful!): Grow lights or sunny windowsill (for indoor seedlings)
- ● Plant labels (to track varieties)
- ● Insecticide soap (to deter early pests like aphids)
Step-by-step guide to growing cold-stratified monarch butterfly seed mix
Transform your garden into a monarch haven with these foolproof steps for jumpstarting milkweed blooms.
🌱 Step 1: Prepare Your Seed Mix and Containers
Start by filling your chosen containers—whether it's 4-inch pots or a seed tray with cells—with a sterile seed-starting mix. I like to add a 10% perlite or vermiculite mix to improve drainage, which helps prevent fungal issues common with milkweed seeds. Moisten the mix until it's damp but not soggy, then let it sit for 10-15 minutes to settle.
Scatter the seeds evenly across the surface. Monarch seed mixes often contain Asclepias species, so don't worry if the packet includes multiple varieties. Press them lightly into the soil—just enough so they make contact, but no deeper than ¼ inch. This ensures they won’t rot before germinating. Label your containers with the variety and date, since milkweed seeds can take 2-4 weeks to sprout.
💧 Step 2: Cold-Stratify for Successful Germination
Here’s the magic: milkweed seeds need cold stratification to break dormancy. Place your containers in a plastic bag and seal them tightly, then refrigerate for 4-6 weeks. Keep them in the crispest part of your fridge, around 35-40°F, and check weekly for moisture. If the soil dries out, mist lightly—condensation inside the bag will help maintain humidity.
This cold treatment mimics winter conditions, tricking the seeds into thinking spring has arrived. After 4 weeks, transfer the containers to a warm, bright spot (like a sunny windowsill) and wait for germination. You’ll know it’s working when you see tiny green shoots pushing through the soil in 7-14 days. Patience is key—some seeds may take longer, especially if your fridge runs cooler.
☀️ Step 3: Transplant and Provide Optimal Growing Conditions
Once seedlings reach 2-3 inches tall and develop their first true leaves (not the initial cotyledons), it’s time to transplant. Harden them off by placing them outside in partial shade for 2-3 hours the first day, gradually increasing exposure. After 5-7 days, they’ll be ready for their permanent spot in the garden.
Choose a location with full sun (6+ hours daily) and well-draining soil. Monarchs are picky about their host plants, so ensure your milkweed gets regular watering—keep the soil evenly moist but not waterlogged. Mulch around the base with 2-3 inches of organic mulch to retain moisture and suppress weeds. You’ll see rapid growth once established, with some varieties flowering in as little as 8-10 weeks.
🌿 Step 4: Maintain for Continuous Blooms and Monarch Visits
Milkweed thrives with minimal maintenance, but a little care goes a long way. Deadhead spent blooms to encourage prolonged flowering, which attracts monarchs throughout the season. Watch for aphids or milkweed beetles—they’re common pests, but a strong spray of water usually does the trick. If needed, use neem oil as a natural remedy.
By mid-summer, your plants should be bursting with flowers, and you’ll start seeing monarch caterpillars munching away. This is a good sign! Leave some leaves for them—they’ll turn into vibrant orange and black butterflies in 10-14 days. If you’re in a cooler climate, milkweed may go dormant in fall, but the seeds will self-sow for next year’s garden.
Tips & tricks for perfect monarch butterfly seed mix
Here's what nobody tells you about getting those milkweed seeds to sprout reliably—these tricks make all the difference.
Soil Prep Secret: When mixing your sterile seed-starting mix with the 10% perlite or vermiculite, sift it first to break up any clumps. This ensures even moisture distribution and prevents fungal issues that can kill your seeds before they sprout. I also like to warm the mix slightly (not hot) before planting—just place the containers in a warm spot for 30 minutes. This jumpstarts microbial activity that helps seeds establish faster.
Cold-Stratification Hack: The 4-6 week refrigeration period is critical, but don't just toss your containers in any fridge shelf. Place them in a plastic bag with a tiny hole for airflow, then position them on the crispest shelf—usually the lower drawer or back of the fridge where temps hover around 35-40°F. I've found that checking weekly for moisture is key: condensation inside the bag maintains humidity perfectly, but if you notice the soil looks dry, just mist lightly with water at room temperature.
Germination Visual Cue: When you transfer your containers to that warm, bright spot after 4 weeks, look for these signs of success: tiny green shoots appear first, followed by the first true leaves (they'll look different from the initial seed leaves). If you're impatient, place a heat mat underneath your containers—just set it to 70°F to speed up germination without overheating the seeds. Most seeds will sprout within 7-14 days, but some stubborn varieties might take up to 21 days.
Pro Tips for Monarch Seed Mix
- Here's what nobody tells you about getting those milkweed seeds to sprout reliably—these tricks make all the difference.
- Soil Prep Secret: When mixing your sterile seed-starting mix with the 10% perlite or vermiculite, sift it first to br...
- Cold-Stratification Hack: The 4-6 week refrigeration period is critical, but don't just toss your containers in any f...
Frequently asked questions
Got questions about growing monarch butterfly seed mixes?
You’re not alone! Here are answers to the most common queries to help you cultivate a thriving habitat for these majestic pollinators.
What does "cold-stratified" mean, and why is it necessary?
Cold-stratification mimics winter conditions to break seed dormancy. Monarch seed mixes require this process (typically 4–6 weeks in the fridge) to germinate properly. Skipping it often results in poor or no sprouting—so don’t skip this step!
How long does it take for monarch seed mix to germinate?
Germination usually takes 10–21 days after cold-stratification, depending on soil warmth and moisture. Keep seeds in consistent humidity (not soggy!) and watch for tiny green shoots. Patience pays off—milkweed is worth the wait!
Can I plant monarch seed mix in fall instead of spring?
Yes! Fall planting (after the first frost) works if your climate has mild winters. Seeds will naturally stratify in the ground. Just ensure they’re covered lightly with soil (¼ inch) and protected from critters. Spring planting is safer in colder zones.
What if my seeds don’t sprout? Troubleshooting tips.
Try these fixes:
- Check stratification: Ensure seeds spent 4–6 weeks in the fridge (not freezer!).
- Soil warmth: Seeds need consistent 60–70°F soil to germinate.
- Moisture: Keep soil damp (not waterlogged) with a spray bottle.
- Fresh seeds: Old seeds (over 1 year) may lose viability.
Are there alternatives if milkweed isn’t available?
While milkweed is essential for monarchs, you can supplement with native nectar plants like:
- Swamp milkweed (Asclepias incarnata)
- Butterfly weed (Asclepias tuberosa)
- Joe-Pye weed (Eutrochium spp.)
- Goldenrod (Aster spp.)
Wrapping up and next steps
Growing a monarch seed mix is your chance to create a vibrant, pollinator-friendly haven right in your backyard! 🌸 With just a little patience and care—especially that all-important cold stratification—you’ll soon witness milkweed magic unfold as monarchs flutter through your garden.
Ready to take the next step? Start small—plant a few seeds in a pot or a dedicated patch, then expand as your confidence (and monarch population!) grows.
Now grab those gloves, grab a trowel, and let’s get planting—your future monarch friends are waiting! 🦋✨