
Propagation
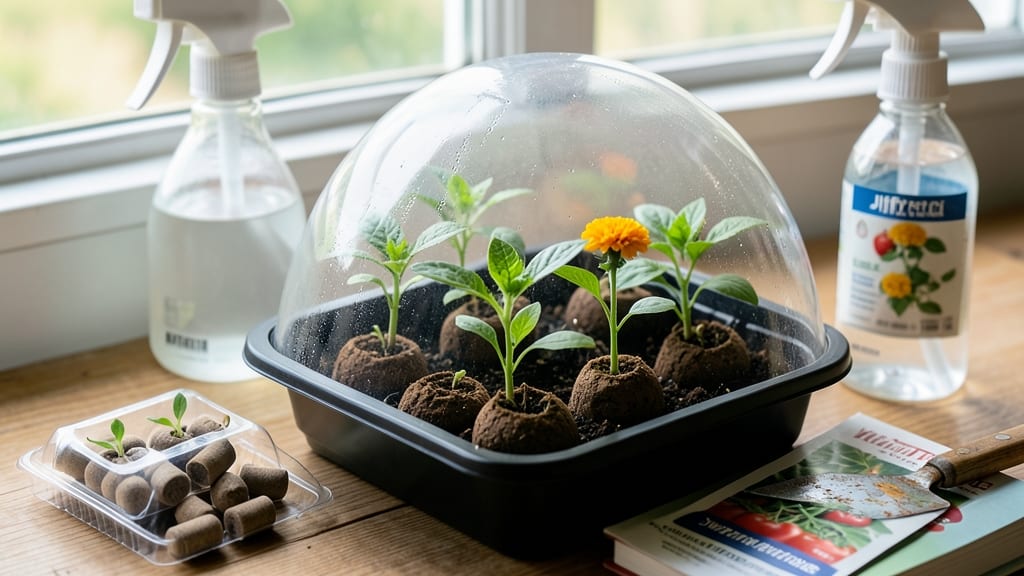
Jiffy seed starting mix turns stubborn seeds into sprouts in just 7 days—no more waiting weeks for germination. 🌱 I’ve used it for everything from delicate herbs to stubborn tomatoes, and the difference is night-and-day compared to regular soil.
The secret? Perfect moisture retention, aeration, and a neutral pH that coaxes seeds awake faster than anything else.
The magic is in the pre-moistened pellets that expand into fluffy, airy pots—no measuring or mixing required. You’ll need a tray or flat to catch drainage, a spray bottle for gentle watering, and a warm spot (around 70°F) to keep things cozy.
Light comes next: bright, indirect light for most seeds, but some like parsley and carrots prefer shade until they sprout.
By day 7, you’ll see tiny green hooks breaking through the surface, ready to soak up sunlight. The best part? Transplanting is gentle—just pop the whole pellet into the ground, roots and all. No root disturbance means stronger seedlings that outpace store-bought plants by weeks.
Here’s the kicker: this method works for indoor windowsills or outdoor cold frames, and it’s foolproof for beginners. No more guessing if your seeds are dead or just slow—just follow the steps, and you’ll have a jungle of seedlings in no time. Let’s get those seeds growing!
📚 In This Guide
- What you need
- Instructions
- Tips and common mistakes
- Wrapping up and next steps
What you need
- ● Jiffy Seed Starting Mix – 1-2 packs (72-144 pellets) (standard 1.5"–2" size)
- ● Seedling trays or pots – 1-2 trays (1020-cell or 72-cell) OR 4"-6" pots
- ● Seeds – Fast-germinating varieties (e.g., lettuce, radishes, basil, or marigolds)
- ● Water – Room-temperature, dechlorinated (let sit 24 hrs) or rainwater
- ● Spray bottle – 8-16 oz with fine mist nozzle
- ○ Clear plastic dome or plastic wrap – For humidity (optional but recommended)
- ● Grow lights or sunny windowsill – 6+ hours of light daily
- ● Gloves – Nitrile or gardening gloves (to keep hands clean)
- ● Tweezers or pencil – For placing tiny seeds
- ○ pH test kit – Optional (ideal soil pH: 6.0–7.0)
- ● Fertilizer (balanced, water-soluble) – 1 tsp per gallon of water (use after sprouts appear)
- ○ Heat mat (optional) – For cold climates (70–75°F ideal for germination)
- ● Label markers & tags – To track seed varieties
Step-by-Step instructions for Jiffy seed starting mix
Here's how I guarantee fast, healthy germination with Jiffy pellets—no guesswork, just reliable results.
🌱 Step 1: Soak and Hydrate the Jiffy Pellets
Place your 4 Jiffy pellets in a shallow tray or plate. Pour warm water (around 70-75°F) over them until fully submerged. Let them soak for 10-15 minutes—they’ll expand dramatically, tripling in size. Handle gently; they’re fragile when wet. The goal is even hydration so each pellet grows uniformly.
Once soaked, drain excess water by tipping the tray at an angle. Press each pellet lightly to release air bubbles trapped inside. You’ll see them firm up slightly—this means they’re ready for planting. If any pellet feels soft or collapses, it didn’t soak properly. Re-soak briefly and try again. Proper hydration is the foundation for strong germination.
🌱 Step 2: Plant Seeds at the Right Depth and Spacing
Use your finger to create a small ¼-inch-deep dimple in the center of each pellet. Gently place 1-2 seeds per pellet, depending on the seed packet’s instructions. Press them lightly into the dimple—don’t bury them too deep, or they’ll struggle to emerge. For delicate seeds like lettuce, just press them onto the surface.
I like to label each pellet with the seed type and date using a toothpick and a permanent marker. This saves headaches later when seedlings look identical. Place the tray in a warm, dark spot (like a cabinet or under a grow light on low setting) for 24-48 hours. This mimics natural soil conditions and encourages roots to establish before shoots appear.
☀️ Step 3: Provide Ideal Light and Temperature for Germination
After 24-48 hours, move the tray to a bright, indirect light source—a south-facing window or under grow lights set to 12-14 hours daily. Avoid direct sun at this stage; it can overheat the pellets and dry them out too quickly. You’ll see the first true leaves (not the initial seed leaves) appear in 5-7 days—that’s your signal everything’s on track.
Keep the pellets consistently moist by misting lightly with water every 2-3 days. The pellets should feel damp but not soggy—squeeze one gently. If water runs through immediately, it’s too dry. If it stays clumped in your hand, it’s overwatered. A humidity dome helps retain moisture if your home runs dry. Maintain a room temperature of 65-75°F for fastest germination.
🌿 Step 4: Transplant Seedlings When Ready
Once seedlings develop 2-3 sets of true leaves (usually 3-4 weeks after planting), they’re ready to transplant. Gently squeeze the pellet to loosen it from the tray—it should come out intact with the seedling’s roots. Plant the entire pellet ½ inch deeper than it was in the tray to stabilize the seedling. The pellet will break down naturally over time.
Space seedlings according to their mature size. For example, tomatoes need 18-24 inches apart, while lettuce can stay 6-8 inches apart. Water deeply after transplanting to help the roots settle. Avoid fertilizing for the first 2 weeks—the pellet provides enough nutrients initially. Watch for leggy growth (long, weak stems), which means they need more light.
⏰ Step 5: Maintain Moisture and Light for Strong Growth
After transplanting, keep the soil evenly moist—not soggy, not bone-dry. Stick your finger 1 inch deep into the soil; if it feels dry, water gently. Overwatering at this stage causes root rot, while underwatering stresses seedlings. A drip irrigation system or watering can with a fine rose works best to avoid disturbing the soil.
Rotate the seedlings a quarter turn every 3-4 days so they grow straight toward the light, not lopsided. You’ll notice stronger stems and darker green leaves within a week—that’s your reward for consistent care. If leaves yellow, it’s often a sign of overwatering or nutrient deficiency. Adjust your routine and watch them bounce back within days.
Tips & tricks for perfect Jiffy seed starting
Took me a while to figure these out, so here goes—these little tricks make all the difference when working with Jiffy pellets.
Hydration is Everything: The 10-15 minute soak time is non-negotiable for even germination. I use a kitchen thermometer to check that water stays at 70-75°F—cold water shocks the pellets, while hot water can cook them. After soaking, I place the tray on a wire rack to drain completely; this prevents waterlogging which causes mold. The pellets should feel firm but not rock-hard when ready for planting.
Seed Placement Precision: In Step 2, that ¼-inch dimple is crucial—deeper planting can suffocate seeds, while too shallow may expose them to drying. For seeds like basil or parsley that need light to germinate, I simply press them onto the surface rather than burying them. Labeling each pellet with a toothpick saves me from confusion later when seedlings look identical—trust me on this.
Light and Temperature Balance: The 24-48 hour dark period is about root establishment, not photosynthesis. After moving to light, I place my trays under LED grow lights set to 12-14 hours daily—fluorescent bulbs work too but may require closer placement. Watch for condensation on the humidity dome; if it disappears within 24 hours, your environment's too dry and you'll need to mist more frequently.
Transplanting Technique: When seedlings have 2-3 true leaves (usually 3-4 weeks in), I gently squeeze the pellet to release it from the tray. The key is planting the entire pellet ½-inch deeper than its tray position—this stabilizes the seedling while allowing the pellet to break down naturally. For larger plants like tomatoes, I use a dibble tool to create planting holes that match the pellet size.
Pro Tips for Jiffy Seed Starting
- Took me a while to figure these out, so here goes—these little tricks make all the difference when working with Jiffy...
- Hydration is Everything: The 10-15 minute soak time is non-negotiable for even germination. I use a kitchen thermomet...
- Seed Placement Precision: In Step 2, that ¼-inch dimple is crucial—deeper planting can suffocate seeds, while too sha...
Frequently asked questions
Got questions about Jiffy seed starting? You’re not alone! Here are answers to the most common queries—so you can get growing with confidence.
What’s the best time to start seeds in Jiffy pellets?
Timing depends on your plants! For fast growers like lettuce or radishes, start 6–8 weeks before the last frost. Slow growers (tomatoes, peppers) need 8–12 weeks. Check your frost dates and seed packets for exact timing. Pro tip: Use a seed-starting calendar to avoid rushing or delaying!
Why aren’t my seeds germinating in Jiffy pellets?
Germination issues often stem from moisture, warmth, or light. Double-check:
- Soak pellets fully (they should feel like a damp sponge).
- Keep them warm (70–85°F) with a heat mat if needed.
- Avoid light until sprouts appear (2–3 weeks for most seeds).
Are Jiffy pellets worth it compared to soil?
Pellets offer cleaner, faster germination with no transplant shock. They’re also reusable (compost after use) and sterile, reducing mold risks. For beginners, they’re a game-changer—but if you’re scaling up, bulk soil mixes can be cheaper for large batches.
Can I reuse Jiffy pellets for multiple seed batches?
Yes! After harvesting, sterilize pellets by baking at 200°F for 30 minutes or soaking in a 1:10 bleach-water mix (rinse well). They’re eco-friendly and save money long-term. Just avoid reusing them for the same plant family (e.g., tomatoes and peppers) to prevent disease.
Do Jiffy pellets work for all types of seeds?
Most vegetable, herb, and flower seeds thrive in Jiffy pellets, but giant seeds (like sunflowers) or delicate perennials may need deeper pots. Avoid bulbs or corms (they need special handling). Always check seed packet instructions—some, like carrots, prefer direct sowing.
What should I do if my Jiffy pellets mold?
Mold = too much moisture or poor airflow. Act fast:
- Remove affected pellets and discard.
- Repot healthy seeds in fresh, dry pellets.
- Use a fan for gentle airflow next time.
- Prevent future mold with sterile water and no overcrowding.
Wrapping up and next steps
Mastering Jiffy seed starting is your fast track to a thriving garden—no green thumb required! 🌱 With the right mix, patience, and these simple steps, you’ll watch tiny seeds transform into vibrant seedlings in just 7 days.
The magic lies in consistency: moisture, warmth, and light are your secret weapons.
Now that you’re armed with knowledge, roll up your sleeves and start sowing! Try a few seeds this week—whether it’s herbs, veggies, or flowers—and share your progress. Happy planting leads to bigger harvests and even bigger smiles. Ready to grow? Your first batch is just a Jiffy away! 🌿