
Lawn
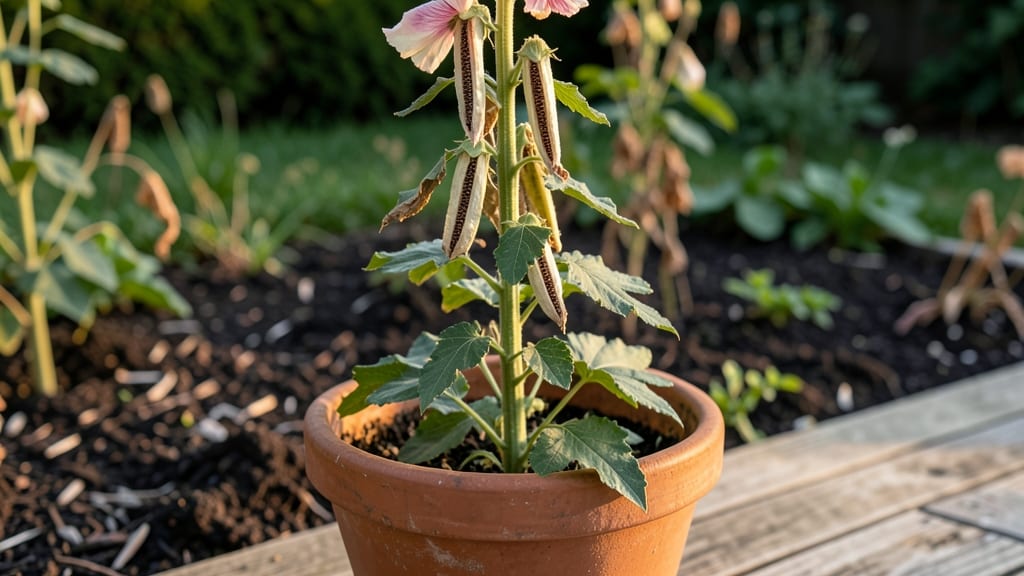
Saving hollyhock seeds from those tall, rustling seed pods is easier than you think—and it guarantees free plants next year. 🌱 The key is timing: harvest when the pods turn brown and dry but before they split open, usually in late summer or early fall.
I’ve collected seeds from my own garden for three seasons now, and the process gets simpler each time.
Once harvested, dry the pods indoors for a week or two in a warm, dry spot—no fancy equipment needed. After that, crack open the pods to release the seeds, then store them in a paper envelope until spring.
The cold stratification step (mimicking winter) is what breaks dormancy, and it’s as simple as mixing seeds with damp sand and refrigerating for 6-8 weeks.
You’ll end up with sturdy seedlings ready to plant out after the last frost, their tall stems already reaching for the sky. The payoff is worth the effort: hollyhocks grown from seed thrive longer, bloom more prolifically, and often outperform store-bought plants.
Plus, you’ll save money and avoid the risk of disease that comes with cuttings or divisions.
Watch for hungry slugs or rain that can rot pods before harvest—cover plants with row fabric if needed. With a little patience, you’ll have a stand of heirloom hollyhocks that’ll be the envy of the neighborhood. Ready to try it?
📚 In This Guide
- What you need
- Instructions
- Tips and common mistakes
- Wrapping up and next steps
What you need
- ● Mature hollyhock seed pods – Harvest when pods turn brown and dry (typically late summer to early fall). Aim for at least 10-15 pods for reliable germination.
- ● Pruning shears or sharp scissors – For cleanly snipping pods from stems.
- ● Paper bags or breathable mesh sacks – Use 1-2 bags per 5-10 pods to allow airflow.
- ○ Newspaper or cardboard – For creating a drying tray (optional but helpful for bulk drying).
- ● Plastic zip-top bags or airtight containers – For storing stratified seeds.
- ● Refrigerator or cold frame – Must maintain 35–45°F (2–7°C) for stratification.
- ● Permanent marker or labels – To tag pods by variety/date.
- ● Seed pod drying rack – Elevates pods for even airflow (great for large batches).
- ● Desiccant packets – Reduces humidity during drying (place 1-2 per bag).
- ● Digital thermometer – Monitors fridge temps if using a non-dedicated space.
- ● Glass jar with damp paper towel – For quick germination tests post-stratification.
Step-by-step guide to harvesting and preparing hollyhock seed pods
Here’s how I turn last year’s spent blooms into next year’s garden stars.
🌿 Step 1: Identify and Harvest Mature Seed Pods
Wait until seed pods turn from green to a dry, papery brown—this signals they’re ready. I check pods in late summer or early fall, after the blooms have faded completely. Gently twist the pod from the stem (don’t pull—it can rip the plant). If it resists, leave it for another week; it’s not fully mature yet.
Harvest on a dry, sunny morning when dew has evaporated. This prevents mold from forming on the pods while they dry. Place them in a single layer on a wire rack or hang them upside down in small bunches with twine. Avoid stacking—airflow is key to preventing rot.
⏰ Step 2: Dry Seed Pods Thoroughly
Let pods dry for 4-6 weeks in a warm, dry, and well-ventilated space. I use a garage or covered porch where temperatures stay between 60-75°F. You’ll know they’re ready when the pods rattle when shaken—this means the seeds are loose inside. If moisture remains, seeds may mold or fail to germinate.
If humidity is high, prop open windows or use a small fan to circulate air. Avoid direct sunlight, which can overheat and crack the pods. Once fully dry, store them in a paper bag or envelope—plastic traps moisture and ruins seeds.
❄️ Step 3: Cold Stratify for Better Germination
Hollyhock seeds need cold stratification to break dormancy. Place dried pods in a sealed plastic bag with a damp paper towel (not soaking wet). Store them in the refrigerator for 4-6 weeks at 35-40°F. Check weekly—the towel should stay slightly damp, not soggy.
After stratification, remove the seeds from the pods by gently squeezing or rubbing them between your fingers. Plant them ¼ inch deep in well-draining soil. You’ll see sprouts in 2-4 weeks—patience is key here, as rushing stratification can reduce germination rates.
🌱 Step 4: Plant Stratified Seeds
Sow seeds in early spring after the last frost date, or indoors 8-10 weeks before transplanting. Use a light, sandy loam mix—hollyhocks hate soggy soil. Space seeds 12-18 inches apart to give them room to grow into sturdy stems.
Keep soil consistently moist but not waterlogged until germination. Once seedlings appear, thin to the strongest 3-4 per foot of row. Hollyhocks grow fast—you’ll have towering blooms by midsummer if you start them early!
Tips & tricks for perfect hollyhock seed pod preparation
Here's what I've learned after years of turning last season's hollyhocks into next year's blooms.
Harvesting Timing: The dry, papery brown color is your best indicator, but don't rush—wait until pods rattle when shaken gently. I've learned the hard way that harvesting too early means seeds won't germinate properly. Also, harvesting on dry mornings prevents mold from forming during the drying process.
Drying Conditions: While 4-6 weeks is ideal, I've had success in as little as 3 weeks when using a small fan to circulate air in humid conditions. Just make sure to keep temperatures between 60-75°F—any hotter and you risk cracking the pods. I keep mine in a garage with open windows to maintain airflow without direct sunlight.
Stratification Secrets: The 4-6 week cold stratification is non-negotiable for hollyhocks, but I've found that placing the sealed bag in the crisper drawer of your fridge (which stays around 35°F) works just as well as the main fridge compartment. Just remember to check that damp paper towel weekly—it should stay moist but not soaked.
Planting Depth: That ¼ inch planting depth seems shallow, but hollyhock seeds need light to germinate. I've had better success with this method than planting deeper, which can lead to leggy seedlings. Use your finger to make a small dimple in the soil rather than digging a hole—this keeps the seed at exactly the right depth.
Pro Tips for Hollyhocks Seed Pods
- Here's what I've learned after years of turning last season's hollyhocks into next year's blooms.
- Harvesting Timing: The dry, papery brown color is your best indicator, but don't rush—wait until pods rattle when sha...
- Drying Conditions: While 4-6 weeks is ideal, I've had success in as little as 3 weeks when using a small fan to circu...
Frequently asked questions
Got questions about hollyhock seed pods? You’re not alone! Here are some of the most common queries—and their answers—to help you master the process like a pro.
When is the best time to harvest hollyhock seed pods?
Harvest seed pods when they’re dry and brown but before they split open (usually late summer to early fall). If left too long, seeds scatter, and you lose your yield. Aim for a crisp, papery texture—like a dried-up balloon!
How long does cold stratification take for hollyhock seeds?
Cold stratification typically requires 6–8 weeks in the fridge (or outdoors in winter). Place moistened seeds in a sealed bag with damp peat moss or paper towels. Patience pays off—this mimics nature’s way of breaking seed dormancy!
Can I save seeds from hybrid hollyhocks?
Probably not! Hybrid hollyhocks (marked with _F1_) may not produce true-to-type offspring. For reliable results, source seeds from heirloom varieties or reputable nurseries. Save time and heartache—start with proven performers!
What do I do if my seed pods develop mold or pests?
If pods show fuzzy mold or tiny holes (pests!), isolate them immediately. Improve airflow by spacing plants 2–3 feet apart and avoid overhead watering. For mild infestations, spray with neem oil. Severe cases? Toss the pods and disinfect tools.
Do hollyhock seed pods need to dry indoors or outdoors?
Outdoor drying is ideal—hang pods in a shady, dry spot (like a porch or garage) for 2–3 weeks. If rain’s in the forecast, bring them indoors near a fan to speed up the process. Just avoid direct sunlight to prevent cracking!
Wrapping up and next steps
Hollyhock seed pods are a gardener’s hidden treasure—packed with potential for next season’s vibrant blooms! 🌱 By mastering the drying, harvesting, and cold stratification process, you’ll ensure strong, healthy seedlings ready to thrive. Whether you’re a seasoned green thumb or just starting, these simple steps make propagation effortless and rewarding.
Ready to grow your garden’s future? Grab those pods, follow the timeline, and watch your hollyhocks return even more stunning next year. Start small, stay patient, and enjoy the process! 🌸