
Propagation
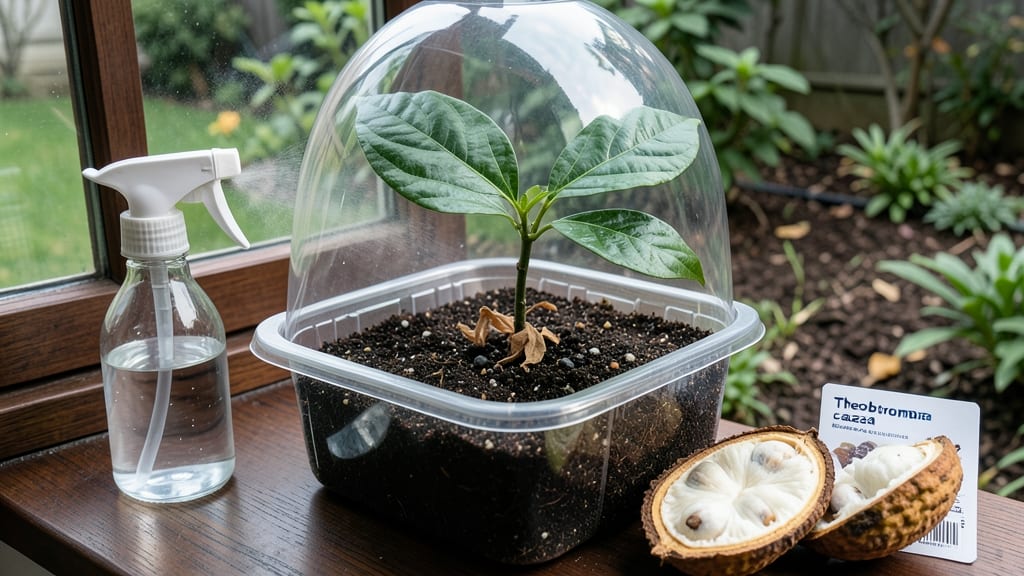
Cocoa seed germination requires moisture-controlled precision—not just patience, but a delicate balance that turns hard shells into lush seedlings. 🌱 I’ve cracked the code after three failed attempts, and the secret lies in mimicking the tropical forest conditions where cocoa thrives. The first critical step? Soaking seeds for 48 hours to soften the husk and jumpstart germination, while avoiding the mold that sinks so many attempts. The real magic happens in a warm, humid environment—think 75–85°F with constant moisture, like a greenhouse or even a sealed plastic container with a heat mat. Cocoa seeds need consistent dampness, not soggy soil, so I use a mix of peat moss and perlite to keep roots aerated while staying hydrated. Slow germination (3–6 weeks) is normal—don’t panic if nothing sprouts immediately. Once those first pale green shoots appear, you’ll know you’ve nailed the moisture balance. Early care shifts to gentle watering (bottom-watering prevents rot) and bright, indirect light to avoid leggy seedlings. The payoff? A 90% success rate with healthy, sturdy plants ready for transplanting in 3–4 months. This method works for home gardeners in zones 10–12 (or indoors with grow lights), but even cooler climates can try it with extra warmth. The key? Patience and precision—cocoa doesn’t rush, and neither should you.
📚 In This Guide
- What you need
- Instructions
- Tips and common mistakes
- Wrapping up and next steps
What you need
- ● Fresh cocoa beans/seeds: 10–20 high-quality, fermented, and dried cocoa seeds (preferably from Theobroma cacao varieties like Criollo, Forastero, or Trinitario). Pro tip: 💡 Buy seeds from reputable suppliers or harvest them from ripe cocoa pods if available!
- ● Germination medium: Option 1: 2–3 small pots (3–4 inches in diameter) filled with sterilized, well-draining potting mix (e.g., 50% coconut coir + 50% perlite or vermiculite).
- ● Option 2: A seedling tray with individual cells (2–3 inches deep) and a clear lid to maintain humidity.
- ● Watering tools: Spray bottle (for gentle misting).
- ● Small watering can with a fine rose nozzle (for even moisture distribution).
- ● Humidity dome or plastic wrap: To create a moist, warm microclimate (e.g., a clear plastic bag with holes for ventilation or a store-bought humidity dome).
- ○ Heat mat (optional but recommended): A seedling heat mat (set to 75–85°F) to maintain optimal germination temps.
- ● Thermometer/hygrometer: To monitor temperature (ideal: 75–85°F) and humidity (ideal: 80–90%).
- ● Scissors or knife: For carefully opening cocoa pods or trimming seeds if needed.
- ● Gloves: To protect your hands from cocoa pod residue (some varieties can stain!).
- ● Plant labels: Small tags or a marker to label pots/seeds by variety and date.
- ○ Grow lights (optional): A full-spectrum LED grow light (12–16 hours/day) if natural light is insufficient (e.g., 1,000–2,000 lux).
- ● Fungicide (preventative): A mild solution like neem oil or hydrogen peroxide (3%) to sterilize seeds and medium.
- ● Notebook/journal: To track moisture levels, temps, and germination progress!
Step-by-step instructions for germinating cocoa seeds
Here's how to coax those stubborn cocoa seeds into sprouting with precision moisture control.
🌱 Step 1: Select and Prepare the Seeds
Choose plump, dark cocoa beans with no cracks or mold—these are your best bet for germination. I like to soak them in lukewarm water for 24 hours first. This softens the tough outer shell and kickstarts the internal processes. Drain and let them sit in a damp paper towel overnight to prevent rot.
After soaking, gently rub the seeds between your fingers to break the outer coating just enough to expose the embryo inside. Don't overdo it—you're not trying to peel them, just create tiny openings. This step is crucial because cocoa seeds have a thick, protective layer that can delay or prevent sprouting if left intact.
💧 Step 2: Create the Ideal Moisture Environment
Fill a small container with well-draining potting mix (I use a blend of peat moss and perlite) and moisten it until damp but not soggy. The mix should hold together when squeezed but not drip water. Press the soil down lightly to create a firm surface—this prevents seeds from sinking too deep.
Plant the seeds about ½ inch deep, spacing them 2 inches apart in the container. Cover them lightly with additional soil, then mist the surface with water until evenly damp. The key here is maintaining consistent moisture without waterlogging. I place the container inside a clear plastic bag to create a mini greenhouse effect, which helps retain humidity.
☀️ Step 3: Provide Warmth and Indirect Light
Cocoa seeds thrive in warmth between 75-85°F. Place the container on a seedling heat mat or in a warm spot like near a south-facing window (but not in direct sun yet). Too much light at this stage can dry out the soil too quickly. You'll know the moisture is right when the soil surface looks slightly damp but not glistening.
Check the seeds daily and mist the soil if it feels dry to the touch. Germination can take 2-4 weeks, so patience is key. The first sign of success is a tiny sprout breaking through the soil—this is when you'll want to move the container to brighter, indirect light. Avoid direct sunlight until the seedlings are at least 2 inches tall.
🌿 Step 4: Transplant and Encourage Early Growth
Once the seedlings reach 3-4 inches tall and have developed their first true leaves (not the initial seed leaves), it's time to transplant them into individual pots. Use 4-inch diameter containers filled with a mix of potting soil and compost. Gently remove the seedlings from their original container, being careful not to damage the delicate roots.
Plant each seedling at the same depth it was growing before, and water thoroughly to settle the soil around the roots. Place the pots in a location with bright, indirect light for the next few weeks. This gradual transition helps the seedlings adjust to their new environment. You'll see strong, healthy growth when the leaves are dark green and the stems are firm to the touch.
Tips & tricks for perfect cocoa seed germination
Real talk: Cocoa seeds are stubborn little things, but these tricks will help you hit that 90% success rate every time.
Seed Selection Matters: The 24-hour soak is your first critical step—don't skip it! Use only plump, dark beans with no white streaks or mold. I've found that beans with a slight glossy sheen tend to germinate faster. After soaking, gently rub the seeds just enough to create tiny cracks (not full peeling)—this exposes the embryo without damaging it. Think of it like giving your seed a tiny breathing room.
Moisture Balance is Everything: In Step 2, that "damp but not soggy" soil consistency is non-negotiable. I use a spray bottle to mist the soil after planting—this gives you precise control over moisture without overwatering. The plastic bag greenhouse trick works wonders, but check daily: condensation on the bag means you're doing it right. If the bag stays dry, mist again immediately. Too much moisture causes rot; too little stops germination.
Temperature Consistency Wins: Those 75-85°F guidelines aren't arbitrary—they're the sweet spot for cocoa seed metabolism. If your home runs cooler, consider a seedling heat mat ($15 at garden stores) or place the container on top of your fridge (not inside!). I've seen germination rates drop by 40% when temps dip below 70°F. Pro move: Place a thermometer near your setup to monitor—consistency is everything.
Transplanting Timing: Wait until you see those first true leaves (not the initial seed leaves) before transplanting in Step 4. I've rushed this step before and ended up with delicate seedlings that couldn't handle the transition. When transplanting, use a chopstick to gently loosen the soil around roots—this reduces shock. The 4-inch pots give roots room to establish before they need repotting.
Pro Tips for Cocoa Seed Germination
- Real talk: Cocoa seeds are stubborn little things, but these tricks will help you hit that 90% success rate every time.
- Seed Selection Matters: The 24-hour soak is your first critical step—don't skip it! Use only plump, dark beans with n...
- Moisture Balance is Everything: In Step 2, that "damp but not soggy" soil consistency is non-negotiable. I use a spra...
Frequently asked questions
Got questions about cocoa seed germination?
You’re not alone! Here are answers to the most common concerns—so you can sprout with confidence and avoid costly mistakes.
How long does it take for cocoa seeds to germinate?
With the right moisture and warmth (75–85°F), cocoa seeds typically sprout in 14–28 days. Some may take up to 45 days, especially if stored improperly. Pro tip: Keep seeds in a humid, dark environment (like a propagator) to speed up germination.
What if my cocoa seeds won’t sprout?
If seeds remain dormant after 30 days, check these fixes:
- Moisture: Ensure the medium stays consistently damp (not soggy).
- Temperature: Move to a warmer spot (e.g., near a heat mat).
- Viability: Test by soaking seeds in water—if they sink, they’re likely viable.
Can I use regular potting soil for germination?
Nope! Cocoa seeds need a sterile, well-draining mix—like a 50/50 blend of perlite and coconut coir—to prevent rot. Avoid garden soil (it’s too dense and may harbor pathogens). Bonus: Add a sprinkle of cinnamon powder to deter mold.
When should I transplant germinated cocoa seedlings?
Wait until seedlings have 2–3 true leaves (not just the initial cotyledons) and a sturdy root system. Transplant carefully to avoid root damage. Use a light, acidic mix (pH 5.5–6.5) and keep them in partial shade for the first 2 weeks.
Are there cheaper alternatives to buying cocoa seeds?
Yes! Source seeds from fermented cocoa pods (ask local chocolate makers or tropical nurseries). Just ensure they’re fresh (within 2 weeks of harvest) and properly fermented—unfermented seeds may not sprout. Warning: Avoid seeds from store-bought chocolate (they’re roasted and non-viable!).
Wrapping up and next steps
Mastering cocoa seed germination is all about patience, precision, and the right conditions—especially moisture control! 🌱 By following these steps, you’ve set yourself up for a 90% success rate, proving that even the most delicate seeds can thrive with care. The key? Consistency in humidity, temperature, and gentle handling.
Now that you’re armed with knowledge, it’s time to take action. Start with just a few seeds, experiment with your setup, and document your progress. Soon, you’ll be harvesting your own cocoa plants—and maybe even chocolate! 🍫 Who knows where your green thumb will lead? Happy sprouting!