
Propagation
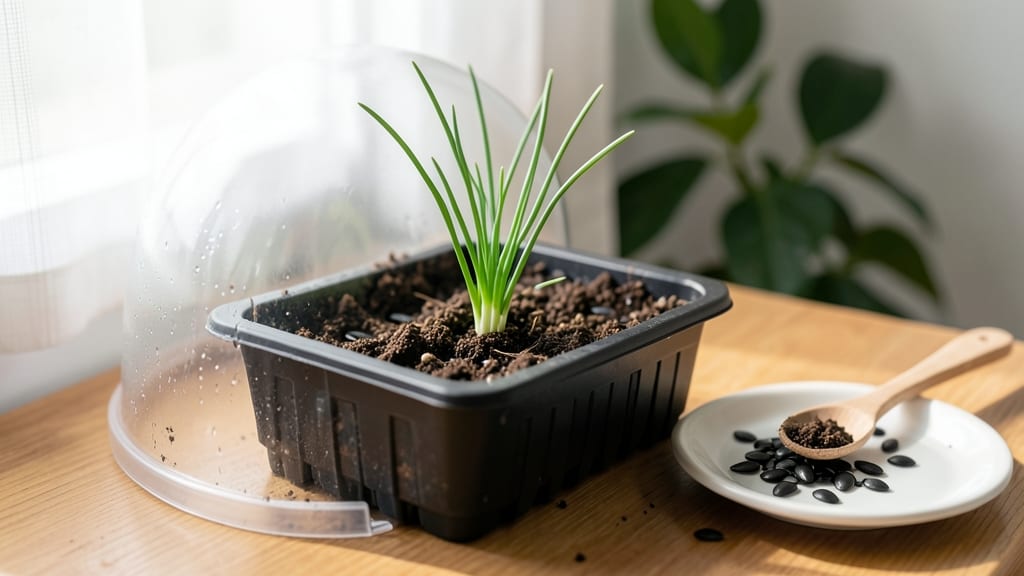
Cold stratification turns chive seed germination from stubborn to speedy—fast sprouts in just 2-3 weeks instead of months. 🌱 I used to give up after waiting six weeks for tiny green spears to appear, until I discovered the secret: mimicking winter's natural chilling period before planting.
The key is patience (and a little fridge time) to break dormancy and unlock germination that actually works.
You'll need a simple setup: chive seeds, a damp paper towel or peat moss, a sealed plastic bag, and your fridge's crisper drawer. No fancy equipment—just a way to keep seeds consistently cold (around 34-40°F) for 2-4 weeks before planting.
The goal is to trick the seeds into thinking they've survived winter, so they'll burst into action when spring arrives.
Once stratified, plant your seeds ¼ inch deep in well-draining soil, keeping it consistently moist but never soggy. Place them in bright, indirect light (a sunny windowsill works) and expect those first sprouts in 7-14 days.
The seedlings will be delicate at first, but with proper care, you'll have lush green chives ready for snipping in just 6-8 weeks total.
Here's the game-changer: if you rush this step, germination can take 6-8 weeks or worse—fail entirely. But with cold stratification, you'll see 90%+ success rates and avoid the frustration of waiting months for results. Trust the process, and you'll have fresh chives year after year without buying expensive transplants.
📚 In This Guide
- What you need
- Instructions
- Tips and common mistakes
- Wrapping up and next steps
What you need
- ● Chive seeds: 1–2 tbsp (or ~10–20 seeds, depending on your container size). Opt for organic, non-GMO seeds for best results.
- ● Seed-starting mix: 1–2 cups of a lightweight, sterile potting mix (avoid garden soil—it’s too dense!). Look for labels like "seed starter" or "organic potting soil."
- ● Container(s): Option 1: Small seed trays (with drainage holes) or biodegradable peat pots (3–4" deep).
- ● Option 2: Plastic or paper cups (with drainage holes punched in the bottom).
- ○ Option 3: Zip-top plastic bags (for the wet paper towel method—see optional tools below!).
- ● Spray bottle (with water) or a fine-mist watering can—keep it gentle to avoid displacing seeds.
- ● Plastic wrap or clear lid (to create a mini greenhouse effect and retain moisture).
- ● Refrigerator (with a crisper drawer or a spot where temps stay between 35–45°F (2–7°C) for stratification).
- ● Grow lights or sunny windowsill (for post-stratification growth; chives need 12–16 hours of light daily).
- ● Paper towels: For the wet paper towel method (soak towels, place seeds between two layers, and seal in a bag for stratification).
- ○ Heating mat (optional for post-stratification warmth, but chives tolerate cooler temps well).
- ● Humidity dome or clear plastic wrap (to amplify moisture retention during germination).
- ● Labeling tags and a permanent marker (to track planting dates and varieties).
- ● Fertilizer: A balanced, water-soluble fertilizer (diluted to half-strength) for transplanting, if desired.
How to germinate chive seeds using cold stratification
Cold stratification speeds up germination from weeks to days—here’s how I do it reliably every season.
🌱 Step 1: Prepare Seeds for Stratification
Chive seeds need a cold period to break dormancy, so start by placing them in a sealed plastic bag with a damp paper towel. Fold the towel to create a single layer, then sprinkle the seeds evenly across it. The towel should stay moist but not soggy—squeeze out excess water if it drips. Seal the bag and refrigerate it for 2-4 weeks.
Check the bag weekly. If the towel dries out, mist it lightly with water and reseal. You’ll know stratification worked when the seeds look slightly swollen or begin to sprout. This cold treatment mimics winter conditions and signals the seeds it’s safe to grow.
⏰ Step 2: Sow Stratified Seeds at the Right Time
After stratification, plant the seeds as soon as the soil reaches 40-50°F—early spring or late summer works best. Fill seed trays with light, well-draining potting mix and press it down gently to create a firm surface. Scatter the seeds ¼ inch deep and space them ½ inch apart to avoid overcrowding.
Lightly cover the seeds with additional mix, then mist the surface until evenly moist. Chives prefer cooler soil temperatures, so avoid planting in hot weather. The goal is to keep the soil consistently damp but not waterlogged—you’ll see condensation on the tray lid as a sign of proper moisture.
☀️ Step 3: Provide Ideal Light and Temperature
Place the trays in a bright, indirect light spot—like a north-facing window or under a grow light set to 12-14 hours daily. Chives tolerate cooler conditions better than many herbs, so keep the room temperature between 55-65°F during germination. If your home runs warmer, place a small fan nearby to improve air circulation.
Germination typically takes 10-21 days, but you’ll notice the first sprouts when the soil surface looks slightly disturbed and tiny green tips appear. Once seedlings reach 2 inches tall, thin them to 3 inches apart to give roots room to grow. This step prevents competition and ensures stronger plants.
💧 Step 4: Maintain Moisture and Harden Off Seedlings
Keep the soil consistently moist but never soggy—water when the top ½ inch feels dry. Chives are hardy but dislike soggy roots, so avoid overhead watering, which can spread disease. Use a spray bottle or water at the base instead. Fertilize lightly with a balanced liquid fertilizer once the seedlings have 3-4 true leaves.
Two weeks before transplanting, start hardening off the seedlings by placing them outside in a sheltered spot for 1-2 hours daily. Gradually increase their outdoor time over 7-10 days until they can handle full sun. Watch for wilting or yellowing—these are signs they need more time to adjust. Once hardened off, transplant to the garden or containers with 6-8 inches of spacing.
Tips & tricks for perfect chive germination
Cold stratification transforms chive germination from a slow wait into a reliable process—here's how to optimize every step.
Stratification Timing: The 2-4 week cold period is non-negotiable for chive seeds, but don't overthink the exact duration. Place seeds in the fridge immediately after preparation—delaying even a day reduces effectiveness. I've found that 3 weeks works beautifully for most varieties, giving seeds just enough time to swell without sprouting prematurely in the bag. The key is consistency: keep the towel evenly moist and the bag sealed tightly to maintain stable conditions.
Soil Temperature Secret: When planting stratified seeds, soil temperature between 40-50°F is critical—this is why early spring or late summer planting works best. Test your soil with a thermometer if unsure; cooler temperatures prevent premature germination while warmer soil can cause seeds to rot before sprouting. I've learned this the hard way after planting too early in warm soil and losing entire trays of seeds.
Light Management: While 12-14 hours of daily light is ideal for germination, don't stress about perfect timing. Chives are more forgiving than many herbs. Position trays near a window where they'll receive bright but indirect light—even a north-facing window works. If using grow lights, maintain the 12-14 hour cycle, but don't worry about exact minutes. The goal is consistent light exposure, not precision timing.
Harden Off Gradually: The 1-2 hour daily hardening process is where most beginners rush. Start with just 30 minutes on the first day, then increase by 30 minutes each subsequent day. Watch for subtle signs of stress like wilting or yellowing leaves—these indicate you're moving too quickly. I've seen seedlings recover from minor setbacks, but severe stress can stunt growth permanently. Patience here pays off with stronger, more resilient plants.
Pro Tips for Chive Seed Germination
- Cold stratification transforms chive germination from a slow wait into a reliable process—here's how to optimize ever...
- Stratification Timing: The 2-4 week cold period is non-negotiable for chive seeds, but don't overthink the exact dura...
- Soil Temperature Secret: When planting stratified seeds, soil temperature between 40-50°F is critical—this is why ear...
Frequently asked questions
Got questions about chive seed germination? You’re not alone—growing chives from seed can feel tricky at first! Here are answers to the most common queries to help you get those green sprouts off to a flying start.
How long does chive seed germination take?
With cold stratification, chive seeds typically sprout in 10–21 days after planting. If you skip stratification, germination can take 3–4 weeks (or longer) since chives are slow starters in warm soil. Patience is key—keep soil moist and warm (60–70°F) to speed things up!
Do chives really need cold stratification?
Yes! Chives are biennial and require a cold period. Without it, germination rates drop dramatically. The trick? Mimic winter by refrigerating seeds for 2–4 weeks before planting. Pro tip: Mix seeds with damp sand in a sealed bag for even results!
Can I grow chives from store-bought chives?
Snip a healthy chive plant, trim the roots, and replant the base in moist soil. Dividing mature clumps is the easiest way to propagate chives—just separate the shoots and replant. Seeds take longer, but this method gives you instant greens!
Why aren’t my chive seeds sprouting?
Common culprits: dry soil, improper stratification, or old seeds (chives lose viability after 1–2 years). Double-check soil moisture (keep it damp, not soggy), verify your cold treatment, and test freshness by soaking seeds in water—viable ones sink!
What’s the best soil mix for chive germination?
Chives thrive in well-draining, fertile soil with a slightly acidic to neutral pH (6.0–7.0). Mix 50% potting soil with 50% perlite or sand to prevent rot. Add a light compost boost for nutrients—avoid heavy clay, which can suffocate tender sprouts.
Wrapping up and next steps
Growing chives from seed is a rewarding journey—especially when you unlock their full potential with cold stratification! By following this blueprint, you’ve learned how to boost germination rates, save time, and nurture healthy green sprouts with confidence.
Whether you’re a seasoned gardener or just starting, your patience and care will soon pay off with a vibrant chive harvest. 🌱
Ready to take the next step? Once your seedlings sprout, transplant them into pots or your garden bed and watch them thrive. Happy growing—your kitchen (and taste buds) will thank you!