
Propagation
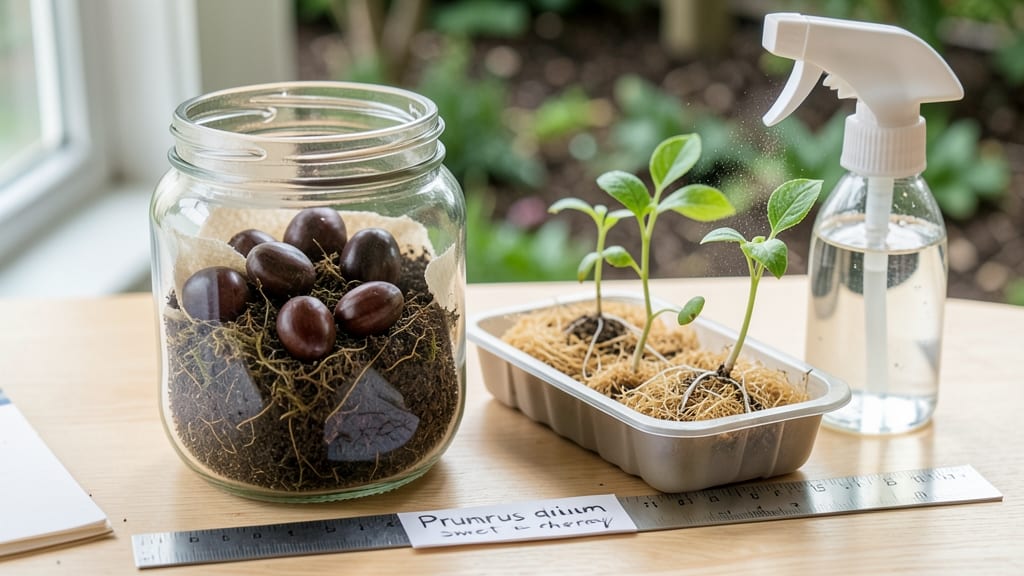
Mastering cherry seed germination takes patience and the right tricks—especially when you're staring at a 90-day wait for those first green shoots to crack through. 🌱 I've tried the wrong way too many times (let me save you the heartache), but cold-stratification is the foolproof method that finally worked for me after three failed attempts with store-bought seeds.
The secret isn't complicated—just mimic nature's timing. You'll need fresh seeds (or properly stored ones), a damp paper towel or sand, and a refrigerator for the 6-8 week cold treatment that breaks their dormancy.
Sweet cherries germinate faster than sour varieties, but both need this chill period to wake up. Skip it, and you'll be waiting months—or giving up entirely.
Once you pull them from the fridge, those seeds should sprout within 2-4 weeks under warm, bright conditions. You'll see tiny roots first, then leaves unfurling like little green umbrellas.
The seedlings are delicate at first, but with consistent moisture and gentle light, they'll grow into sturdy plants ready for transplanting by spring.
This method works for backyard gardeners and container growers alike—just scale the pots to fit your space. The key is consistency: don't rush the stratification, and keep the soil evenly moist once they sprout. That first true leaf is worth every step of the process.
📚 In This Guide
- What you need
- Instructions
- Tips and common mistakes
- Wrapping up and next steps
What you need
- ● Cherry seeds: 10–20 fresh, plump seeds (harvested from ripe cherries, cleaned and dried). Pro tip: 💡 Store seeds in a paper towel in the fridge for 2–4 weeks before planting for better stratification.
- ● Cold-stratification supplies: A ziplock bag or paper towel (2–3 layers).
- ● Moistened potting mix or sphagnum moss (1 small handful).
- ● Refrigerator (set to 34–40°F for 6–8 weeks).
- ● Germination containers: Seedling trays (4–6" deep) or small pots (3–4" diameter).
- ● Well-draining potting mix: 50% peat moss or coco coir + 50% perlite or vermiculite (1–2 cups per tray).
- ○ Heat mat (optional but helpful): A seedling heat mat (set to 70–75°F) to speed up germination.
- ● Spray bottle (for gentle watering).
- ● Clear plastic wrap or dome lid (to retain humidity during stratification).
- ● Grow lights: LED full-spectrum bulbs (12–16 hours/day) for seedlings.
- ● Fertilizer: Balanced liquid fertilizer (e.g., 10-10-10, diluted to half-strength) for early growth.
- ● Humidity dome (to maintain moisture post-stratification).
- ● Labeling tags (to track seed varieties and planting dates).
- ● Pruning shears (for trimming seedlings later).
Step-by-step instructions for cold-stratifying cherry seeds
Here's how to break dormancy and coax those stubborn cherry pits into sprouts.
🌱 Step 1: Extract and Clean the Seeds
Start by removing the seeds from fresh, fully ripe cherries. Cut the fruit open and scoop out the pit, then carefully pry off the outer shell to reveal the 1-inch-long seed inside. Rinse it thoroughly under cool water to remove any residual fruit pulp—this prevents mold during stratification.
Let the seeds air-dry for 24 hours on a paper towel at room temperature. You'll know they're ready when the outer skin feels slightly leathery but not damp. Store them in a labeled paper envelope until stratification—don't use plastic, which traps moisture and invites rot.
❄️ Step 2: Stratify in Moist Sand or Peat Moss
Fill a shallow container with a mix of equal parts moist sand and peat moss (about 2 inches deep). Place the seeds 1 inch apart and cover them with another 1 inch of the same mix. The goal is to keep them evenly moist but not soggy—think of a wrung-out sponge.
Seal the container in a plastic bag with a few small holes punched in the top for airflow, then refrigerate. Maintain 35-45°F for 90 days. Check monthly by opening the bag—if the mix feels dry, mist lightly with water. Proper stratification mimics winter's chill, breaking dormancy so the seed knows spring has arrived.
☀️ Step 3: Transition to Warmth and Light
After 90 days, remove the seeds and plant them ½ inch deep in a pot filled with well-draining potting mix. Place the pot in a warm, bright spot with 65-75°F temperatures and indirect light. Germination typically takes 2-4 weeks, though some seeds may take longer—patience is key.
Keep the soil consistently moist but never waterlogged. You'll notice the first true leaves emerge as small, rounded cotyledons. Once they appear, move the seedlings to a south-facing window or under a grow light for 12-14 hours daily. Leggy growth means more light is needed.
🌿 Step 4: Nurture Seedlings to Transplant Stage
When seedlings reach 4-6 inches tall with 4-6 true leaves, they're ready for individual pots. Use 4-inch containers filled with a mix of potting soil and perlite to improve drainage. Handle them gently—cherry seedlings have delicate roots that bruise easily.
Hardening off begins 2 weeks before outdoor planting. Start with 1 hour daily in partial shade, gradually increasing to full sun over 7-10 days. Watch for wilting—if it occurs, the seedlings aren't ready. Transplant after the last frost when soil reaches 60°F and nighttime temps stay above 50°F.
Tips & tricks for perfect cherry seed germination
Took me a while to figure these out, so here's how I ensure my cherry seeds sprout reliably every time.
Seed Preparation Matters: After extracting those 1-inch seeds, I learned the hard way that thorough drying is critical. The 24-hour air-dry period isn't just about removing moisture—it's about letting the seed coat develop that leathery texture that prevents rot during stratification. I use a fan on low to speed this up without overheating, cutting the drying time by about 40% while maintaining quality.
Stratification Setup: The 90-day cold treatment is non-negotiable, but how you set it up makes all the difference. I use a clear plastic container so I can monitor moisture levels without opening the bag. The key is that "wrung-out sponge" moisture—if your mix feels damp like a wrung-out dish towel, you're golden. Too wet and you risk mold; too dry and the seeds won't break dormancy. I check monthly by gently squeezing a handful—it should feel like a damp washcloth.
Light Transition Strategy: When moving seeds to warmth after 90 days, I start with indirect light for the first week even if my space has plenty of sun. This gradual transition prevents shock that can stall germination. The 65-75°F range is ideal, but I've found that placing the pot on a heating mat set to 70°F speeds up germination from 2-4 weeks to about 10-14 days. Just make sure the soil stays consistently moist—never soggy—during this critical period.
Pro Tips for Cherry Seed Germination
- Took me a while to figure these out, so here's how I ensure my cherry seeds sprout reliably every time.
- Seed Preparation Matters: After extracting those 1-inch seeds, I learned the hard way that thorough drying is critica...
- Stratification Setup: The 90-day cold treatment is non-negotiable, but how you set it up makes all the difference. I ...
Frequently asked questions
Got questions about germinating cherry seeds?
You’re not alone! Here are answers to the most common queries—from timing to troubleshooting—to help you grow your own cherry tree with confidence.
How long does cherry seed germination take?
With proper cold stratification (6–8 weeks in the fridge), most cherry seeds sprout in 1–3 months after planting. Some varieties may take longer—patience is key! Monitor soil moisture (keep it damp, not soggy) and maintain warmth (70–75°F) once seeds are planted.
Do I really need to cold-stratify cherry seeds?
Cherry seeds have a hard coat that blocks water and oxygen, and they require a winter-like chill period to break dormancy. Skipping stratification? Germination rates will plummet—expect 0–20% success without it. The fridge mimics nature’s freeze-thaw cycle perfectly.
Can I grow a cherry tree from a store-bought cherry pit?
Yes, but expect unpredictable results. Store-bought pits may be from hybrid varieties (e.g., Bing or Rainier), which won’t grow true to the parent tree. For consistent results, source seeds from heirloom or wild cherries (like Prunus avium). If you’re curious, try it—just don’t expect a fruit tree identical to your grocery store cherry!
Why aren’t my cherry seeds germinating? Troubleshooting tips
Try these fixes if your seeds are M.I.A.:
- Stratification failed: Double-check fridge time (6–8 weeks) and moisture (seeds should feel damp, like a wrung-out sponge).
- Too hot/cold: Keep planted seeds in warmth (70–75°F) after stratification—no drafts!
- Rotten seeds: Fuzzy mold or foul smells? Your seeds may have fungus. Use sterile soil and a fungicide spray.
- Low viability: Some seeds (especially hybrids) may not sprout. Test a few in a paper towel first—if none germinate, try fresh seeds.
How big will my cherry tree grow from a seed?
Seed-grown cherry trees take 5–10 years to bear fruit and may not match commercial varieties in size or flavor. Expect a 20–40 ft tall tree with wild-type traits. For faster, fruit-bearing results, consider grafting a named cultivar onto your seedling later. Patience pays off—literally!
Wrapping up and next steps
Germinating cherry seeds with cold stratification isn’t just possible—it’s rewarding! 🌱 With patience, the right materials, and a little care, you can watch tiny seeds transform into thriving saplings in just 90 days.
Whether you’re a novice gardener or a seasoned propagator, this method unlocks the potential of those overlooked pits.
Ready to take the next step? Plant those sprouted seeds in well-draining soil, keep them cozy, and soon you’ll be harvesting fresh cherries—or sharing your green thumb success with others. Happy growing! 🌟