
Propagation
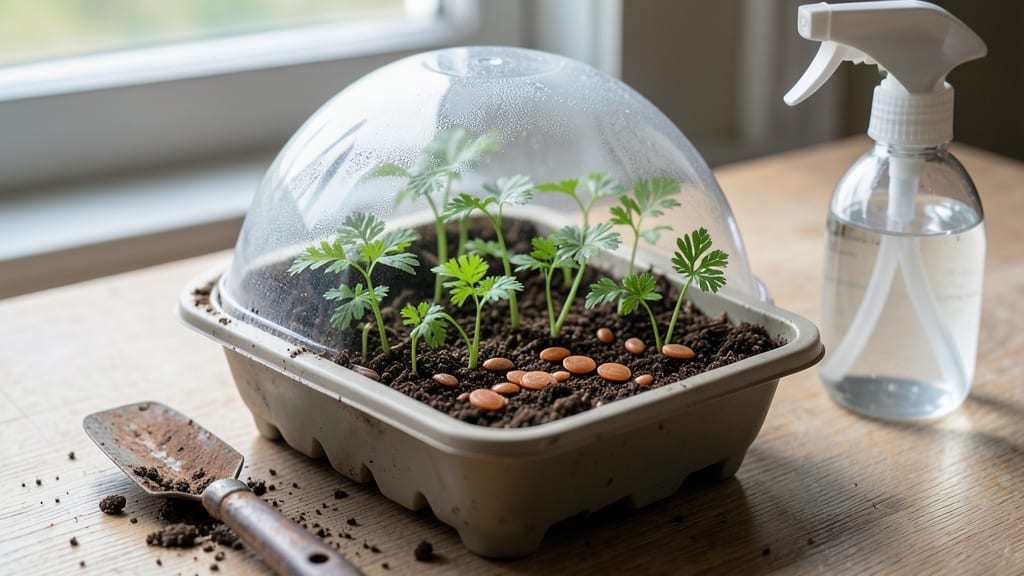
Starting carrots in seed trays isn’t just possible—it’s a game-changer for consistent germination. 🌱 I’ve struggled with uneven sprouts and wasted seeds until I mastered this method, which keeps soil perfectly moist and seeds from drying out in the first critical days.
The secret lies in fine, loose soil and shallow planting—carrot seeds need light to germinate, so press them just ¼ inch deep. A seed tray with drainage holes prevents soggy roots while maintaining that critical moisture, and the shallow depth means you won’t accidentally bury seeds too deep.
Within 10-14 days, you’ll see those first green hooks breaking through, and the seedlings will be ready to transplant in just 3-4 weeks. No more waiting for direct sowing to work—or watching seeds rot in clumpy soil.
This method also gives you a head start on pests: healthy seedlings establish faster in the garden, and you can space them perfectly from day one. Here’s how to do it right—no more guesswork or wasted seeds.
📚 In This Guide
- What you need
- Instructions
- Tips and common mistakes
- Wrapping up and next steps
What you need
- ● Seed trays – 1-2 shallow trays (10-12" x 20-24") with drainage holes (or biodegradable peat pots for transplanting).
- ● Seed-starting mix – 1 bag (1-2 cubic feet) of lightweight, sterile seed-starting soil (avoid garden soil—it’s too dense!).
- ● Carrot seeds – 1 packet of open-pollinated or heirloom carrot seeds (e.g., ‘Nantes,’ ‘Danvers,’ or ‘Paris Market’). Note: Carrot seeds are tiny—1 packet = ~200-300 seeds!
- ● Watering can or spray bottle – With a fine mist nozzle to keep soil consistently moist (not soggy!).
- ● Plastic wrap or humidity dome – To retain moisture and warmth during germination.
- ○ Heat mat (optional but helpful) – A small seedling heat mat (set to 70-75°F) to speed up germination.
- ● Grow lights – 1-2 LED full-spectrum grow lights (12-16 hours/day) if starting indoors before last frost.
- ● Seedling labels – To track varieties (carrots can cross-pollinate!).
- ● Fertilizer – A balanced liquid fertilizer (5-5-5 or 10-10-10) diluted to half-strength for first feeding.
- ● Fine mesh screen – To cover trays and block pests while allowing airflow.
Step-by-Step instructions for starting carrots in seed trays
Here's how to get those tiny seeds sprouting fast—no more waiting weeks for stubborn germination.
🌱 Step 1: Prepare the Seed Tray for Even Moisture
Fill your seed tray with a light, sandy potting mix—carrots hate compacted soil that stunts their roots. I press it down gently with my fingers until the surface is firm but not packed. The key here is keeping moisture consistent without letting it pool, which causes rot. Water the tray thoroughly until water runs out the drainage holes, then let it drain completely.
Spread the seeds ¼ inch deep—any deeper and they’ll struggle to push through. I use a toothpick to make tiny holes in the soil, then drop 2-3 seeds per hole (carrots are fussy about spacing). Cover lightly with a sprinkle of mix, just enough to hide them. Don’t pat it down—you’ll bury them too deep.
💧 Step 2: Create a Humidity Dome for Fast Germination
Carrot seeds need consistent moisture to germinate, and a humidity dome keeps the soil from drying out between waterings. Cover the tray with clear plastic wrap or a seed-starting mat, securing it tightly. Place the tray in a warm spot—70-75°F is ideal—like on top of your fridge or near a sunny window without direct heat.
Check daily for condensation on the plastic. If it’s foggy inside, you’re golden. If it’s dry, mist the soil lightly with a spray bottle and reseal. Germination takes 14-21 days, but with this setup, I’ve seen sprouts in 10 days—just keep the soil damp, not soggy.
☀️ Step 3: Provide Gentle Light After Sprouting
The moment you see first green tips (usually after 10-14 days), remove the humidity dome immediately. Too much moisture now causes damping-off, where seedlings collapse overnight. Place the tray under bright, indirect light—no direct sun yet, or the seedlings will scorch. A grow light 2-3 inches above works best if your windows aren’t sunny.
Watch for true leaves (the second set after the initial cotyledons). When they appear, thin the seedlings to 1 plant per hole, snipping the weakest at the soil line. This prevents overcrowding, which leads to forked, misshapen carrots. Keep the soil moist but not wet—water when the top inch feels dry.
⏰ Step 4: Harden Off Before Transplanting
Two weeks before your last frost, start hardening off the seedlings. Move the tray outside for 1 hour the first day, gradually increasing time by 1 hour daily until they’re out all day. Choose a shaded spot at first—their leaves aren’t tough enough for direct sun yet. This slows them down and prevents shock when they hit the garden.
Transplant when seedlings are 3-4 inches tall and the soil is 55°F or warmer. Dig a furrow ½ inch deep, space plants 2 inches apart, and water deeply after planting. If you’re growing long varieties, thin again to 3 inches apart once they’re established. Patience here pays off—rushed transplants often bolt or split.
Tips & tricks for starting carrots in seed trays
Want to skip the long wait for carrot germination? These simple tricks will help you grow strong seedlings faster.
Soil Prep Secret: For even better moisture control in Step 1, mix in a handful of perlite or coarse sand into your light potting mix. This creates tiny air pockets that prevent compaction while still holding moisture for those delicate seeds. I add about 1 part perlite to 4 parts mix—just enough to keep the soil loose but not gritty. This also prevents the dreaded "rot before sprout" scenario that kills so many trays.
Seed Spacing Hack: When planting your 2-3 seeds per hole in Step 1, make the holes just slightly wider than the seeds themselves. This gives the roots room to expand without crowding. I use the end of a pencil to gently widen the holes after dropping in the seeds—it makes all the difference when thinning later. The extra space also helps prevent the forking that makes homegrown carrots look like they've been hit by lightning.
Humidity Dome Upgrade: In Step 2, instead of just plastic wrap, try a clear plastic lid with ventilation holes punched in it. This maintains humidity while allowing some airflow to prevent fungal growth. I cut small holes in the lid with a nail and cover them with breathable mesh—this keeps the condensation inside while letting fresh air circulate. The 70-75°F temperature range becomes even more critical with this setup, so monitor closely.
Light Transition Tip: When moving seedlings to light in Step 3, start with just 2-3 hours of indirect light on day one, then gradually increase. This slow transition prevents the seedlings from getting sunburned as they adjust. I place my tray near an east-facing window first, then move it to brighter light over 3-4 days. The true leaves stage is your signal to thin—don't wait until you see overcrowding, as that's when the forking starts.
Pro Tips for Can You Start Carrots In Seed Trays
- Want to skip the long wait for carrot germination? These simple tricks will help you grow strong seedlings faster.
- Soil Prep Secret: For even better moisture control in Step 1, mix in a handful of perlite or coarse sand into your li...
- Seed Spacing Hack: When planting your 2-3 seeds per hole in Step 1, make the holes just slightly wider than the seeds...
Frequently asked questions
Got questions about starting carrots in seed trays?
You’re not alone—germinating these finicky seeds can feel like a puzzle! Below, we’ve tackled the most common concerns to help you grow confident, straight, and thriving carrots from the get-go.
---
How deep should I plant carrot seeds in seed trays?
Carrot seeds are tiny—just sprinkle them ¼ inch (0.6 cm) deep on the soil surface and lightly press them in. Over-deepening slows germination, while shallow planting risks drying them out. A fine mist of water after sowing keeps them cozy without disturbing their placement.
Why are my carrot seeds taking so long to germinate?
Patience is key! Carrots can take 2–3 weeks to sprout, especially in cool soil (<60°F/15°C). Keep trays consistently moist (not soggy) and warm (use a heat mat if needed). If seeds still refuse to sprout, test their viability—old seeds may need replacing.
Can I reuse seed trays for carrots after growing other crops?
Yes, but sterilize them first! Soak trays in a 1:10 bleach-water solution for 10 minutes, rinse well, and dry. This prevents soil-borne diseases (like Fusarium) from sabotaging your delicate carrot seedlings. Bonus: Clean trays last longer and reduce waste!
What’s the best soil mix for carrot seed trays?
Carrots hate compacted soil—use a light, sandy loam mix (e.g., 50% potting soil + 50% perlite/vermiculite) to prevent forked roots. Avoid garden soil (it’s too dense) or peat-heavy mixes (they dry out fast). Pro tip: Add a thin layer of sand on top to deter crusting.
My carrot seedlings are leggy—what went wrong?
Leggy seedlings scream for light and warmth! Move trays to a sunny window (south-facing) or under grow lights (12–14 hours/day). If roots are already deep, transplant carefully—avoid disturbing them further. Too much nitrogen in fertilizer can also cause this; stick to balanced 5-10-10 until thinning.
Wrapping up and next steps
Starting carrots in seed trays is absolutely doable—and with the right moisture control tricks, you’ll enjoy fast, healthy germination! Remember, patience and consistency are key: keep those seeds cozy, hydrated, and protected until they sprout.
Once your seedlings are sturdy, it’s time to transplant them into the garden and watch your crisp, sweet carrots grow.
Ready to dive in? Grab your seed trays, gather your supplies, and get growing! 🌱 Your future harvest starts now—happy planting!