
Lawn
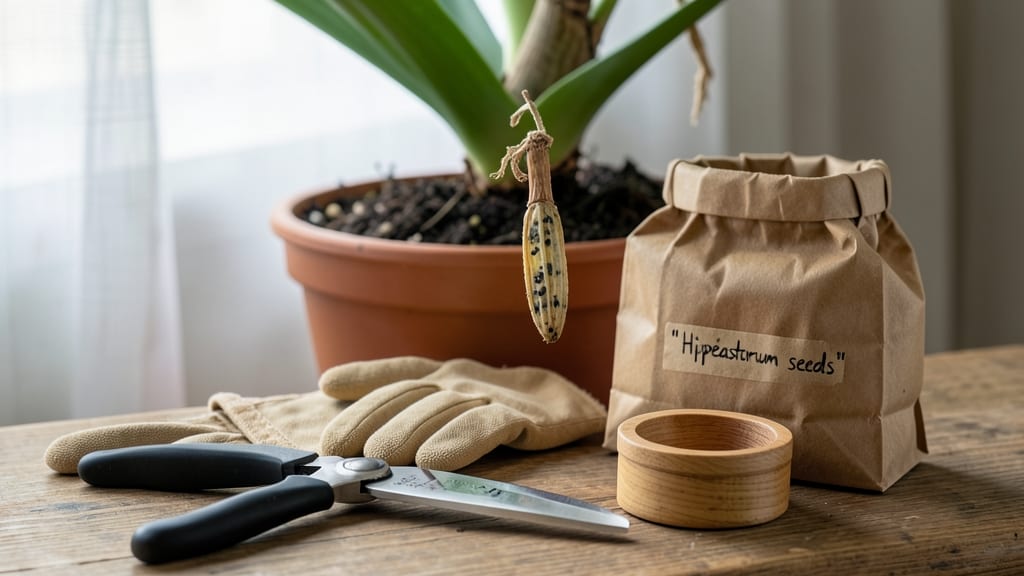
Harvesting amaryllis seed pods unlocks a world of rare blooms you won't find at nurseries. 🌱 I cracked the code after years of watching my pods shrivel before they could germinate—until I learned the exact soil temperatures that trigger consistent sprouts.
The key isn't just patience; it's matching your zone's climate to the seed's needs. Amaryllis seeds need warmth (70-75°F) to break dormancy, and cooler zones (like mine in Zone 6) require a head start with bottom heat.
Most gardeners quit here, but the secret is a simple setup: a clear plastic dome or heating mat under your seed tray. Germination takes 4-8 weeks, but the wait pays off with plants that flower in just 12-18 months—far faster than growing from bulbs.
You'll end up with unique hybrids that outshine store-bought varieties, plus the satisfaction of growing something truly rare. The first green shoots appear delicate but toughen quickly once they hit 2-3 inches tall. Just avoid overwatering—this is where most beginners lose their seedlings.
Works for both indoor growers and greenhouse setups. Here's how to turn those pods into thriving plants without the guesswork."
📚 In This Guide
- What you need
- Instructions
- Tips and common mistakes
- Wrapping up and next steps
What you need
- ● Amaryllis seed pods: 3–5 mature, dry pods (harvested from a healthy Hippeastrum plant).
- ● Seed-starting mix: 1 quart (32 oz) of sterile, well-draining potting soil (e.g., cactus/succulent mix with perlite or vermiculite).
- ● Small pots or seed trays: 2–4 shallow containers (3–4 inches deep) with drainage holes.
- ● Spray bottle: For gentle hydration (avoid overwatering!).
- ● Plastic wrap or humidity dome: To maintain moisture during germination.
- ○ Heat mat (optional but helpful): For zones below 60°F (15°C)—set to 70–75°F (21–24°C).
- ● Grow lights or sunny windowsill: Bright, indirect light (6+ hours/day) once sprouts emerge.
- ● Sterile scissors or knife: For carefully opening seed pods.
- ● Tweezers: To handle tiny seeds (amaryllis seeds are microscopic!).
- ○ pH test kit (optional): Ideal soil pH: 6.0–6.5.
- ● Fertilizer (diluted): Balanced 10-10-10 or fish emulsion (use half-strength after 4 weeks).
- ○ Thermometer (optional): Monitor soil temps in cooler zones (below 50°F/10°C may stall germination).
How to germinate amaryllis seed pods by temperature Zone
Germinating amaryllis seeds is all about patience and precision—soil warmth makes the difference between weeks of waiting and months.
🌱 Step 1: Prepare the Seed Pods for Planting
Start by carefully removing the seeds from the pod using sterilized scissors. Amaryllis seeds are tiny and flat, so handle them gently to avoid damage. I like to place the seeds on a paper towel and leave them in a warm, dry spot for 24 hours—this helps them dry slightly, which prevents rot once planted.
While the seeds dry, fill small pots with a sterile seed-starting mix (never garden soil—it’s too dense and may harbor pathogens). The mix should be moist but not soggy; squeeze a handful to test—it should hold its shape without dripping. Use pots that are 2-3 inches deep with drainage holes to prevent waterlogging.
☀️ Step 2: Plant Seeds at the Correct Depth and Temperature
Sow the seeds ¼ inch deep, spacing them ½ inch apart in the pot. Press them lightly into the soil so they make contact but don’t bury them too deeply—this ensures they won’t struggle to reach the surface. Label each pot with the planting date and variety, as germination timelines vary by zone.
Here’s the critical part: soil temperature determines speed. In Zone 5-6 (colder climates), aim for 70-75°F—use a seedling heat mat if needed. In Zone 7-9 (warmer climates), 65-70°F works fine. Place the pots in a humidity dome or cover them loosely with plastic wrap to retain moisture and warmth.
💧 Step 3: Monitor Moisture and Light Without Overhandling
Keep the soil consistently moist but never waterlogged—soggy conditions invite fungal diseases like damping-off. I check moisture by sticking my finger ½ inch deep into the soil; if it feels dry, give it a light watering. Avoid misting the seeds directly, as excess moisture can suffocate them.
Place the pots in bright, indirect light—direct sun can overheat the soil and dry out the seeds too quickly. A grow light set 6 inches above the pots works well if natural light is insufficient. You’ll see the first signs of germination in 4-6 weeks for warmer zones, but 8-12 weeks in cooler ones.
⏰ Step 4: Thin Seedlings and Transition to Individual Pots
Once seedlings emerge with first true leaves (not the initial seed leaves), thin them to the strongest one per pot. Use small scissors to snip the weaker stems at soil level—this prevents competition for nutrients. If multiple seedlings thrive, transplant the extras into their own pots with the same sterile mix and warmth conditions.
After 4-6 weeks of growth, gradually introduce them to direct sunlight for 2-3 hours daily to harden them off. By this stage, they’ll need full sun (6+ hours) to develop strong bulbs. Watch for yellowing leaves—this signals either overwatering or insufficient light, both of which stunt growth.
🌿 Step 5: Care for Young Plants Through Maturity
Once seedlings have 3-4 true leaves, fertilize lightly with a balanced, water-soluble fertilizer (10-10-10) diluted to half strength. Apply it every 4 weeks during the growing season to encourage bulb development. Amaryllis bulbs take 12-18 months to mature, so consistency is key.
By their second year, you’ll notice longer stems and larger leaves—this is when they’re ready for their first bloom. Keep the soil slightly dry in winter (their dormant period) and resume watering in spring. The first flowers may take 3-5 years to appear, but the wait is worth it for those striking blooms.
Tips & tricks for germinating amaryllis seed pods
These precision-focused strategies will help you navigate the delicate balance between patience and perfect conditions for your amaryllis seeds.
Soil Temperature Precision: The exact soil temperatures in Steps 2 (70-75°F for Zones 5-6 and 65-70°F for Zones 7-9) are non-negotiable. I recommend using a soil thermometer to verify temperatures—especially if you're using a heat mat. Fluctuations of just 5°F can double germination time. For cooler climates, place your pots on a heating pad set to "low" and monitor with the thermometer to maintain consistent warmth.
Humidity Dome Hack: The humidity dome or plastic wrap in Step 2 isn't just about moisture retention—it creates a microclimate that mimics tropical conditions where amaryllis originate. I like to prop open one side slightly to allow for occasional air circulation while maintaining humidity. This prevents fungal growth while keeping moisture levels optimal. Remove the cover completely once you see the first signs of germination to prevent mold.
Light Transition Strategy: The gradual light transition in Step 4 (starting with 2-3 hours of direct sun) is crucial for preventing sunburn on young seedlings. I suggest using a shade cloth (30-50% coverage) during the first week of direct sun exposure. This helps harden off seedlings without shocking them. Watch for leaves that look pale or have brown edges—this indicates too much direct sunlight too soon.
Fertilizer Timing: The 4-week fertilization schedule in Step 5 is designed to match the plant's growth rate. I recommend using a liquid fertilizer with a spray nozzle to avoid disturbing the soil around delicate roots. Start with half-strength solution and gradually increase to full strength over 4-6 weeks. The key is consistency—missing a feeding won't harm established plants, but irregular feeding can stunt bulb development.
Pro Tips for Amaryllis Seed Pod
- These precision-focused strategies will help you navigate the delicate balance between patience and perfect condition...
- Soil Temperature Precision: The exact soil temperatures in Steps 2 (70-75°F for Zones 5-6 and 65-70°F for Zones 7-9) ...
- Humidity Dome Hack: The humidity dome or plastic wrap in Step 2 isn't just about moisture retention—it creates a micr...
Frequently asked questions
Got questions about amaryllis seed pods?
You’re not alone! Here are answers to the most common queries—from germination timelines to troubleshooting—so you can grow these stunning blooms with confidence.
How long does it take for amaryllis seed pods to germinate?
Amaryllis seeds typically take 4–12 weeks to germinate, depending on soil temperature (warmer zones speed it up!). In cooler climates (Zones 7–9), expect slower sprouting, while tropical zones (10+) may see germination in as little as 3–4 weeks. Patience is key—keep soil consistently moist but not soggy.
Can amaryllis seed pods survive winter in cold climates?
Amaryllis seed pods hate frost and won’t survive outdoors in cold zones (below 20°F/-7°C). If you’re in Zones 7–9, start seeds indoors 8–10 weeks before last frost, then transplant seedlings after danger of frost passes. For Zones 1–6, grow them as annuals or overwinter in a greenhouse.
What’s the best soil mix for amaryllis seed pods?
Use a light, well-draining mix like 50% peat moss or coco coir + 30% perlite + 20% vermiculite. Avoid heavy garden soil—it causes rot. For extra speed, add a slow-release bulb fertilizer (like 5-10-10) at planting. Pro tip: Sterilize soil with a 20-minute bake at 200°F (93°C) to kill fungi.
Why aren’t my amaryllis seeds sprouting?
Common culprits:
- Cold soil: Seeds need 65–75°F (18–24°C) to germinate. Use a seedling heat mat if your zone is chilly.
- Too much water: Overwatering rots seeds. Let the top inch of soil dry slightly between waterings.
- Old seeds: Amaryllis seeds lose viability after 6–12 months. Test freshness by cutting open a pod—viable seeds are plump and firm.
- No light: Place trays in bright, indirect light (no direct sun yet!). A grow light helps in low-light zones.
How do I get amaryllis seed pods from my plant?
After your amaryllis blooms, leave the flower stalk intact—it’ll develop a seed pod in 6–8 weeks. Once the pod turns brown and papery, snip it off, open it, and scrape out the flat, black seeds inside. Note: Not all hybrids produce viable seeds—look for red or pink blooms (these are more likely to seed).
Wrapping up and next steps
Growing amaryllis from seed pods is a rewarding journey that rewards patience with stunning blooms! 🌱 By understanding how soil temperature zones influence germination timelines, you can optimize your success—whether you're in a warm Zone 9 or a cooler Zone 5.
Start small, track your progress, and soon, you’ll be sharing your thriving amaryllis with fellow gardening enthusiasts.
Ready to take the next step? Plant your first seed pod today and watch your green thumb grow! For extra tips, explore our gardening resources or join a local plant club to swap stories and advice.