
Planting
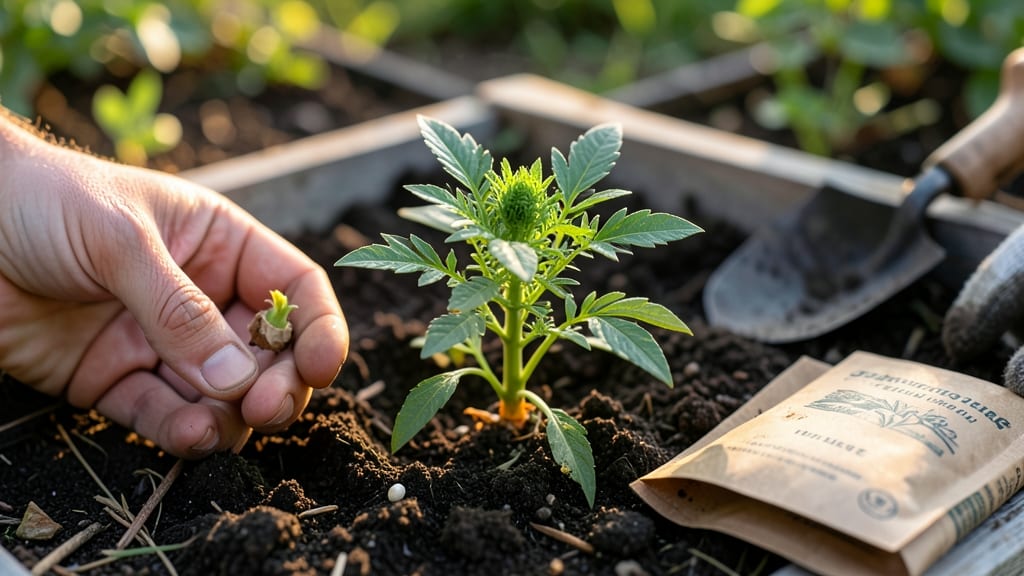
A little seed for me to sow holds a world of possibilities—just ask the snapdragons I grew from a single packet last spring. 🌱 Starting seeds isn't about luck; it's about breaking dormancy the right way, and I'll show you how to coax those first green shoots even in less-than-ideal conditions.
The magic begins with the right seeds, soil, and a little patience—no green thumb required.
You'll need just three things to begin: fresh seeds (check the packet for dormancy needs), a container with drainage, and a mix of potting soil and perlite for airflow. Plant your seeds at twice their width deep—too shallow and they'll dry out; too deep and they'll struggle to reach light.
A spray bottle keeps moisture consistent without drowning delicate sprouts.
Within days, you'll see the first signs of life: tiny loops breaking soil, then leaves unfurling toward the light. Keep them in a warm spot (around 65-70°F) until they develop their second set of leaves, then transplant carefully.
The payoff? Year-round blooms that start with something as simple as a little seed.
This method works for annuals, perennials, and even some vegetables—just adjust watering based on your climate. Whether you're sowing in spring or extending the season, these basics will have you harvesting confidence (and blooms) in no time.
📚 In This Guide
- What you need
- Instructions
- Tips and common mistakes
- Wrapping up and next steps
What you need
- ● Seeds: Choose dormant seeds like lupines, peonies, or delphiniums (5–10 seeds per variety). Opt for organic, untreated seeds for best results.
- ● Growing Medium: Sterilized potting mix (1–2 gallons) – avoid garden soil to prevent mold.
- ● Perlite or vermiculite (½ cup) – for aeration and moisture control.
- ● Containers: Small pots (3–4 inches deep) or seed trays with drainage holes (2–4 per seed type).
- ● Spray bottle (for gentle watering).
- ● Plastic wrap or dome lid (to create a mini greenhouse effect).
- ○ Heat mat or warm spot (optional but helpful for faster germination—set to 70–75°F).
- ● Labels & marker (to track seed varieties and planting dates).
- ● Patience – Dormancy-breaking can take weeks to months!
- ● Consistent warmth – A sunny windowsill or grow light works for most seeds.
- ● Light touch – Avoid overwatering; dormant seeds need moisture, not soggy conditions.
- ● Stratification kit (if using cold-treatment methods).
- ● Grow lights (for 12–14 hours/day if natural light is limited).
- ● Humidity tray (to boost moisture levels in dry climates).
- ● Journal (to log progress and tweak your technique!).
Step-by-Step instructions for breaking seed dormancy
Here’s how to wake up those stubborn seeds and coax them into growth—no matter the season.
🌱 Step 1: Identify Your Seed’s Needs
The first move is figuring out what your seeds need to break dormancy. Some seeds just need moisture, while others require cold treatment or even a little fire. Check the seed packet for clues—if it’s not labeled, research your plant type. For example, lupines and peonies often need cold stratification, while some wildflowers benefit from a quick smoke treatment. If you’re unsure, start with a simple soak test: place a few seeds in warm water overnight. If they swell or crack, they’re ready to germinate.
I like to group seeds by their dormancy type—cold lovers, heat lovers, or scarification (scratchy outer shells) needs. This keeps my process organized and prevents mixing up treatments. Label small bags or containers with the seed type and dormancy method so you don’t forget later.
💧 Step 2: Apply the Right Treatment
For seeds needing cold stratification, place them in a sealed bag with slightly damp peat moss or vermiculite, then refrigerate for 4-12 weeks (check your seed type for specifics). I use a plastic bag with a tiny hole for airflow—condensation inside signals it’s too humid. For scarification, gently rub the seed between sandpaper or a file until the outer shell looks slightly roughened. This mimics natural wear and tear that would happen in the wild.
If your seeds need heat, place them in a warm spot like on top of the fridge or near a sunny window. For smoke treatment, lightly char a piece of paper or wood, then let the seeds sit in the cool, smoky residue for a few hours. Watch for any visible changes—like a slight softening or color shift—that tell you the treatment is working.
☀️ Step 3: Sow and Monitor for Sprouting
Once your seeds have undergone their dormancy treatment, it’s time to plant them. Use a well-draining seed-starting mix and sow seeds at the depth recommended on the packet (usually 2-3 times the seed’s diameter). Keep the soil consistently moist but not soggy—you’ll know it’s right when the surface feels damp but not dripping. Place the container in a warm, bright spot, like under a grow light or on a sunny windowsill.
Patience is key here. Some seeds may sprout in 3-7 days, while others could take 2-4 weeks. I keep a small notebook nearby to track when I planted each seed and what treatment it received. When the first tiny green shoot appears, that’s your signal to keep the soil moist and provide gentle light. If nothing happens after 4 weeks, it’s time to troubleshoot—maybe the dormancy treatment wasn’t strong enough or the conditions weren’t right.
⏰ Step 4: Transplant and Care for New Seedlings
Once your seedlings have 2-3 true leaves (not just the initial seed leaves), they’re ready to move to their permanent home. Gently loosen the soil around the roots and transplant them into individual pots or directly into the garden. If you’re planting outside, wait until the soil is warm and the risk of frost has passed—cold snaps can shock tender seedlings.
After transplanting, give them a good drink of water to help them settle in. Keep an eye on their progress—healthy seedlings will grow steadily and develop strong stems. If you notice any yellowing leaves or stunted growth, it might mean they’re not getting enough light or water. Adjust as needed, and soon you’ll have a thriving garden full of plants that started from a little seed.
Tips & tricks for perfect seed dormancy breaking
Real talk: Breaking seed dormancy is like unlocking a secret code for your garden's success. These little tricks will help you avoid common pitfalls and get those seeds sprouting like clockwork.
Labeling System: I can't stress enough how helpful it is to label everything. Use small stickers or masking tape to mark each container with the seed type and dormancy treatment. This prevents mix-ups, especially when dealing with multiple seed varieties. I've ruined batches by forgetting which seeds needed cold stratification—don't make my mistake!
Soak Test: That overnight soak test in Step 1 is your secret weapon for unsure seeds. If they swell or crack, you know they're ready for immediate planting. If they stay unchanged, they likely need a different treatment—maybe cold stratification or scarification. I always test a few seeds from each new batch before committing to a full treatment.
Refrigeration Tips: When refrigerating seeds for cold stratification, place them on a shelf near the back where temperatures are most consistent. Check on them weekly to ensure no mold develops. If you notice condensation inside the bag, that means it's too humid—open it slightly to let excess moisture escape. The 4-12 week range is wide because some seeds need just a few weeks while others benefit from a longer cold period.
Sprouting Timeline: Remember those 3-7 days to 2-4 weeks estimates? That's a huge range because seed types vary dramatically. I keep a small notebook by my seed-starting station to track each batch. When nothing appears after 4 weeks, it's time to troubleshoot—maybe the dormancy treatment wasn't strong enough or the conditions weren't right. Sometimes a quick re-treatment can work wonders.
Pro Tips for A Little Seed For Me To Sow
- Real talk: Breaking seed dormancy is like unlocking a secret code for your garden's success. These little tricks will...
- Labeling System: I can't stress enough how helpful it is to label everything. Use small stickers or masking tape to m...
- Soak Test: That overnight soak test in Step 1 is your secret weapon for unsure seeds. If they swell or crack, you kno...
Frequently asked questions
Got questions about dormancy-breaking magic? You’re not alone!
Here are the most common queries—and answers—to help you grow year-round blooms with confidence.
What’s the easiest way to break seed dormancy without chemicals?
Try stratification (cold treatment) for seeds like poppies or delphiniums—just mix them with damp sand in a bag and refrigerate for 4–8 weeks. For others, like milkweed, scarification (nick the seed coat) works wonders. No chemicals needed!
How do I know if my seeds are ready to plant after dormancy?
Test for readiness: Soak seeds overnight—if they swell, they’re primed! For cold-stratified seeds, check for a tiny root sprout (like a white tail). If they’re still stubborn, repeat the process—patience is key!
Can I use my fridge for stratification, or do I need a special setup?
Your fridge’s crisper drawer (34–40°F) is perfect! Just avoid the freezer (too cold) and check moisture weekly—seeds should stay damp, not soggy. Pro tip: Label bags with the seed type and date for easy tracking.
What if my seeds still won’t germinate after dormancy treatment?
Don’t panic! Try these fixes:
- Freshness check: Old seeds (2+ years) may need replacing.
- Light exposure: Some seeds (like lettuce) need sunlight to germinate—plant them shallow.
- Heat shock: Soak seeds in warm water for 24 hours before planting.
Are there seeds that don’t need dormancy breaking?
Yes! Fast-germinating seeds like marigolds, zinnias, or sunflowers often sprout in 3–7 days without treatment. Check your seed packet—if it says “direct sow,” skip the dormancy steps and plant right away!
Wrapping up and next steps
A little seed for me to sow isn’t just a phrase—it’s an invitation to harness the magic of dormancy-breaking and unlock a garden that thrives year-round. 🌱 Whether you’re chilling seeds, layering bulbs, or experimenting with scarification, the key is patience and a little creativity.
Your efforts will soon reward you with vibrant blooms and lush growth, proving that even the smallest seeds hold big potential.
Ready to take the next step? Start small—pick one technique to try this week and observe how it transforms your plants. Share your progress, ask questions, and keep exploring! The garden is your canvas, and every seed you plant is a brushstroke toward something beautiful. You’ve got this! 🌿